Integrating Claude into Open Web UI with LightLLM
Unlock the potential of closed-source language models like Anthropic's Claude and OpenAI's GPT-4 within the customizable Open Web UI using LightLLM. This tutorial guides you through integrating these advanced models, offering enhanced controls, monitoring, and seamless management of both open and...

In this tutorial, we will explore how to integrate closed-source language models like OpenAI's Anthropic's Claude into Open Web UI using LightLLM.
Open Web UI is an open-source project that offers a highly customizable chat interface, providing features and tools that surpass many alternatives, including standard interfaces like ChatGPT and Claude.ai.
There is a great tutorial on how to integrate Claude in Open WebUI using pipeline lines. I haven't checked it yet, but it is certainly worth looking at. However, this solution is more generic, offers more control, and allows integration with any LLM, not just Claude.
Open Web UI is an open-source chat interface that allows users to interact with various language models. It offers extensive customization options, including:
- Model Selection: Choose from different language models based on your needs.
- System Prompts: Modify the initial instructions given to the AI.
- Adjustable Settings: Tweak parameters like token size, temperature, and a lot more.
The Challenge with Closed-Source Models
While Open Web UI excels with open-source models, it doesn't natively support closed-source models like Anthropic's Claude out of the box. This limitation can be a hurdle if you want to leverage the advanced capabilities of these models within the Open Web UI environment.
What is LightLLM
LightLLM is a powerful proxy for large language models (LLMs), functioning as a bridge between Open Web UI and closed-source models. With LightLLM, you can:
- Integrate Open and Closed-Source Models
- Provide models to other tools using a unified endpoint.
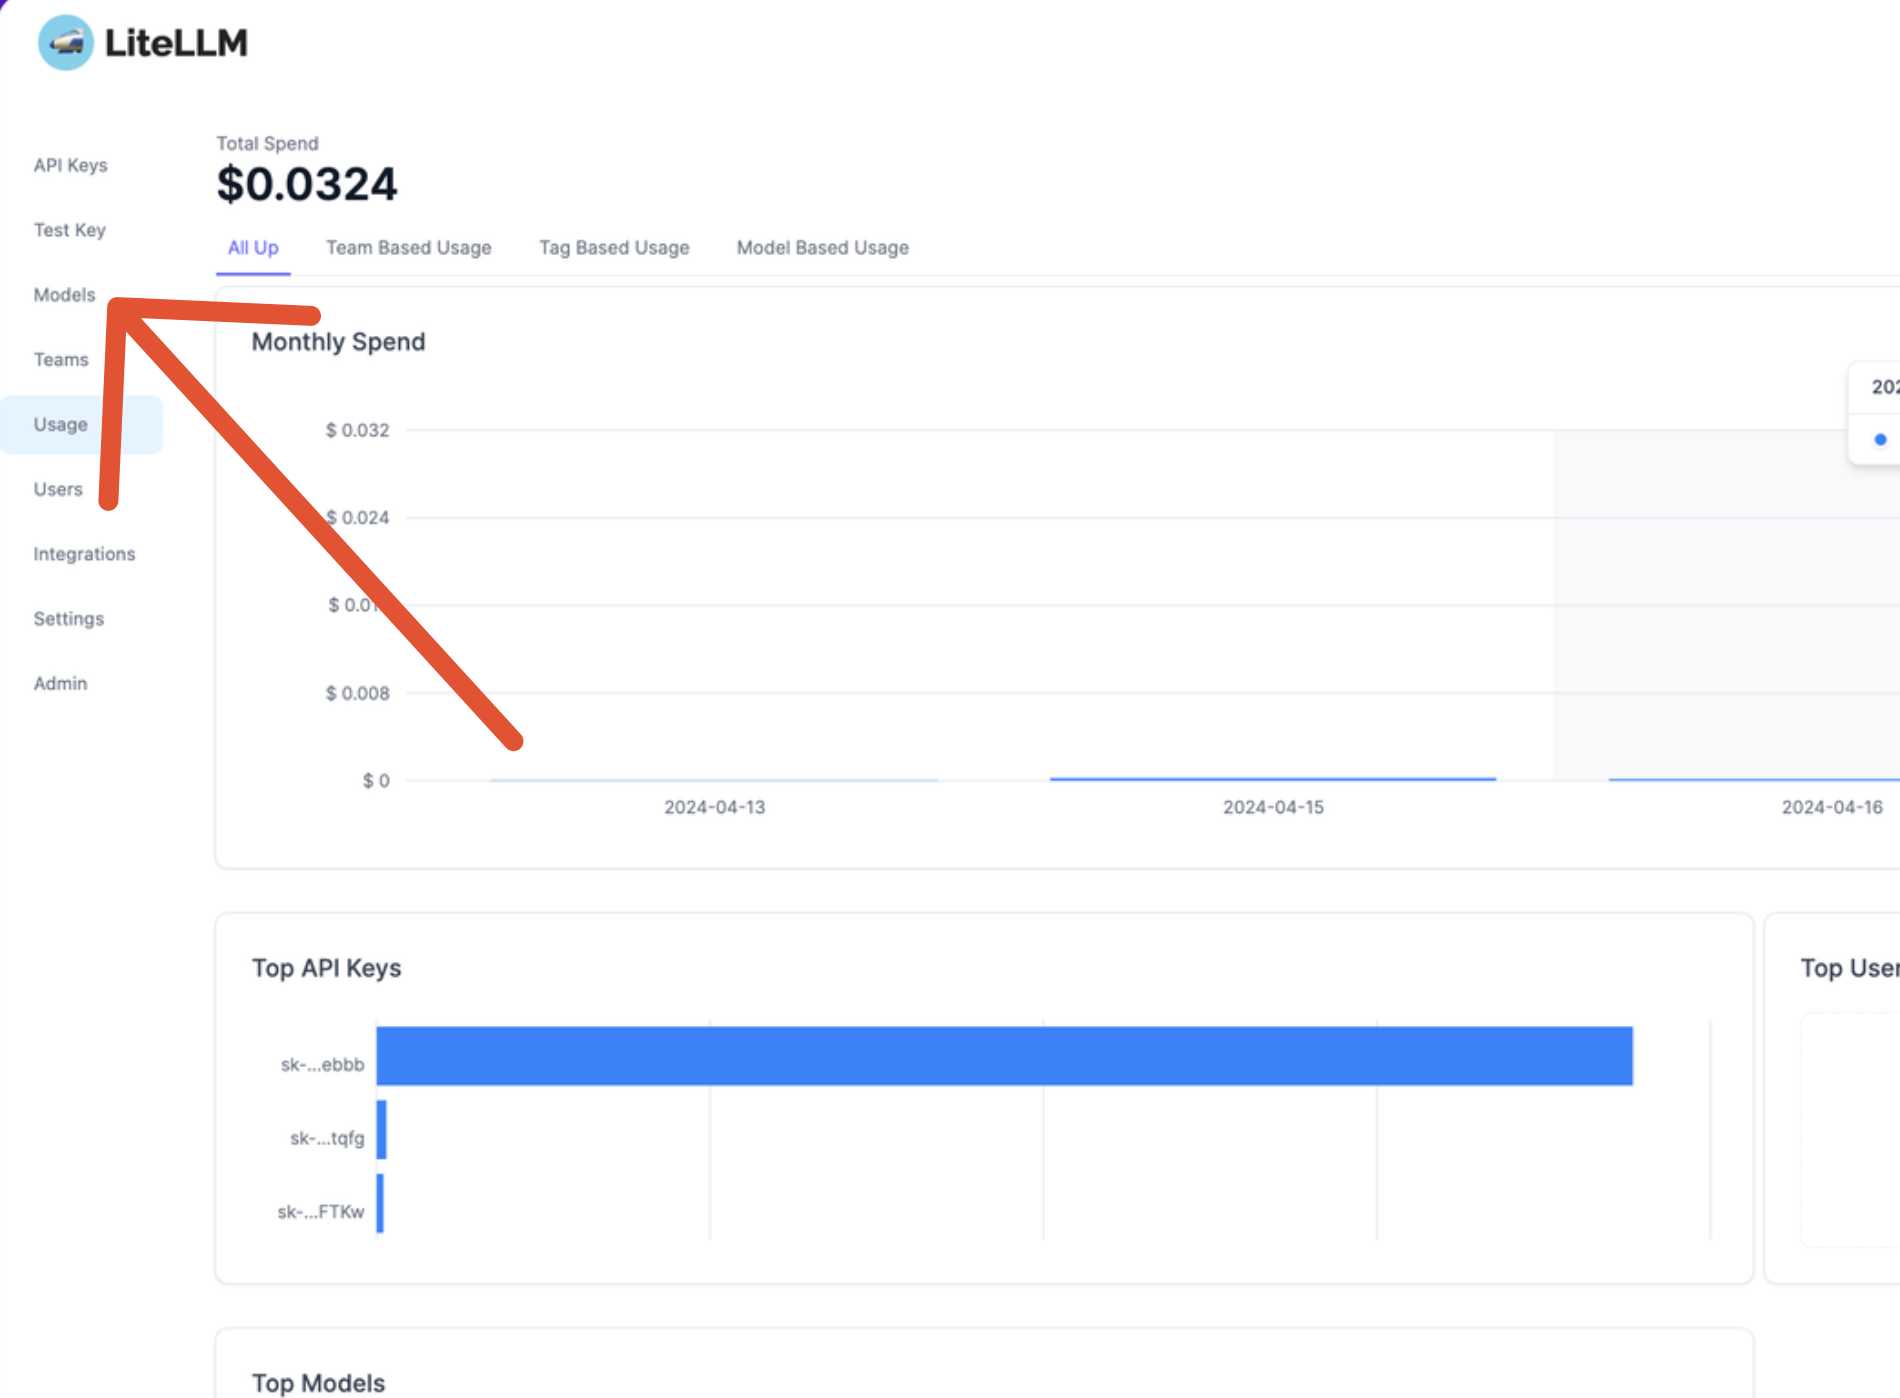
- Set up alerts, create virtual API keys, track usage, and set budgets.
- And many more
Step-by-Step Guide to Integration
Prerequisites
- Open Web UI installed on your system.
- Docker installed to run LightLLM.
- API Keys for the closed-source models you wish to integrate.
Step 1: Install LightLLM
First, clone the LightLLM repository and run it in a Docker container:
# Get the code
git clone https://github.com/BerriAI/litellm

# Go to folder
cd litellm

# Add the master key - you can change this after setup
echo 'LITELLM_MASTER_KEY="sk-1234"' > .env

# Add the litellm salt key - you cannot change this after adding a model
# It is used to encrypt / decrypt your LLM API Key credentials
# We recommned - https://1password.com/password-generator/
# password generator to get a random hash for litellm salt key
echo 'LITELLM_SALT_KEY="sk-1234"' > .env

source .env

# Start
docker-compose up
Note: On macOS, you may need to create a Docker network to facilitate communication between Open Web UI and LightLLM.
# Enable communication between running Docker containers:

# 1. Create a new network (if needed)
docker network create my-network

# 2. Connect existing containers to the network
docker network connect my-network container1
docker network connect my-network container2

# 3. Verify connections
docker network inspect my-network

# 4. Access containers using container names as hostnames
# Example: http://container1:8080
Step 2: Add Models to LightLLM
Access the LightLLM web dashboard at http://localhost:4000/ui and follow these steps:
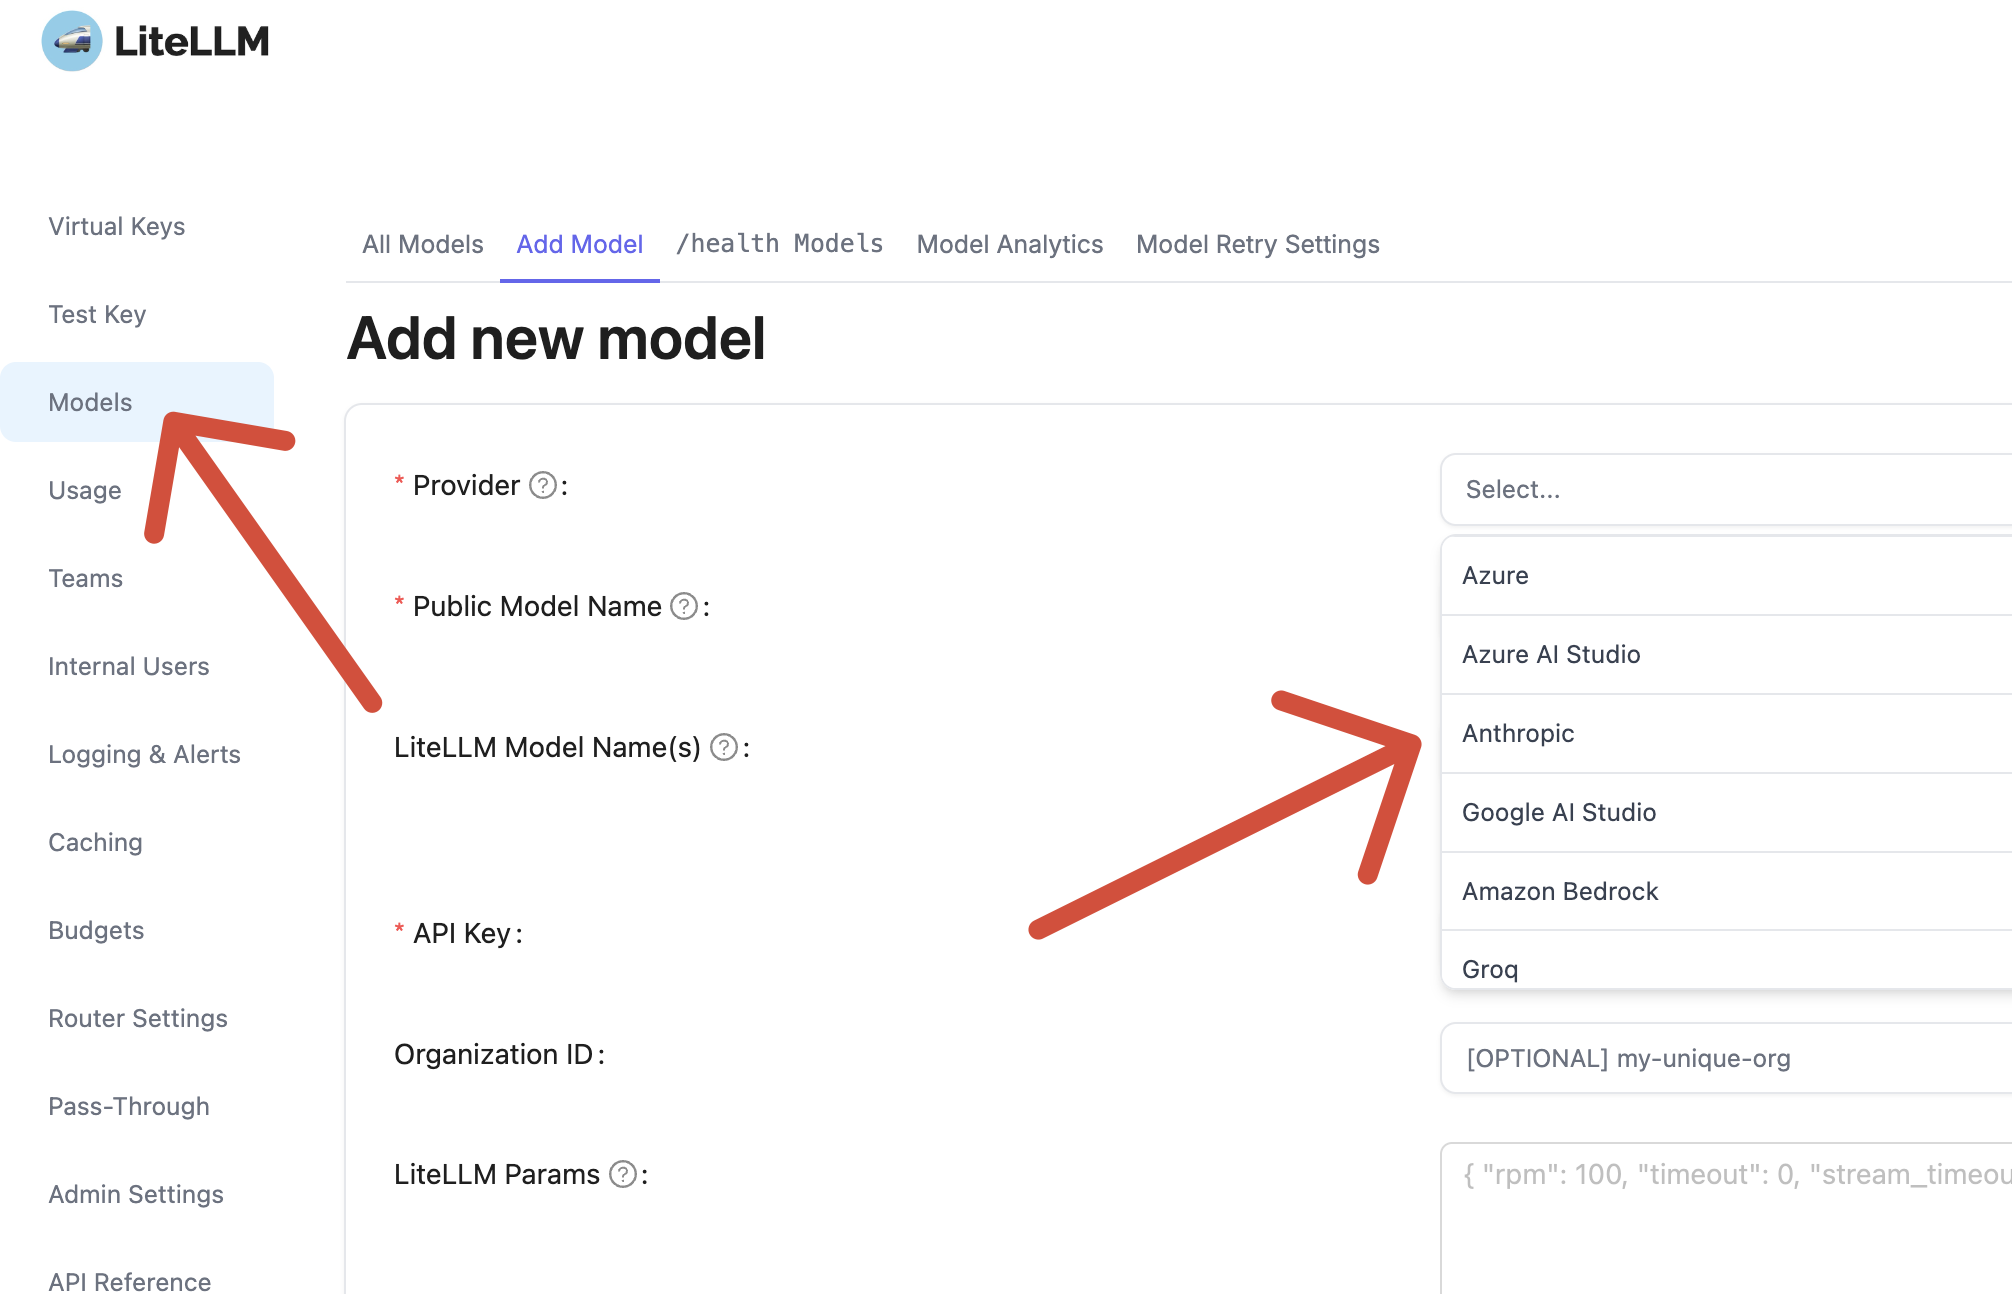
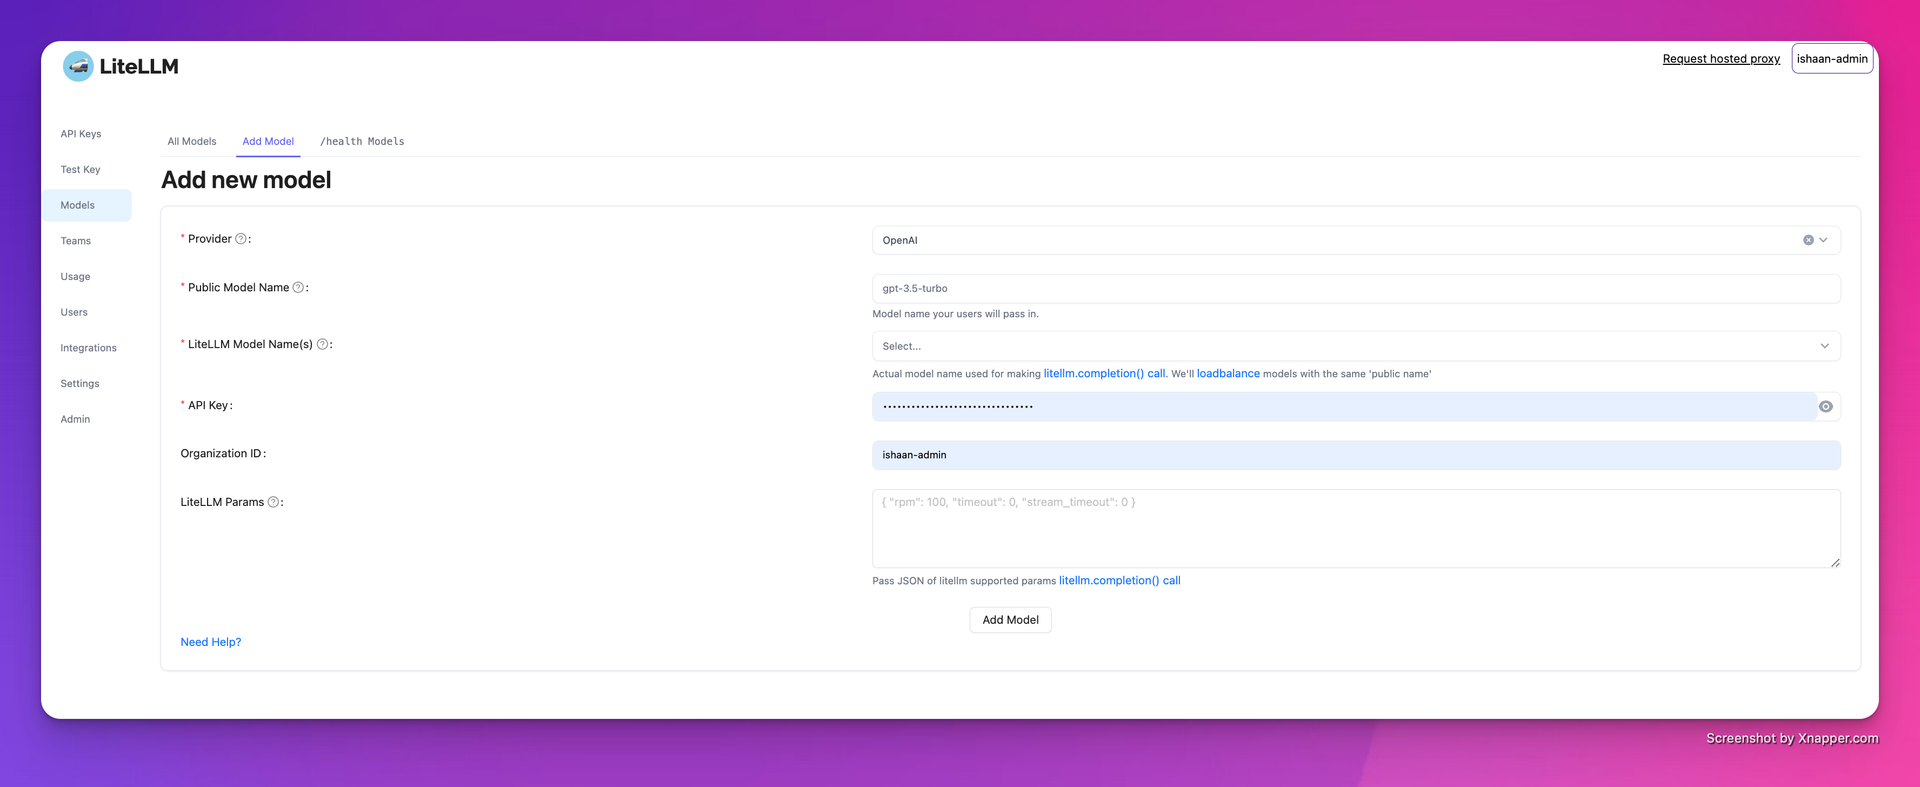
- Add a New Model: Click on "Add Model" and select the closed-source model you wish to integrate (e.g., Claude Sonnet 3.5).
- Enter API Credentials: Provide your API key and any other necessary credentials.
- Configure Model Settings: Adjust any model-specific settings as needed.
The steps are described here in more detail.
Virtual API Keys give you more control over the unlimited access typically provided by services like Claude or OpenAI. When you have a basic key, your control is limited. For instance, you can't easily manage usage or restrict which models are used. Although OpenAI does offer some detailed settings, they are often not enough. With virtual API keys, you can split one given by OpenAI or Claude and add your own constraints like the allowed budget, model, and other restrictions you set in LightLLM.
Step 3: Create a Virtual API Key
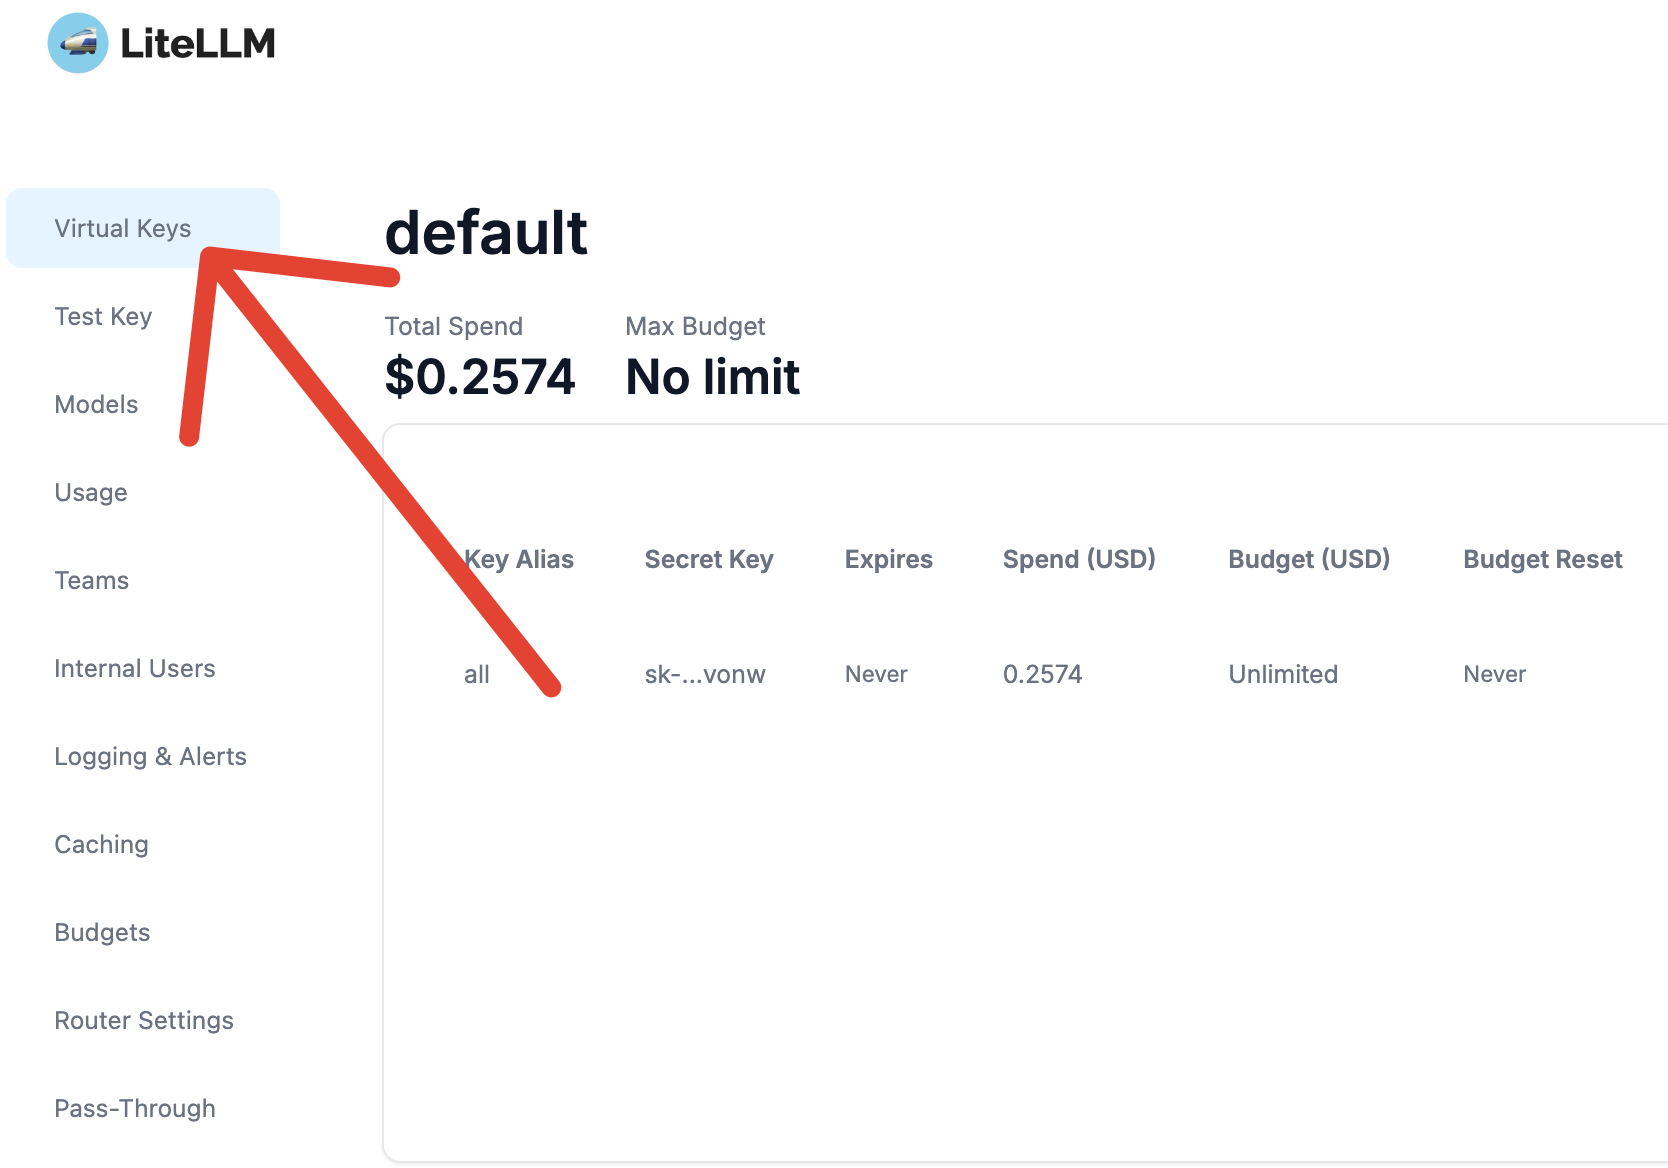
- Navigate to the Virtual Keys section.
- Click on Create New API Key.
- Assign appropriate permissions and save the key.
This virtual API key will be used by Open Web UI to communicate with LightLLM.
Make sure the API key you provide in OpenWebUI is valid for all models you want to use. For example, if you want to use both Claude and GPT-4, the key must allow access to both models. Otherwise, OpenWebUI will only show the models accessible with the provided API key.
Step 4: Configure Open Web UI
We will link LightLLM to OpenWebUI. This only needs to be done once, and OpenWebUI will fetch all models configured in LightLLM. When adding more models later, you only need to hit 'Update'.
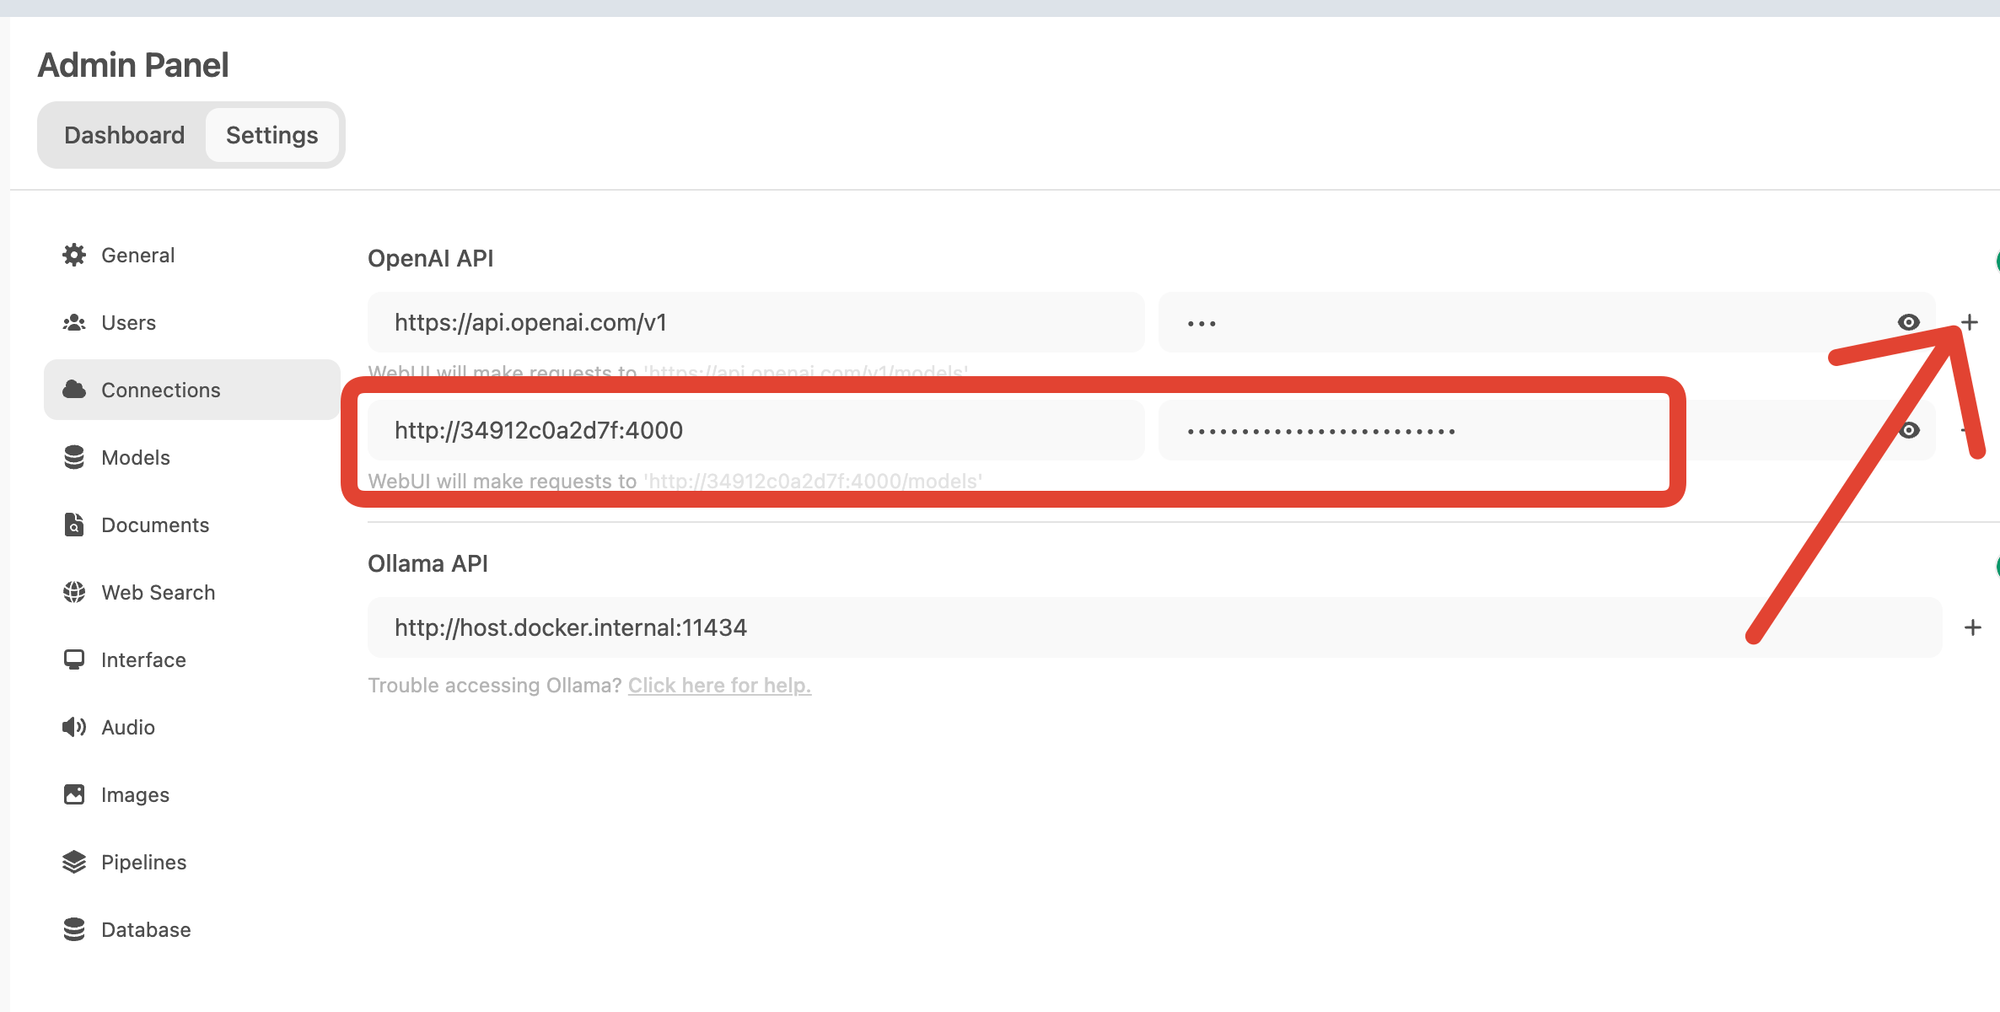
- Go to the Admin Settings.
- Navigate to Connections section.
- Please enter the local endpoint and the Virtual API Key you created in LightLLM.
Endpoint URL: http://localhost:4000Replace container with the hostname or IP address of your LightLLM Docker container if necessary.
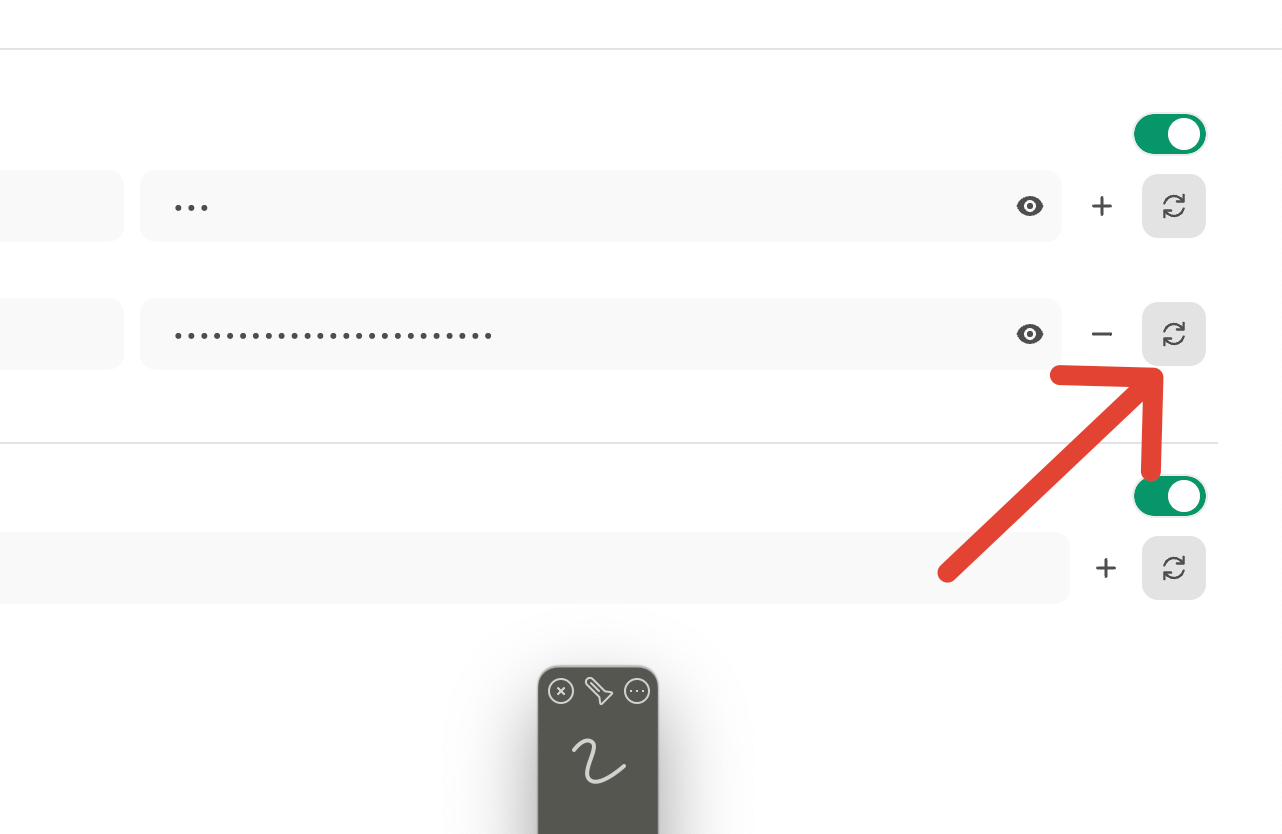
Step 5: Refresh Model List in Open Web UI
When you add the model for the first time, OpenWebUI will automatically fetch the list of models. After that, when you add more models to LightLLM, you need to hit the update button to fetch them in OpenWebUI.
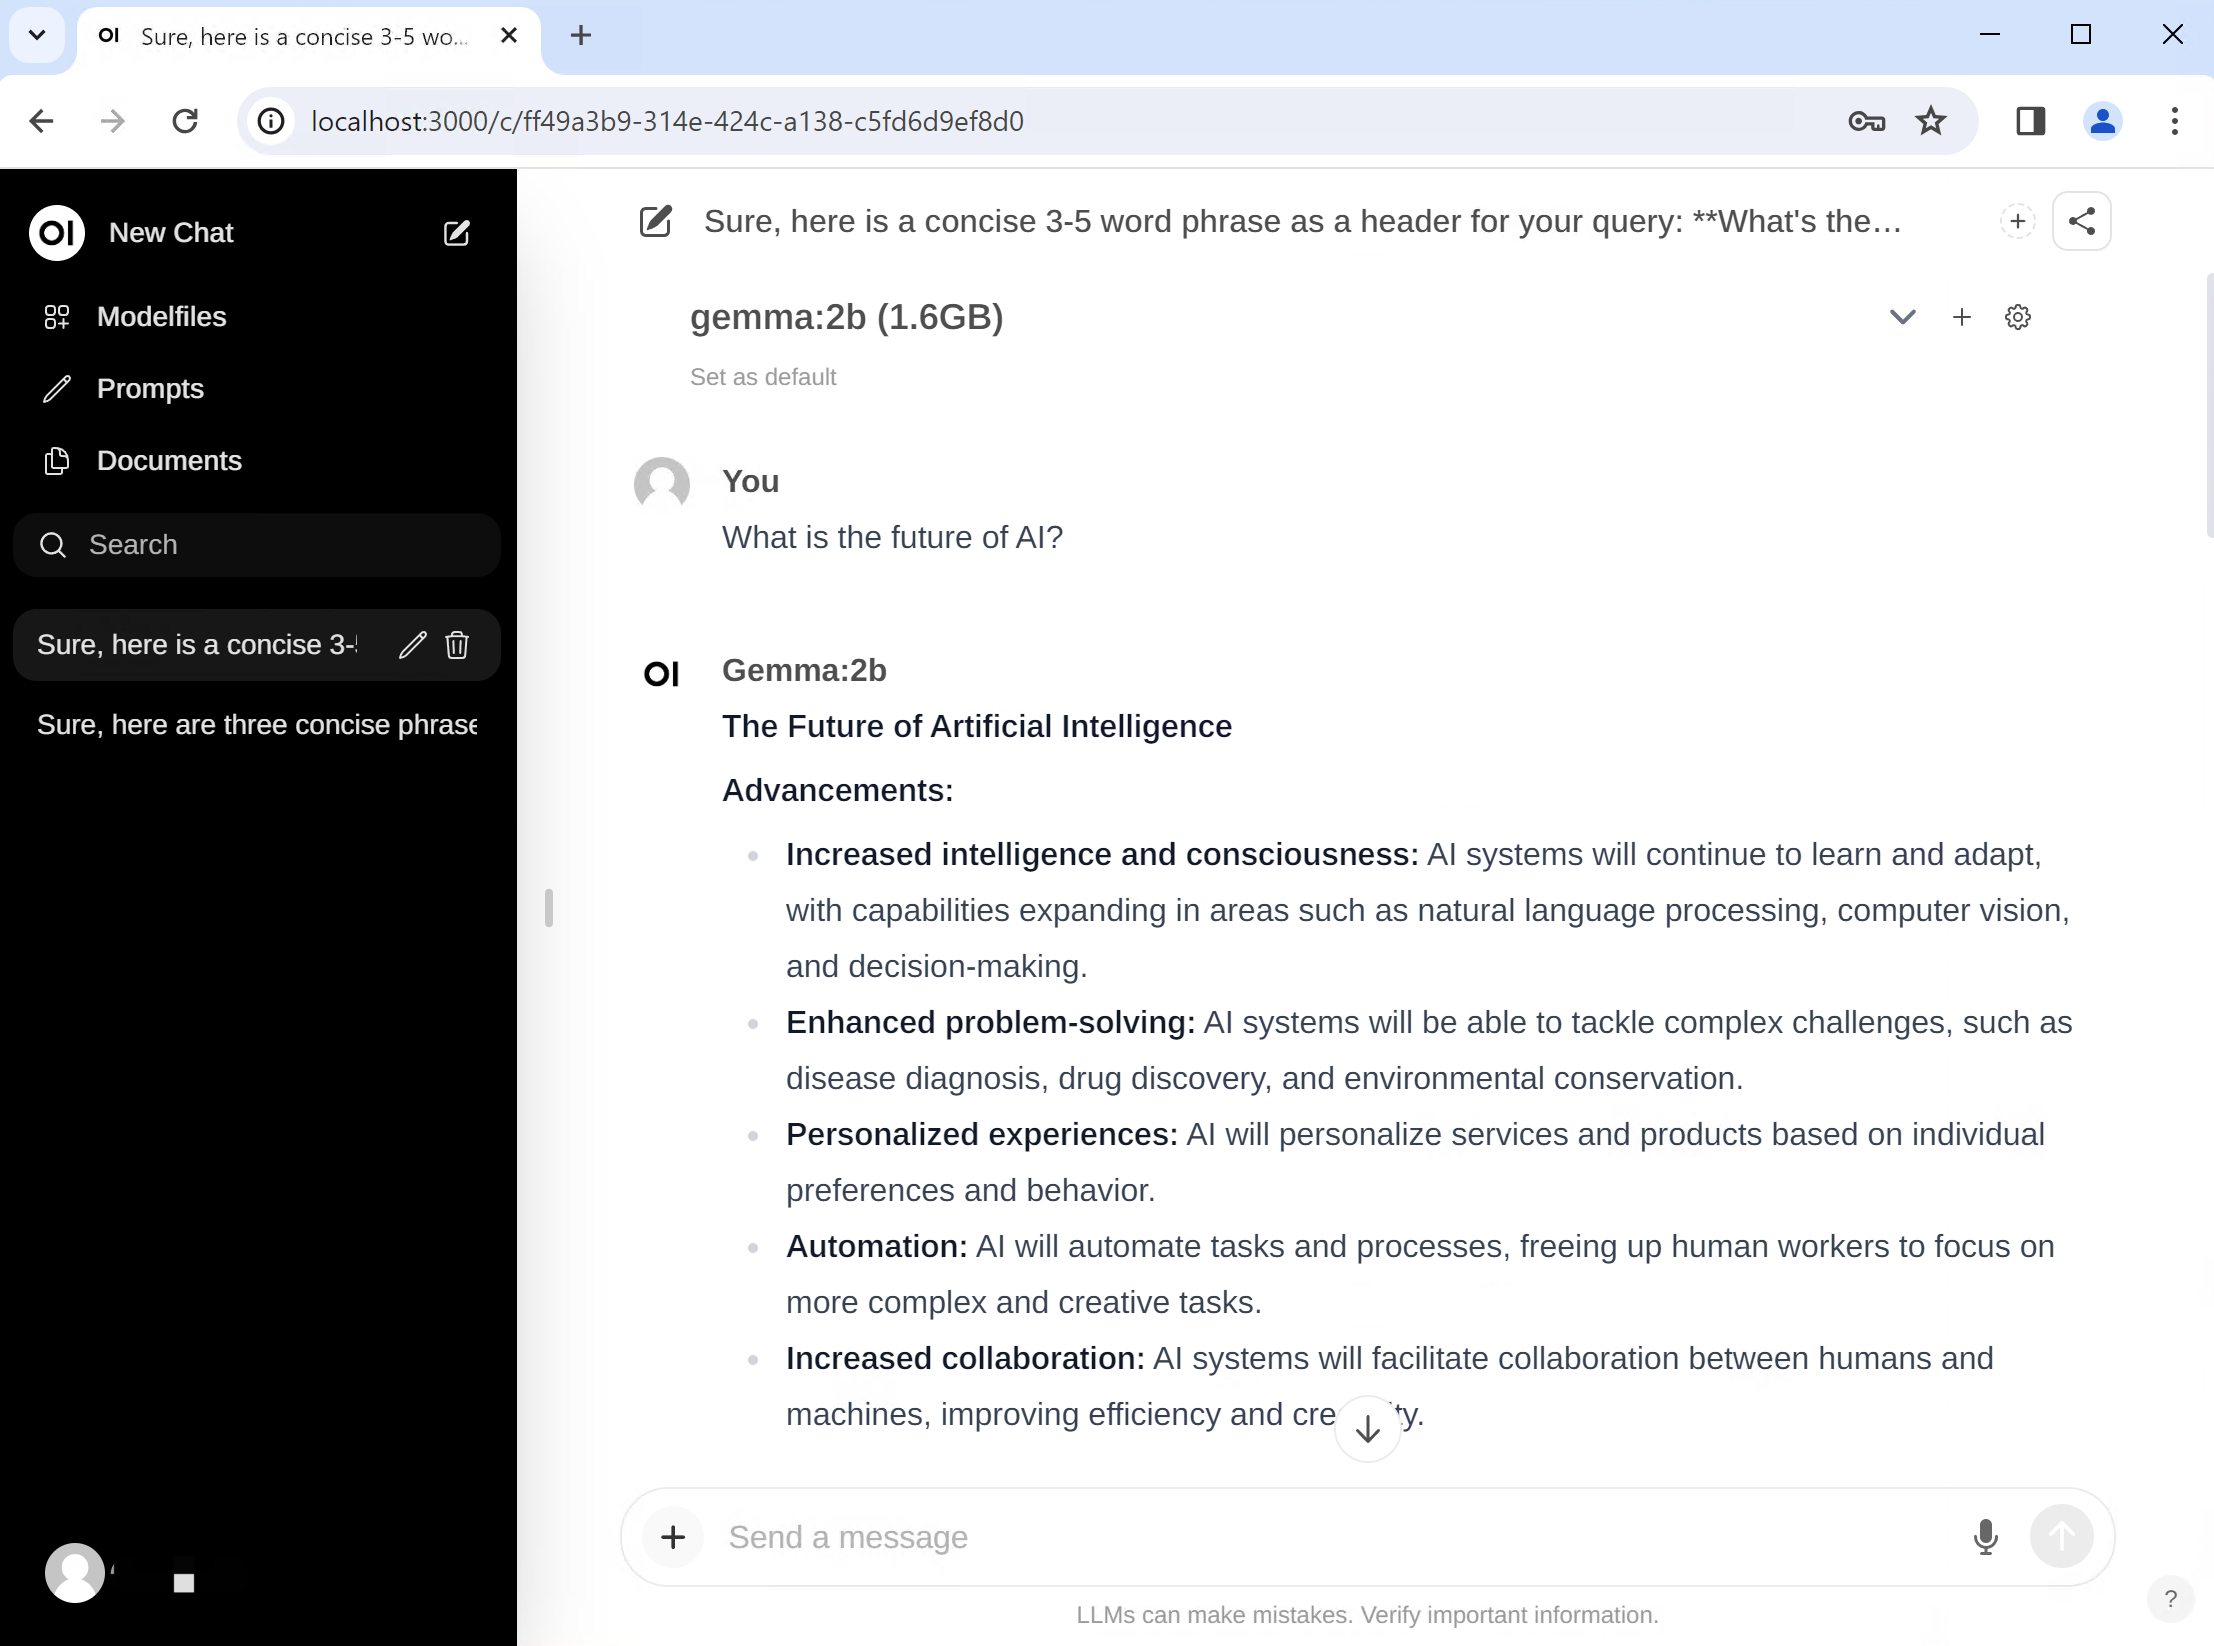
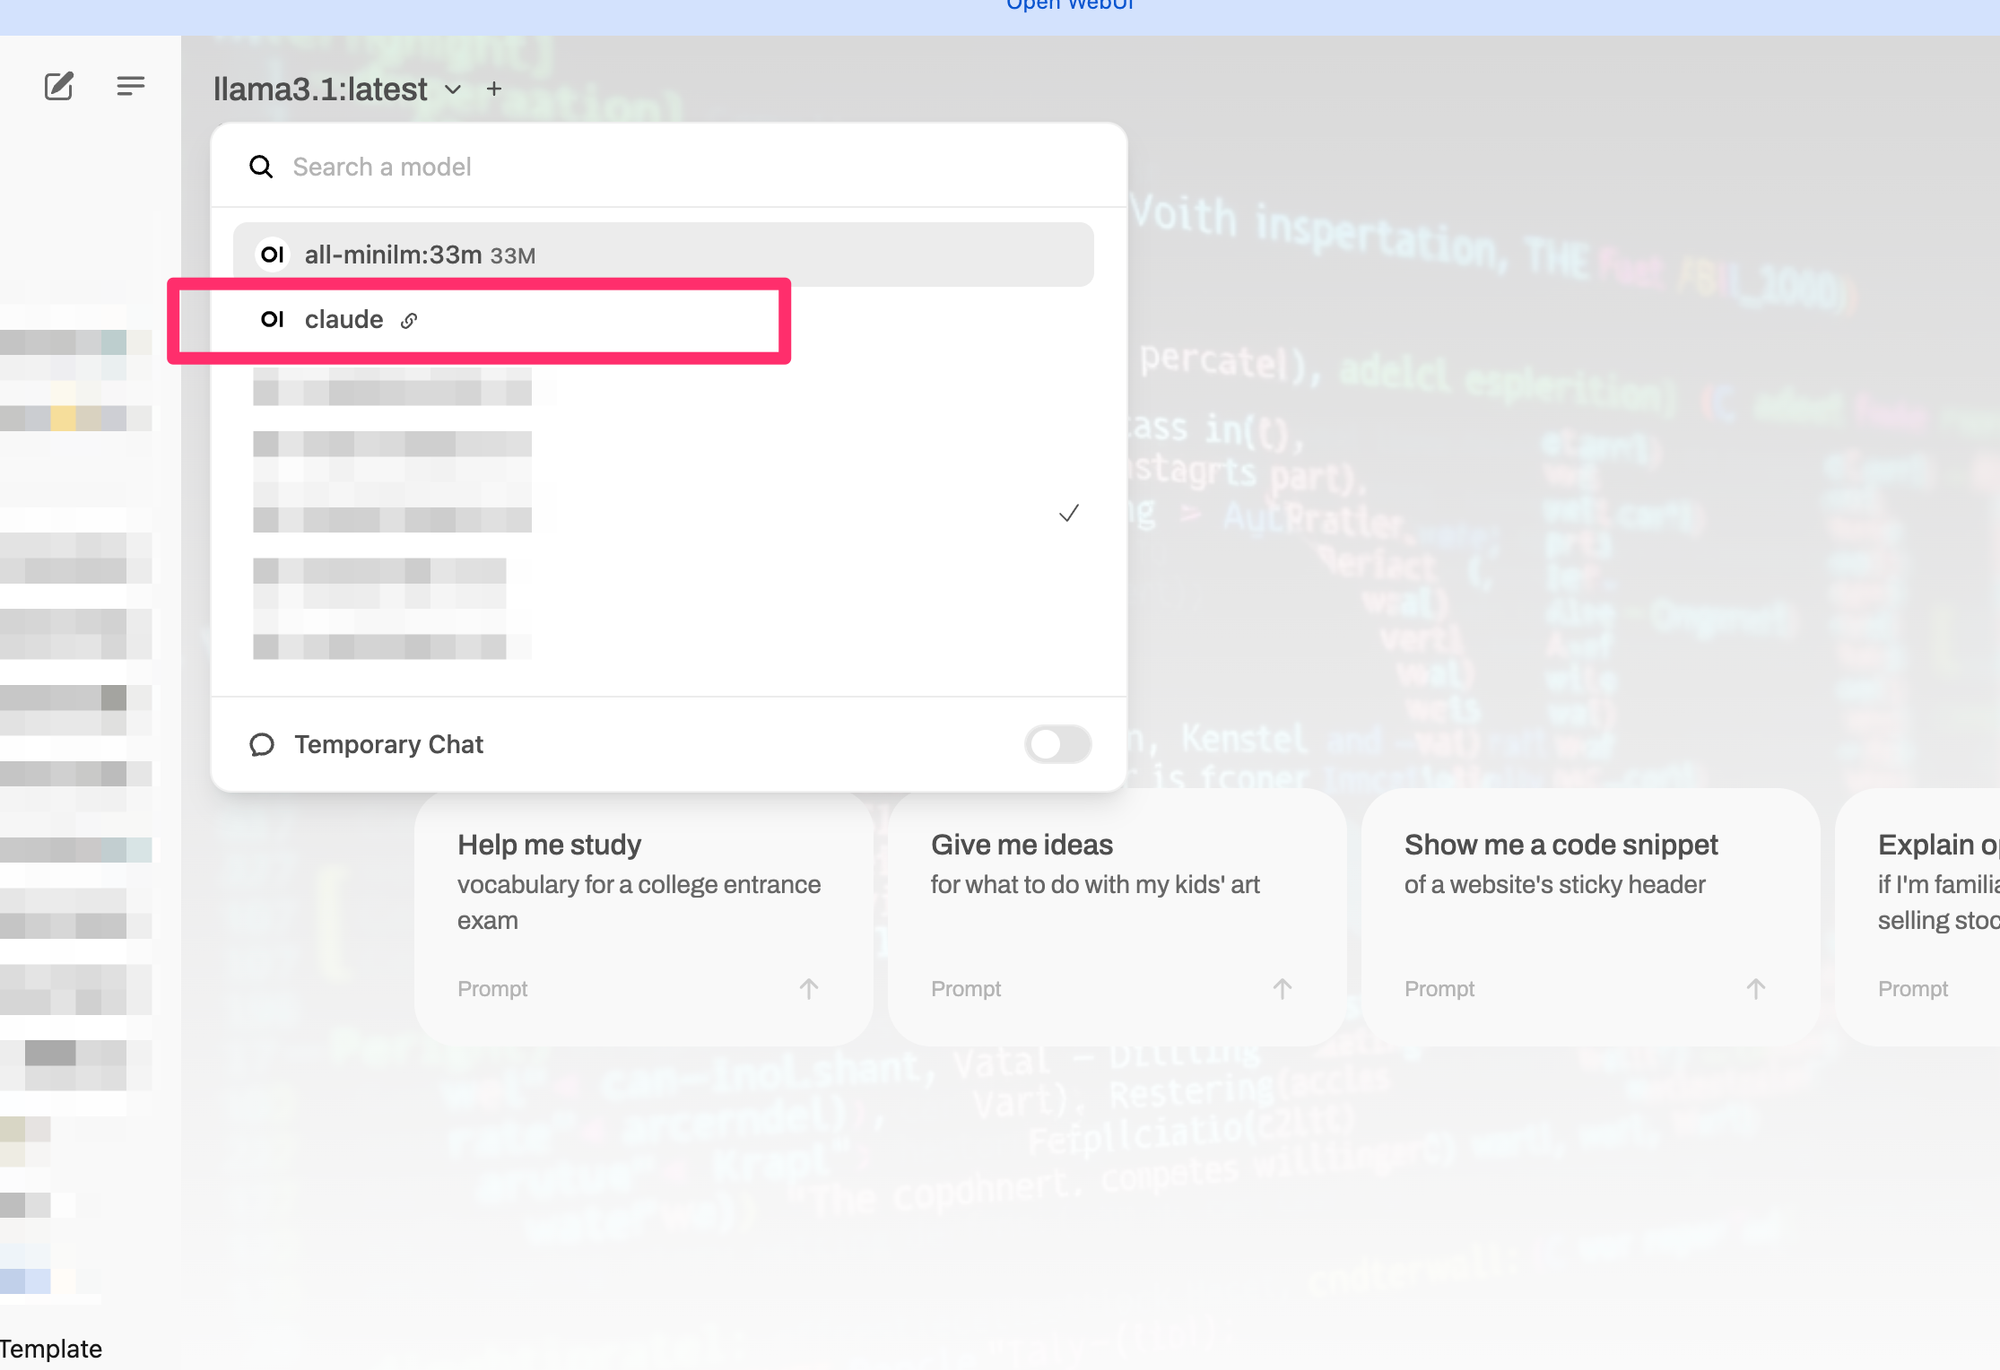
Start Chatting
If everything goes well, you should now be able to see the models you added in LightLLM in the Open WebUI.
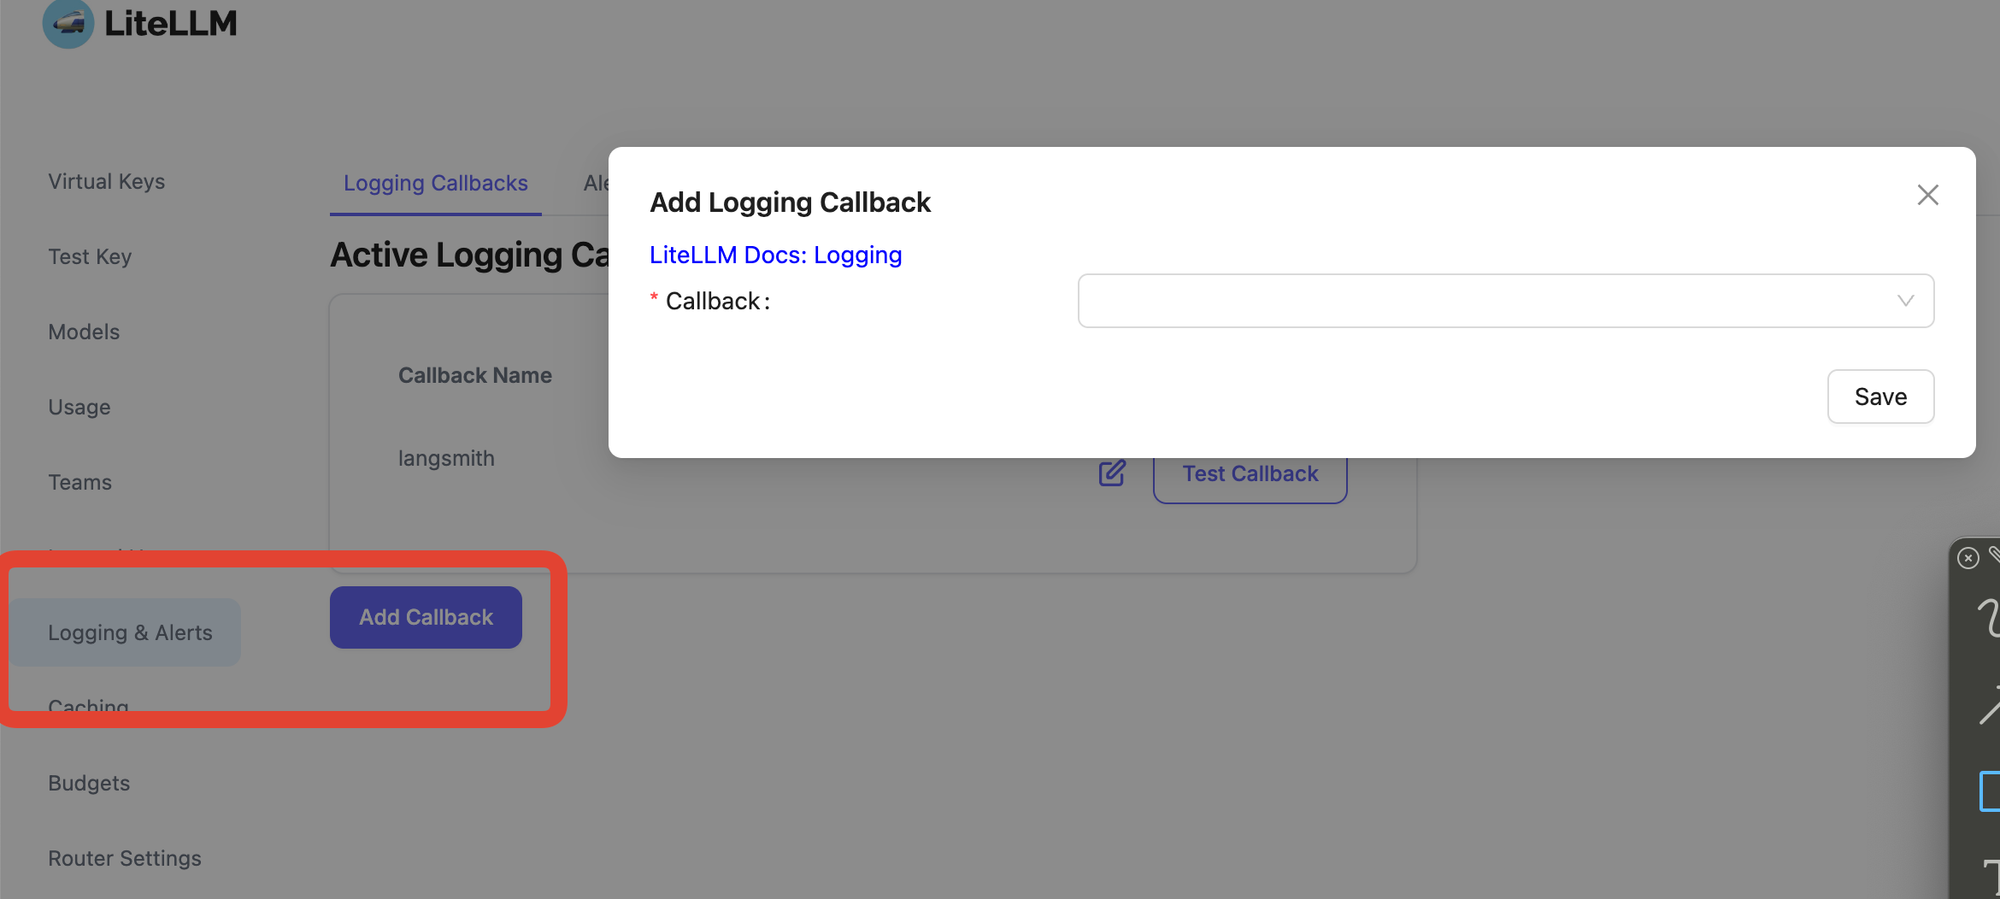
Optional: Monitoring and Debugging with LangSmith
For enhanced monitoring and debugging capabilities, you can integrate LangSmith or DataDog with LightLLM.
Integrating closed-source models like OpenAI's GPT-4 and Anthropic's Claude into Open Web UI using LightLLM opens up a new realm of possibilities for your AI interactions. This powerful combination allows you to leverage the advanced capabilities of these state-of-the-art models within a customizable, open-source interface.
Conclusion
By following this tutorial, you achieve several key advantages:
- Unified Interface: Manage and interact with both open-source and closed-source models seamlessly within Open Web UI, eliminating the need to switch between different platforms.
- Enhanced Customization: Access the granular control that Open Web UI provides—such as adjusting system prompts and fine-tuning parameters—which is often limited or unavailable in standard closed-source interfaces.
- Improved Control and Monitoring: Utilize LightLLM's features to set budgets, track usage, and create virtual API keys, giving you greater oversight over your AI resources.
- Scalability and Flexibility: Easily add or remove models in LightLLM without disrupting your existing setup, allowing you to adapt quickly to new developments or project requirements.