Creating Tutorials has never been easier
Streamline your tutorial creation process with my essential tips and tools! I'll guide you through efficient routines, from configuring shortcuts for quick screenshots to using Blurify for easy image editing. Discover how to enhance your visuals and import them seamlessly into your favorite blogg...
After creating countless tutorials, I've developed a collection of routines and tools that have made my life significantly easier—and today, I want to share them with you. In this tutorial, I'll show you how to effortlessly streamline the key steps to make your own process super easy.
Let's say we want to make a tutorial on how to use Orange, an open source data analysis tool, I would usually go through the following steps more or less
- Configure quick access to shortcuts ( Just once)
- Go through the tutorial step by step and take screenshots (no highlighting or anything, just screenshots!).
- **Open all the screenshots in a tool called Tutorialize.
- Highlight and blur the areas of interest (or non-interest).
- Open the editor, e.g. Medium, and paste all the images at once.
- Add text 'around' the images, using text helpers such as Grammarly here and there.
Step 1:
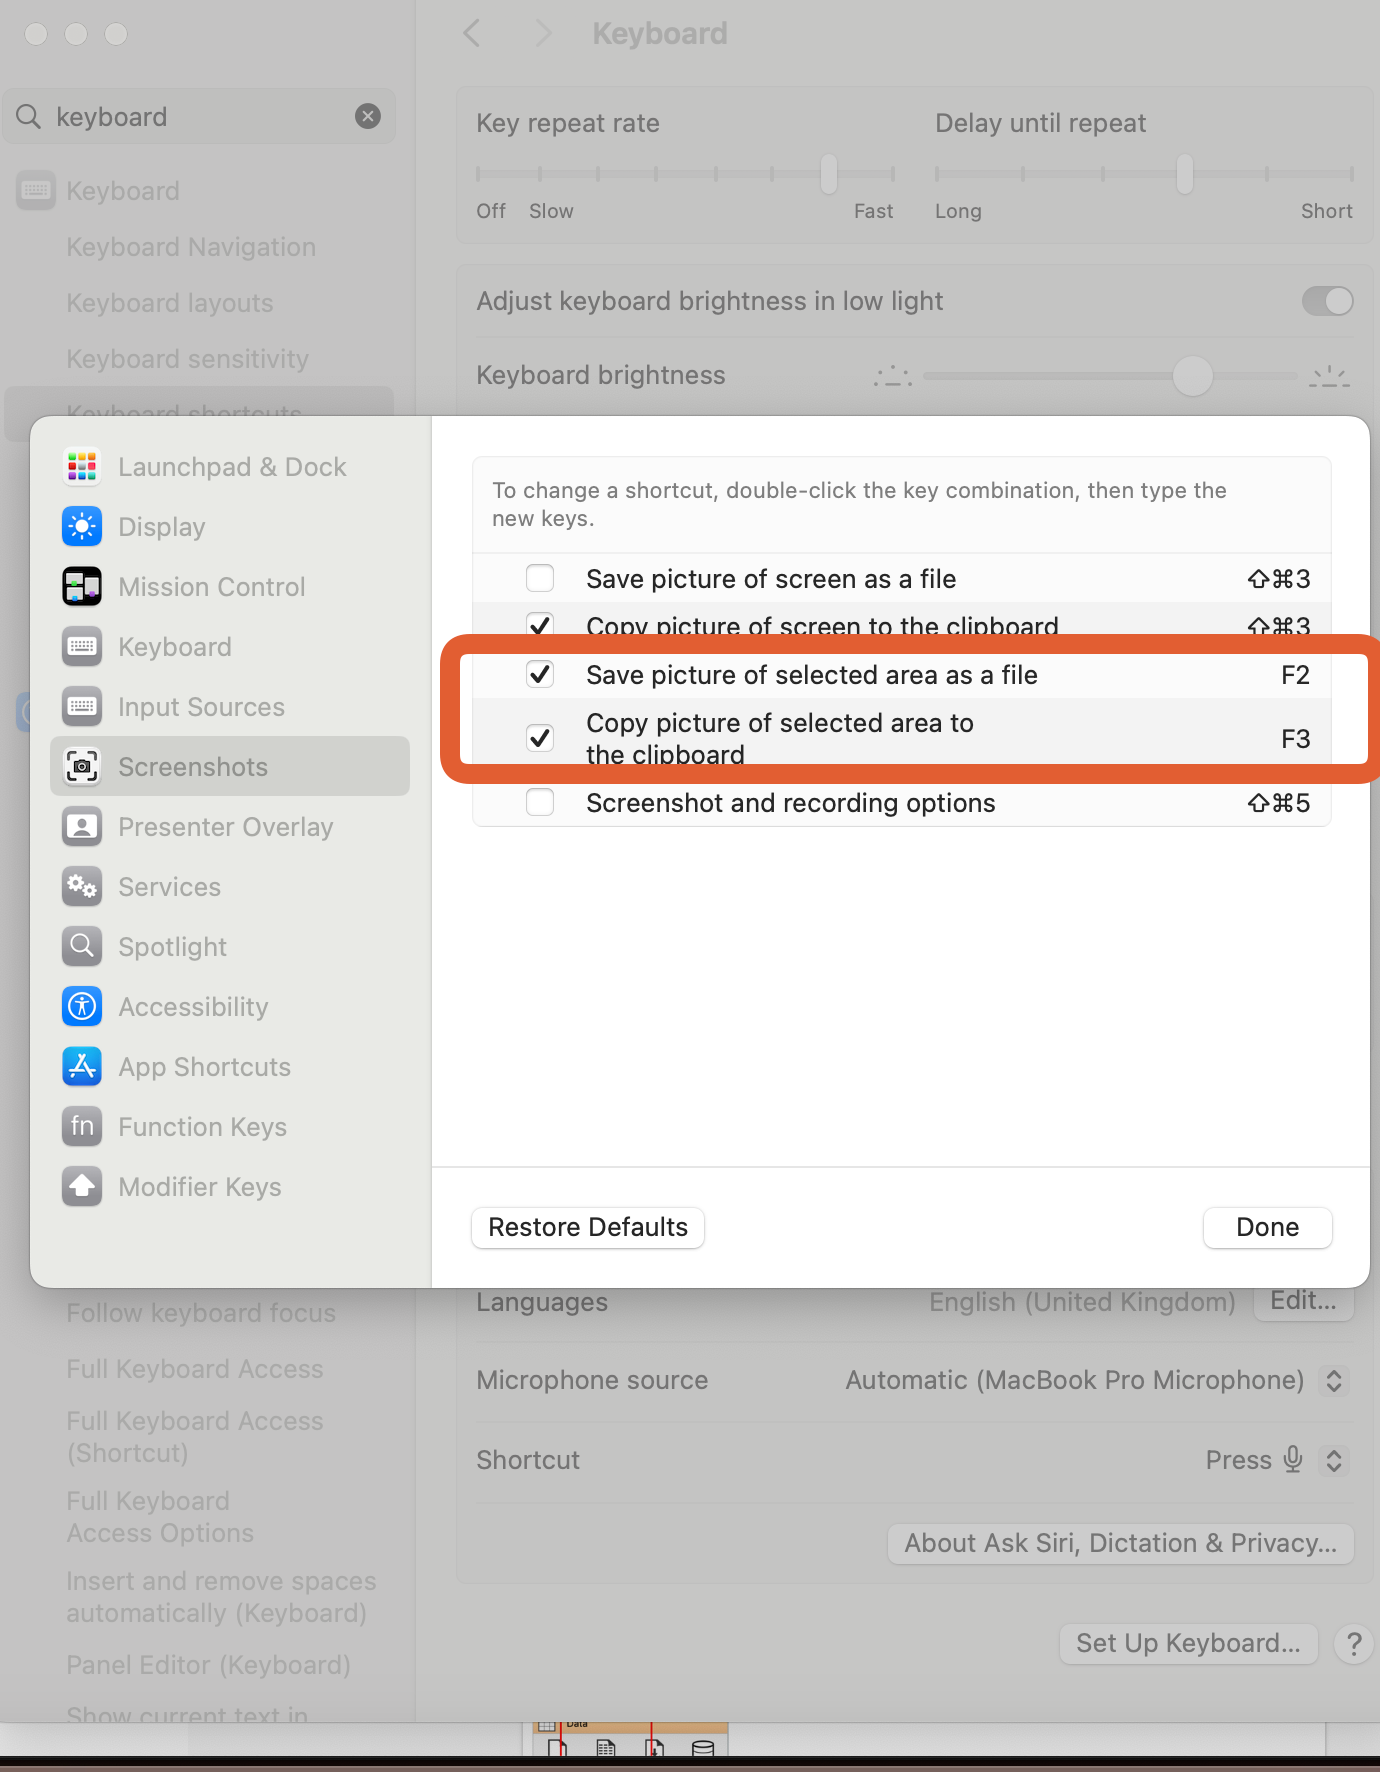
Taking a screenshot is probably something you do quite often when you are making a tutorial. So it becomes even more important to be able to do it quickly and without having to think about it. The best way to do this is with a super simple shortcut.
On the Mac, you can create shortcuts for a selected part of the screen to save to a file or the clipboard. For now, we will mainly use the former. Here it is assigned the F2 shortcut - choose whatever key is free on your keyboard.
Step 2
Go through your tutorial step by step and press the hotkey to take a screenshot of the part of the screen you want. The shortcuts are usually saved in a specific folder (on my Mac it is the Desktop folder).
Step 3
Now that we have all the screenshots, we need to highlight what is interesting so that the user can focus on where the action is and blur out parts that do not need to be shown.
To make this easier, I have developed a tool, blurify (it was originally made for blurring only, but I extended it to also highlight areas in the screenshots), which can do this in bulk - you just upload all your screenshots, highlight and blur them, and download them all at once. You can download it here for free.
And here is how you can use it:
Upload all images from the screenshot folder (on my Mac, it is Desktop by default) as depicted below.
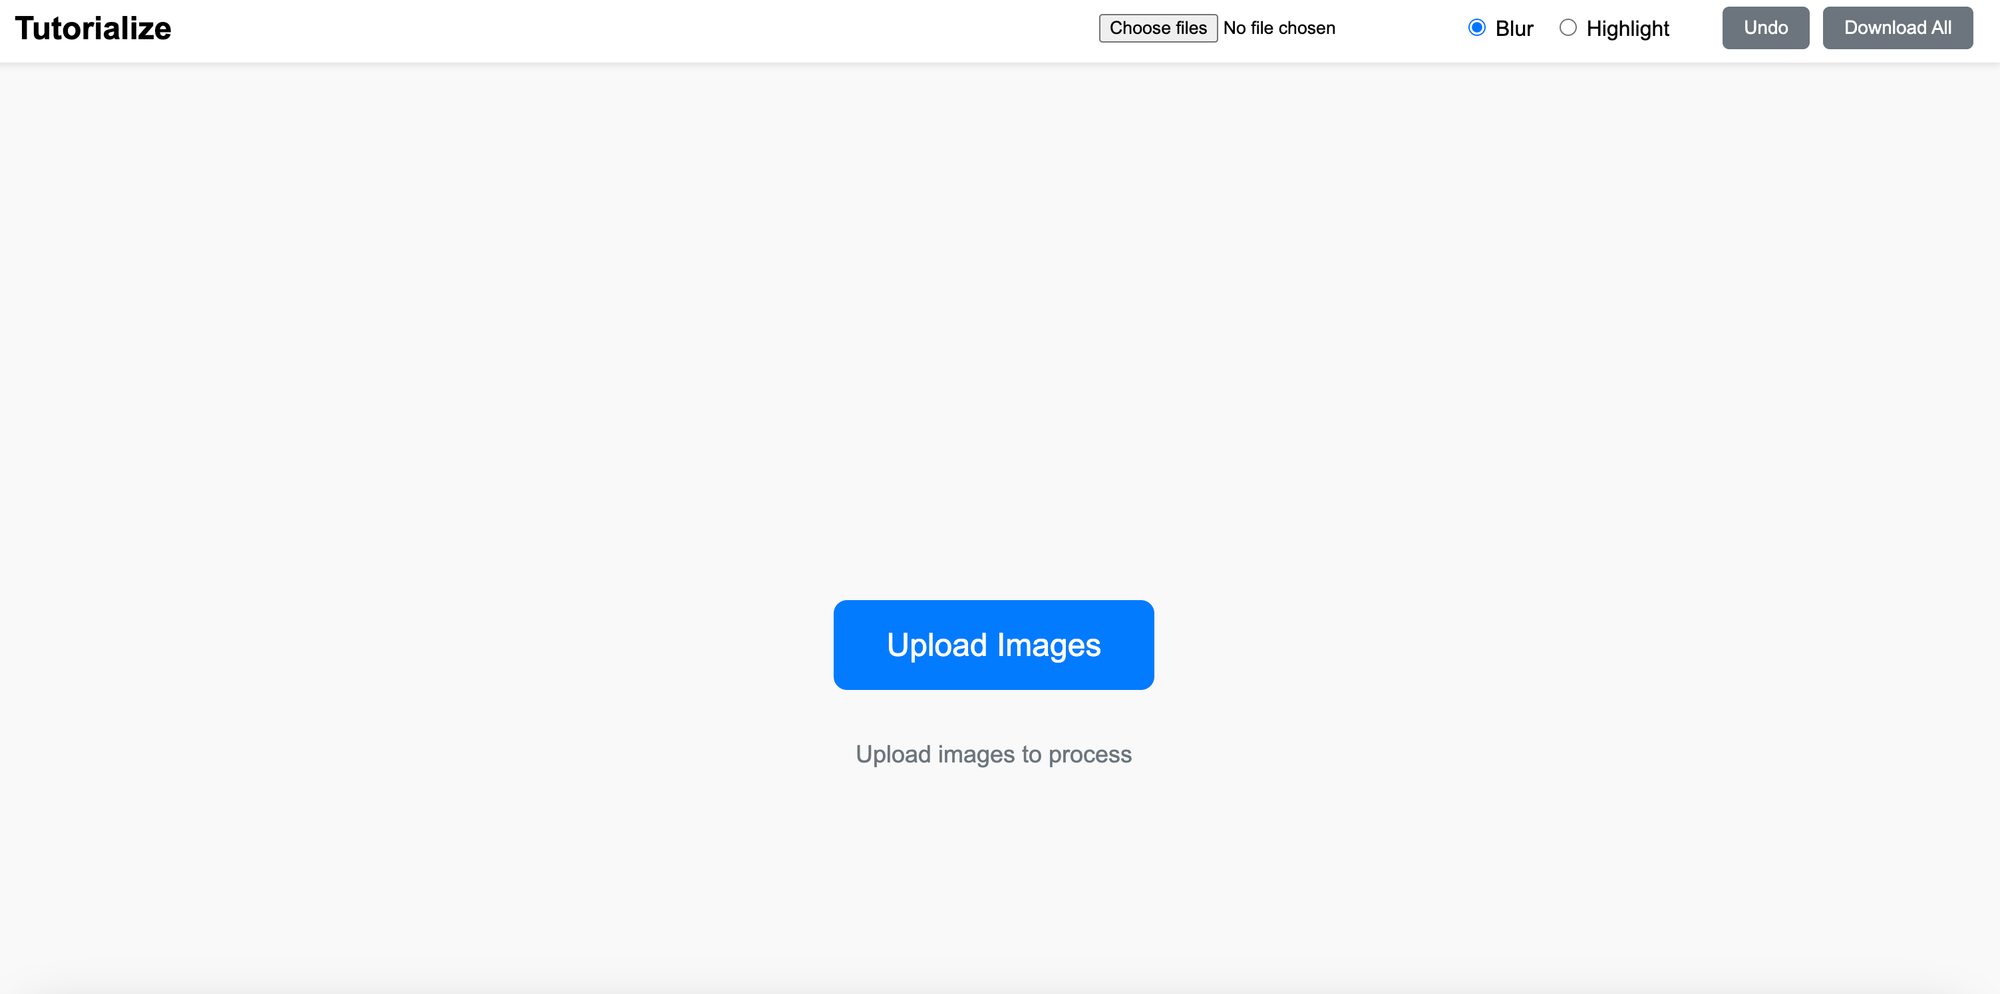
Once uploaded, all the screenshots are stacked on the same page.
The idea of blurify is to blur and highlight each one, then scroll down to the next one and so on. At the end, download them all, with all the blurrings and higlithts you have done, and paste them into your blog editor.
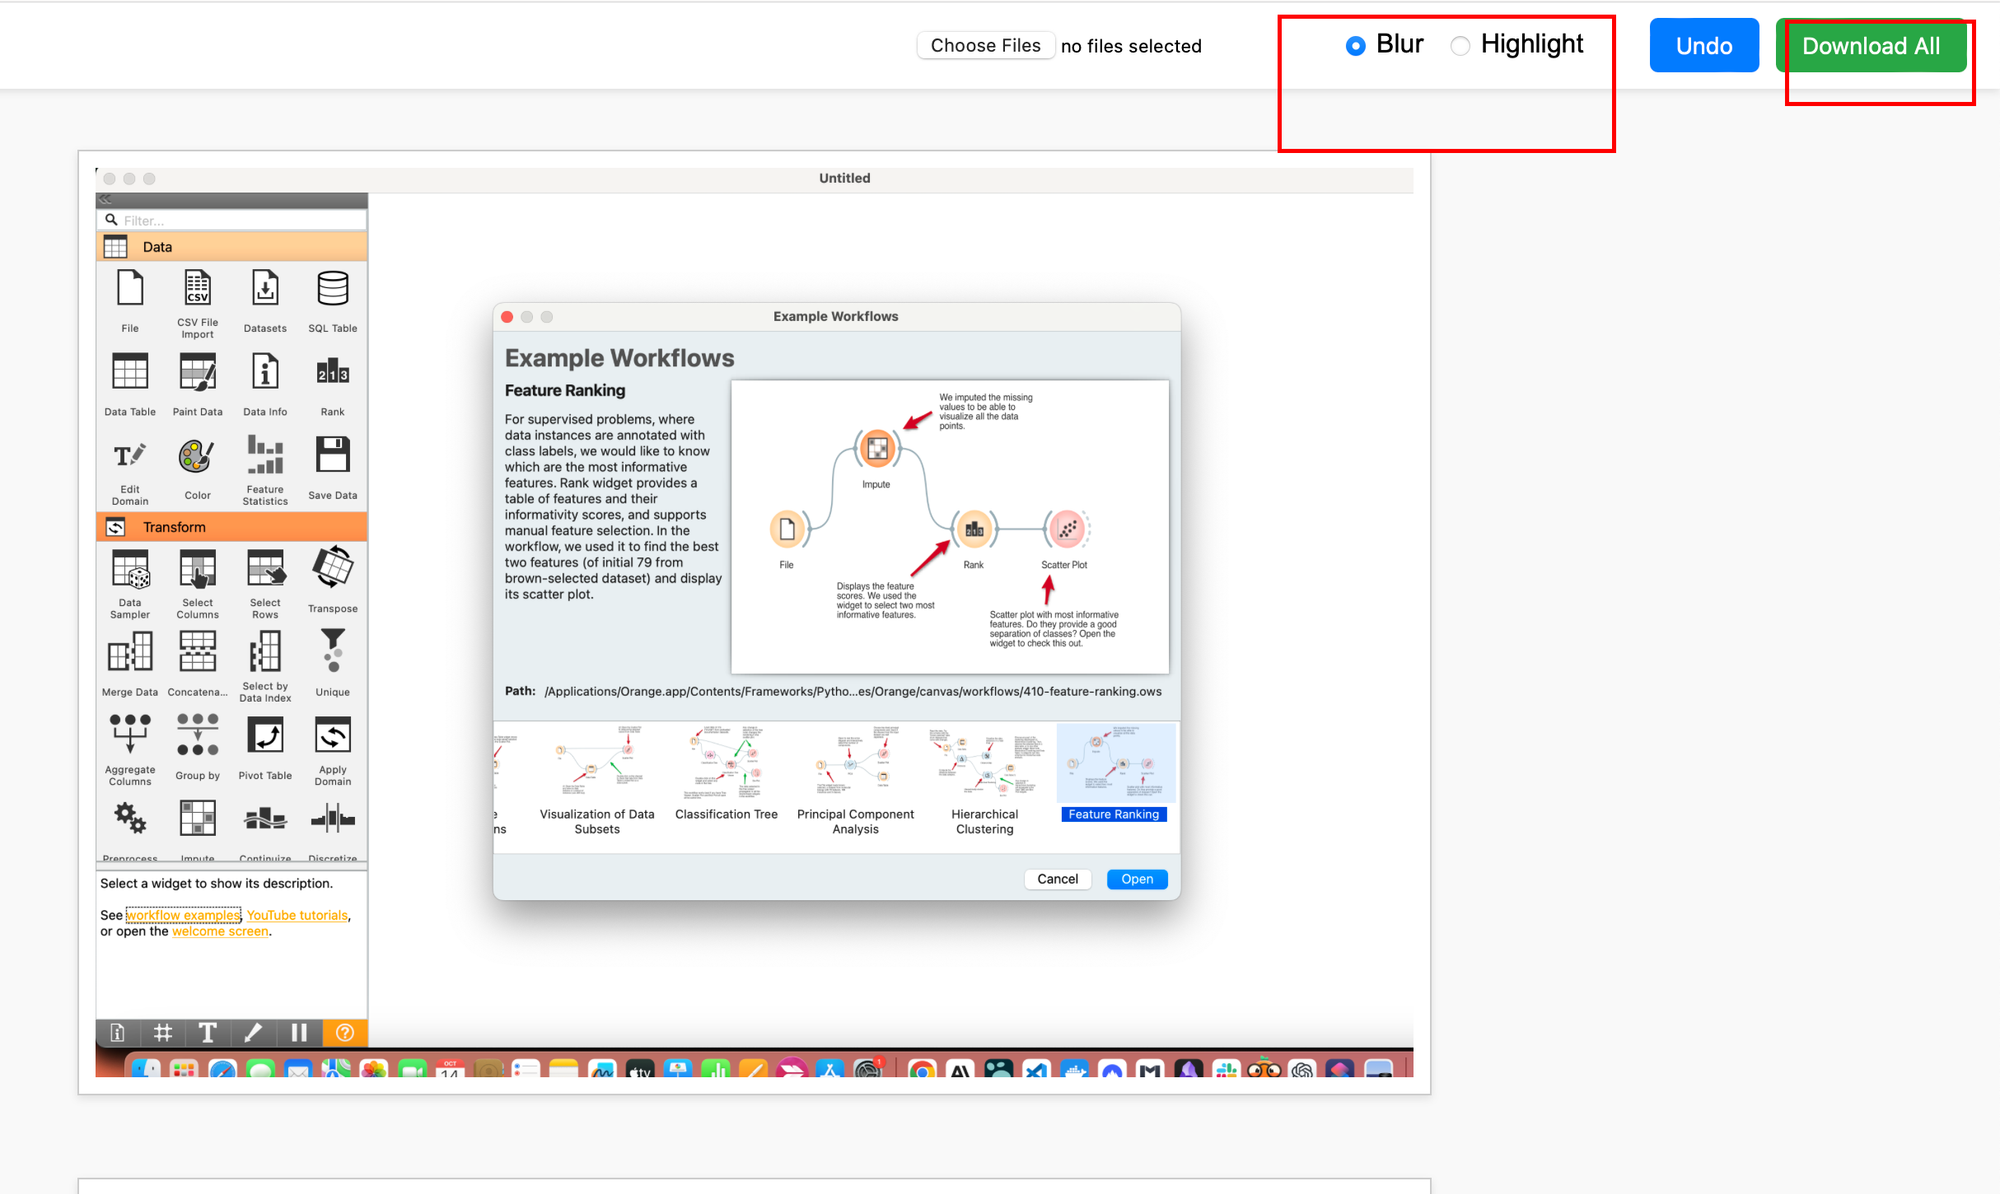
Finally, export all images by pressing Download All.
Once all the images have been processed, you can download them all at once and import them into your favourite blogging tool (Medium, Ghost, etc.).
That's it.
Happy Blogging:)