This solution is 40% cheaper than Google Colab
Explore the powerful GPU options on vast.ai, an affordable alternative to Colab for model training and inference. With setup under 3 minutes and pricing up to 70% lower than Colab, vast.ai offers a user-friendly experience with Jupyter Lab. Dive into this guide to optimize your GPU workflow and s...

Colab is a powerful platform for easily accessing GPUs for various workloads like model training and inference of large models. However, if you look around a bit, you will quickly find that it’s not necessarily the cheapest option available if you need an editor like VSCode, Jupyter, or similar tools with powerful GPUs.
One great alternative I found, which is incredibly competitive and a real alternative (not only in terms of GPU power but also usability and ease of use, even better than Colab), is vast.ai.
If you're looking for a GPU just for inference, you can also check my other blog post for a better alternative.
With this platform, you can get a GPU-powered VM of your choice with Jupyter up and running in less than 3 minutes.
Before we dig deeper into the technical details, let's make a quick comparison of the prices for, say, an A100 GPU.
Colab Pro Pricing as of Oct/2024

Breaking it down to the hourly price:
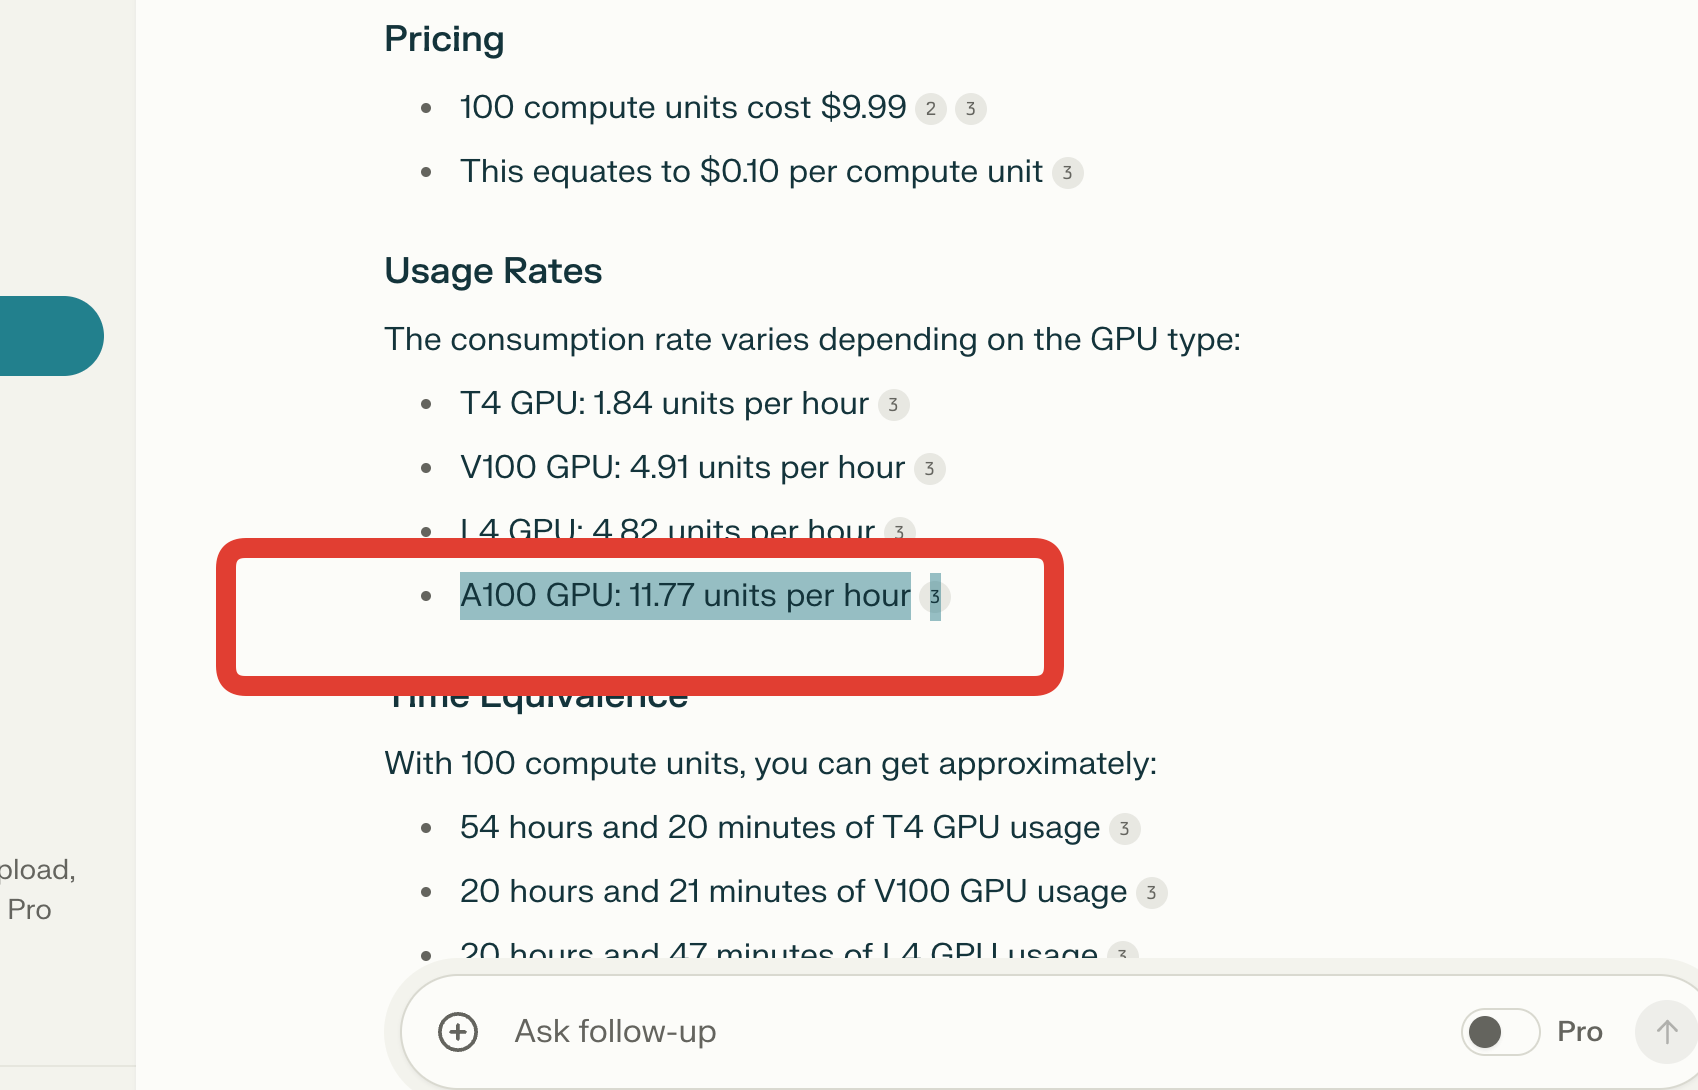
100 compute units / 11.77 units ~ 8.5 hours per month for approx $11
Approximately $1.2 per hour
More on Colab pricing can be found here in greater detail:
https://mccormickml.com/2024/04/23/colab-gpus-features-and-pricing/
Vast.ai Pricing
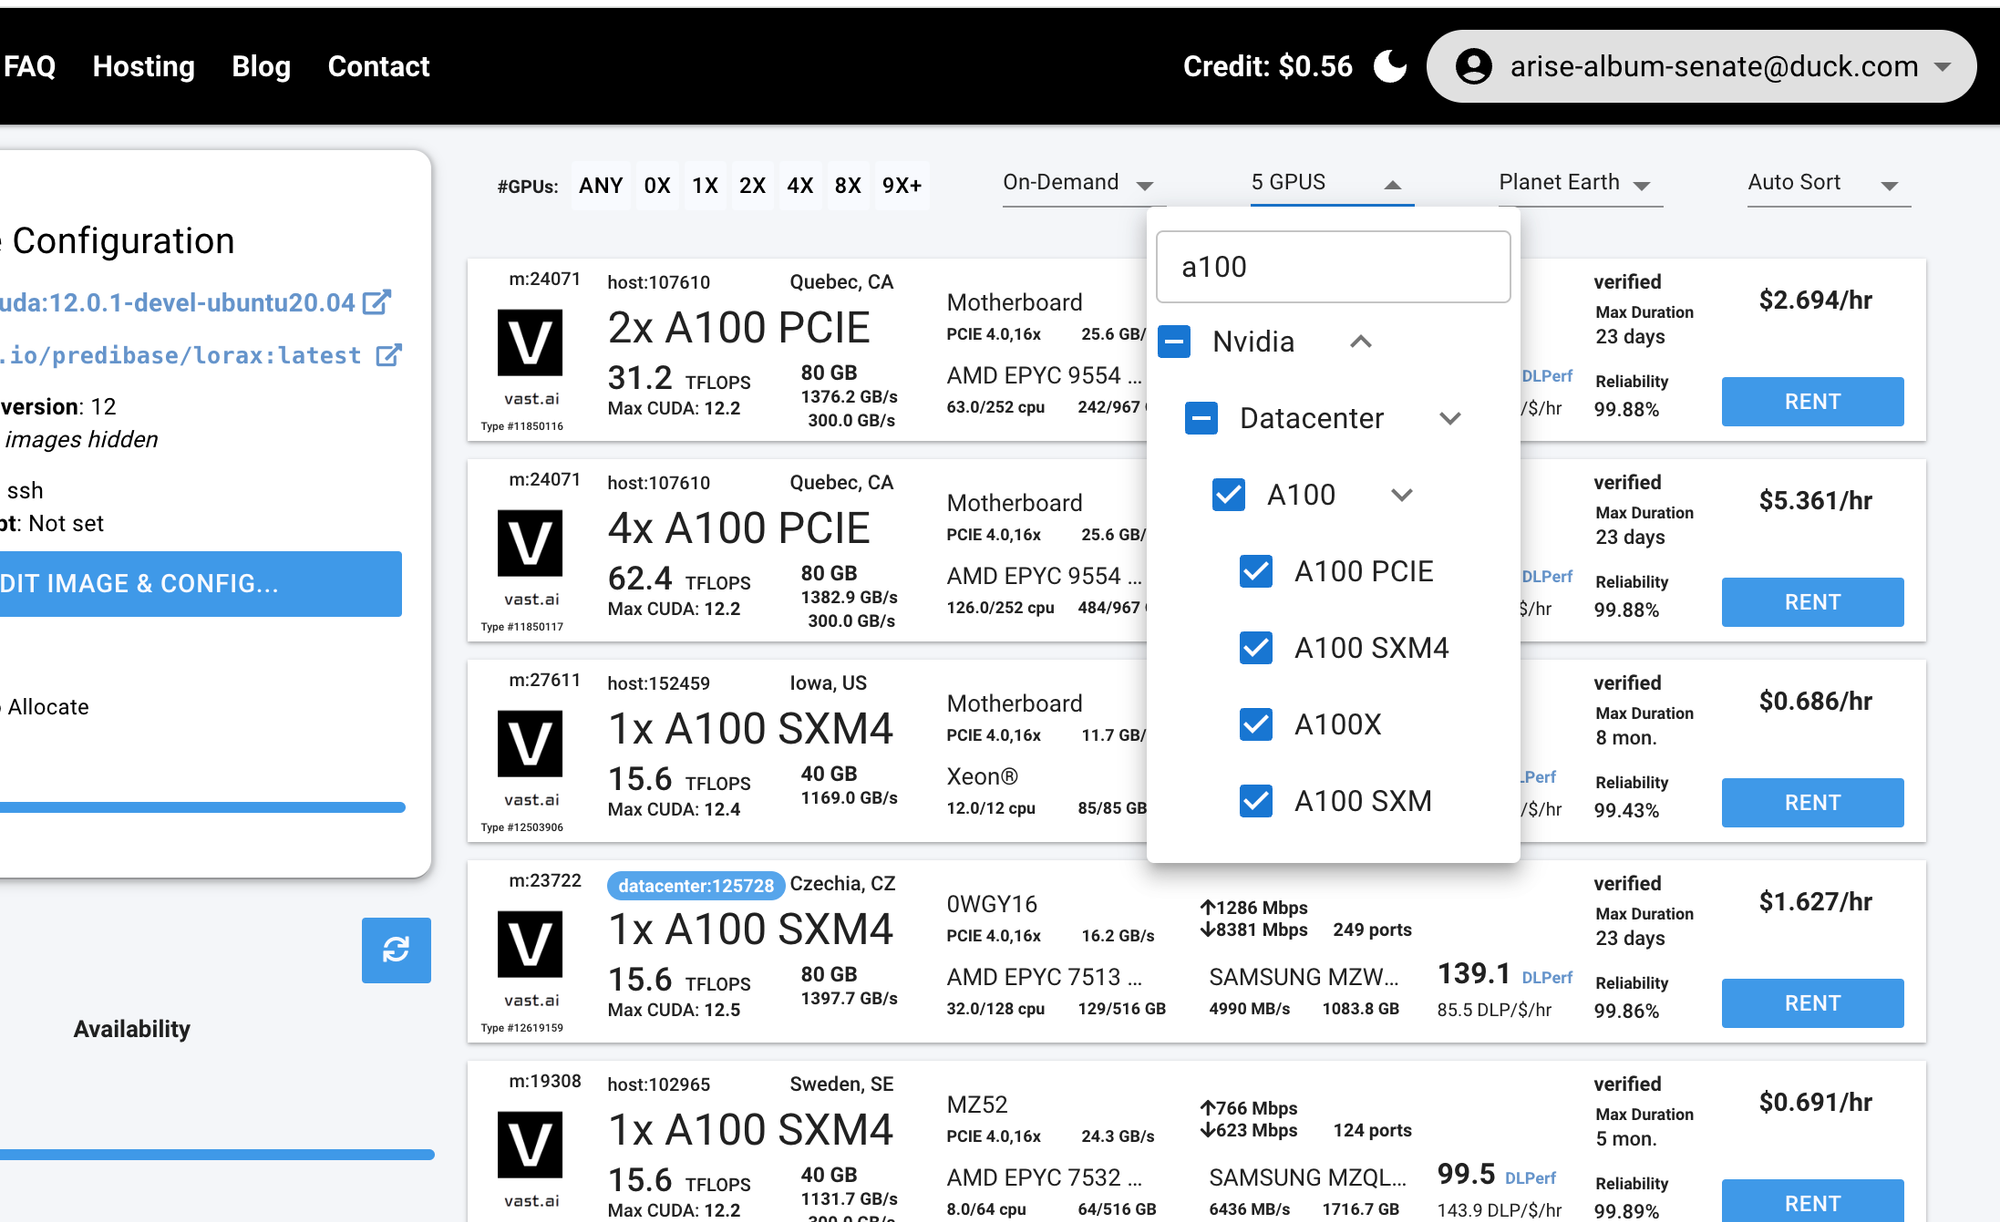
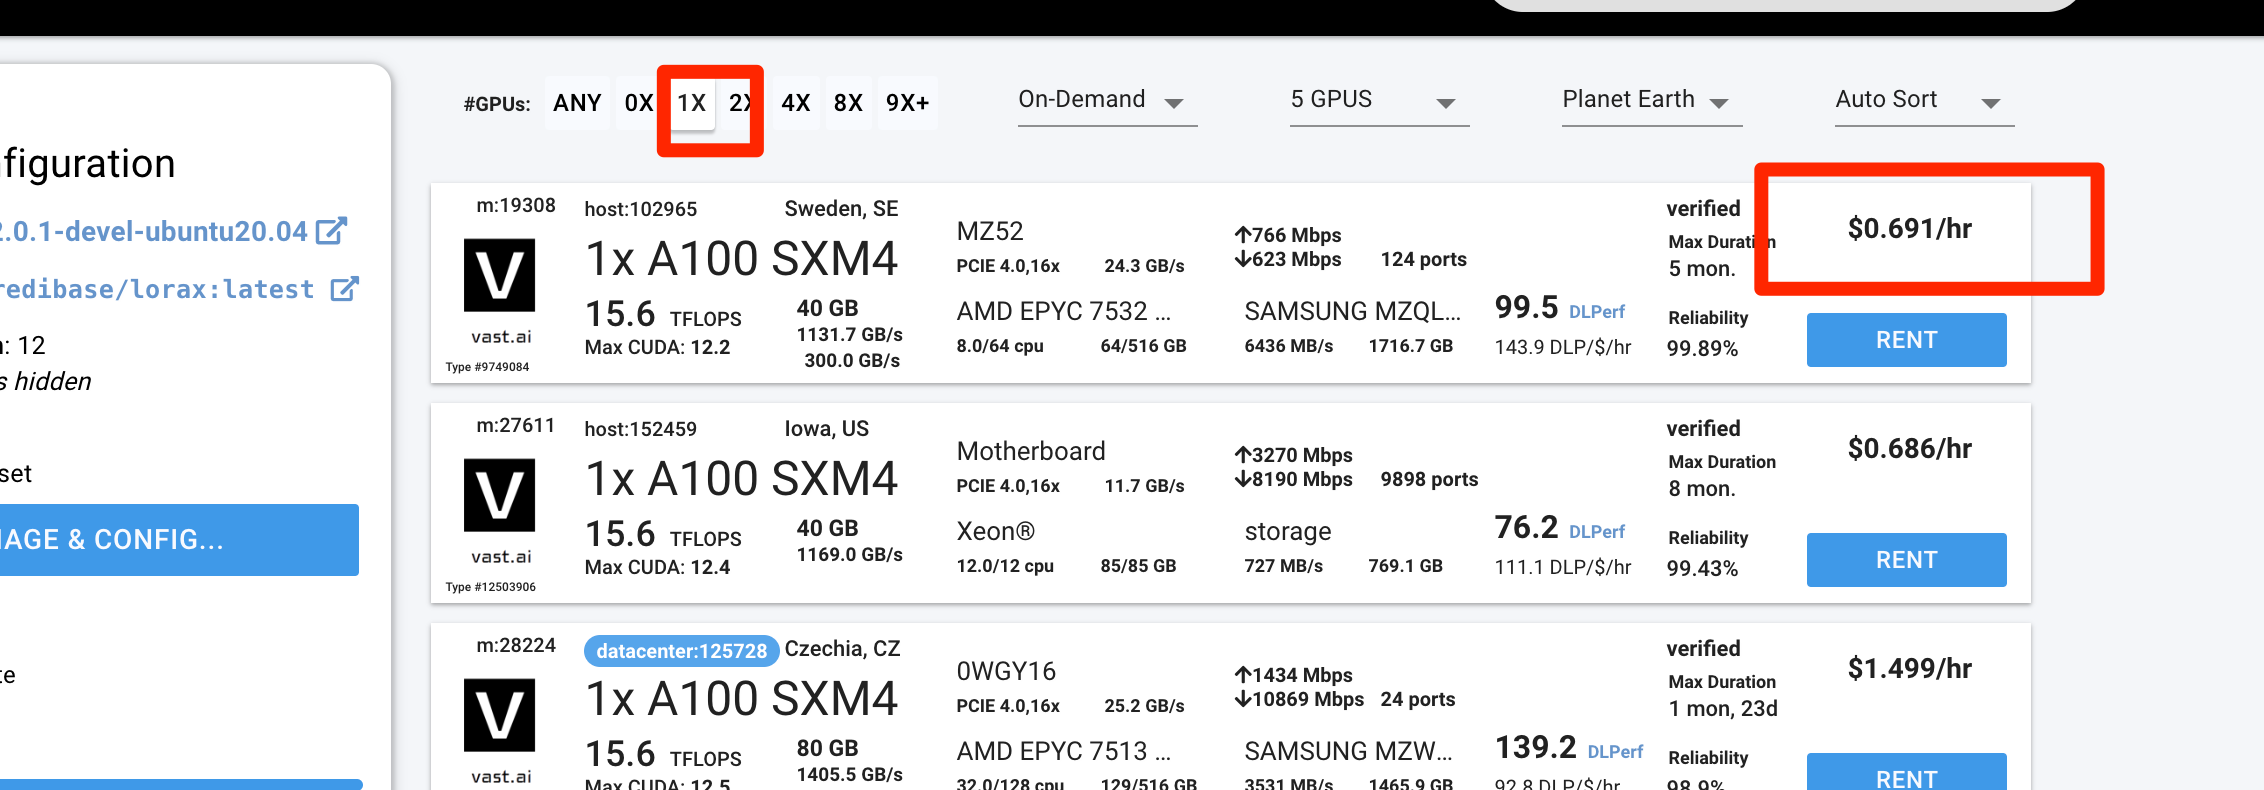
As of the time of writing this blog post, I can get an A100 in less than a minute up and running for less than 70% of Colab's price. If I did the math correctly, this is a saving of more than 40%.
Here' is how you can get started.
Getting Your GPU Instance Up and Running
- After selecting the instance above, click "Rent." You should almost instantly see it available in your instances dashboard.

- To use it, you have basically two options: either directly in the browser or by configuring SSH. For most cases, the browser option is more than sufficient (as it is for Colab).
- To run it in the browser, click on the Jupyter Lab icon at the bottom as depicted below:
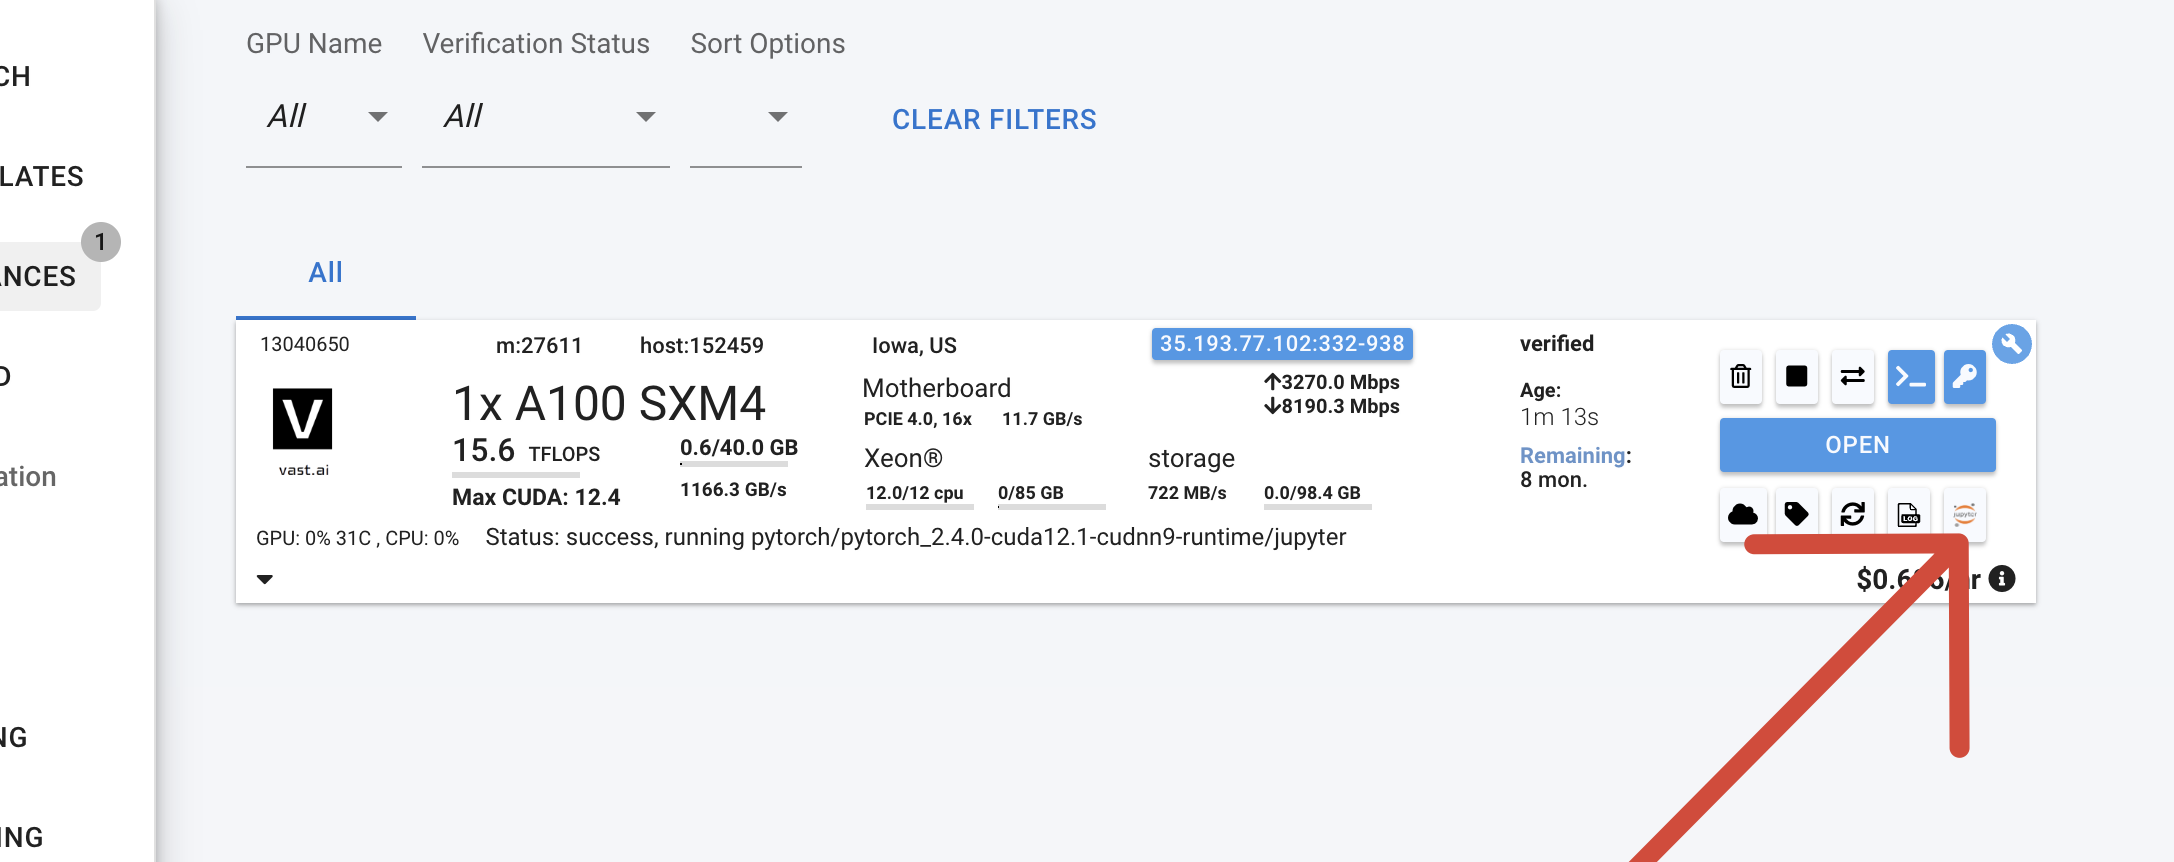
A window opens (if you get a warning for insecure SSL, accept it).
- You should finally see a window like below.
Open View > Open Jupyter Lab
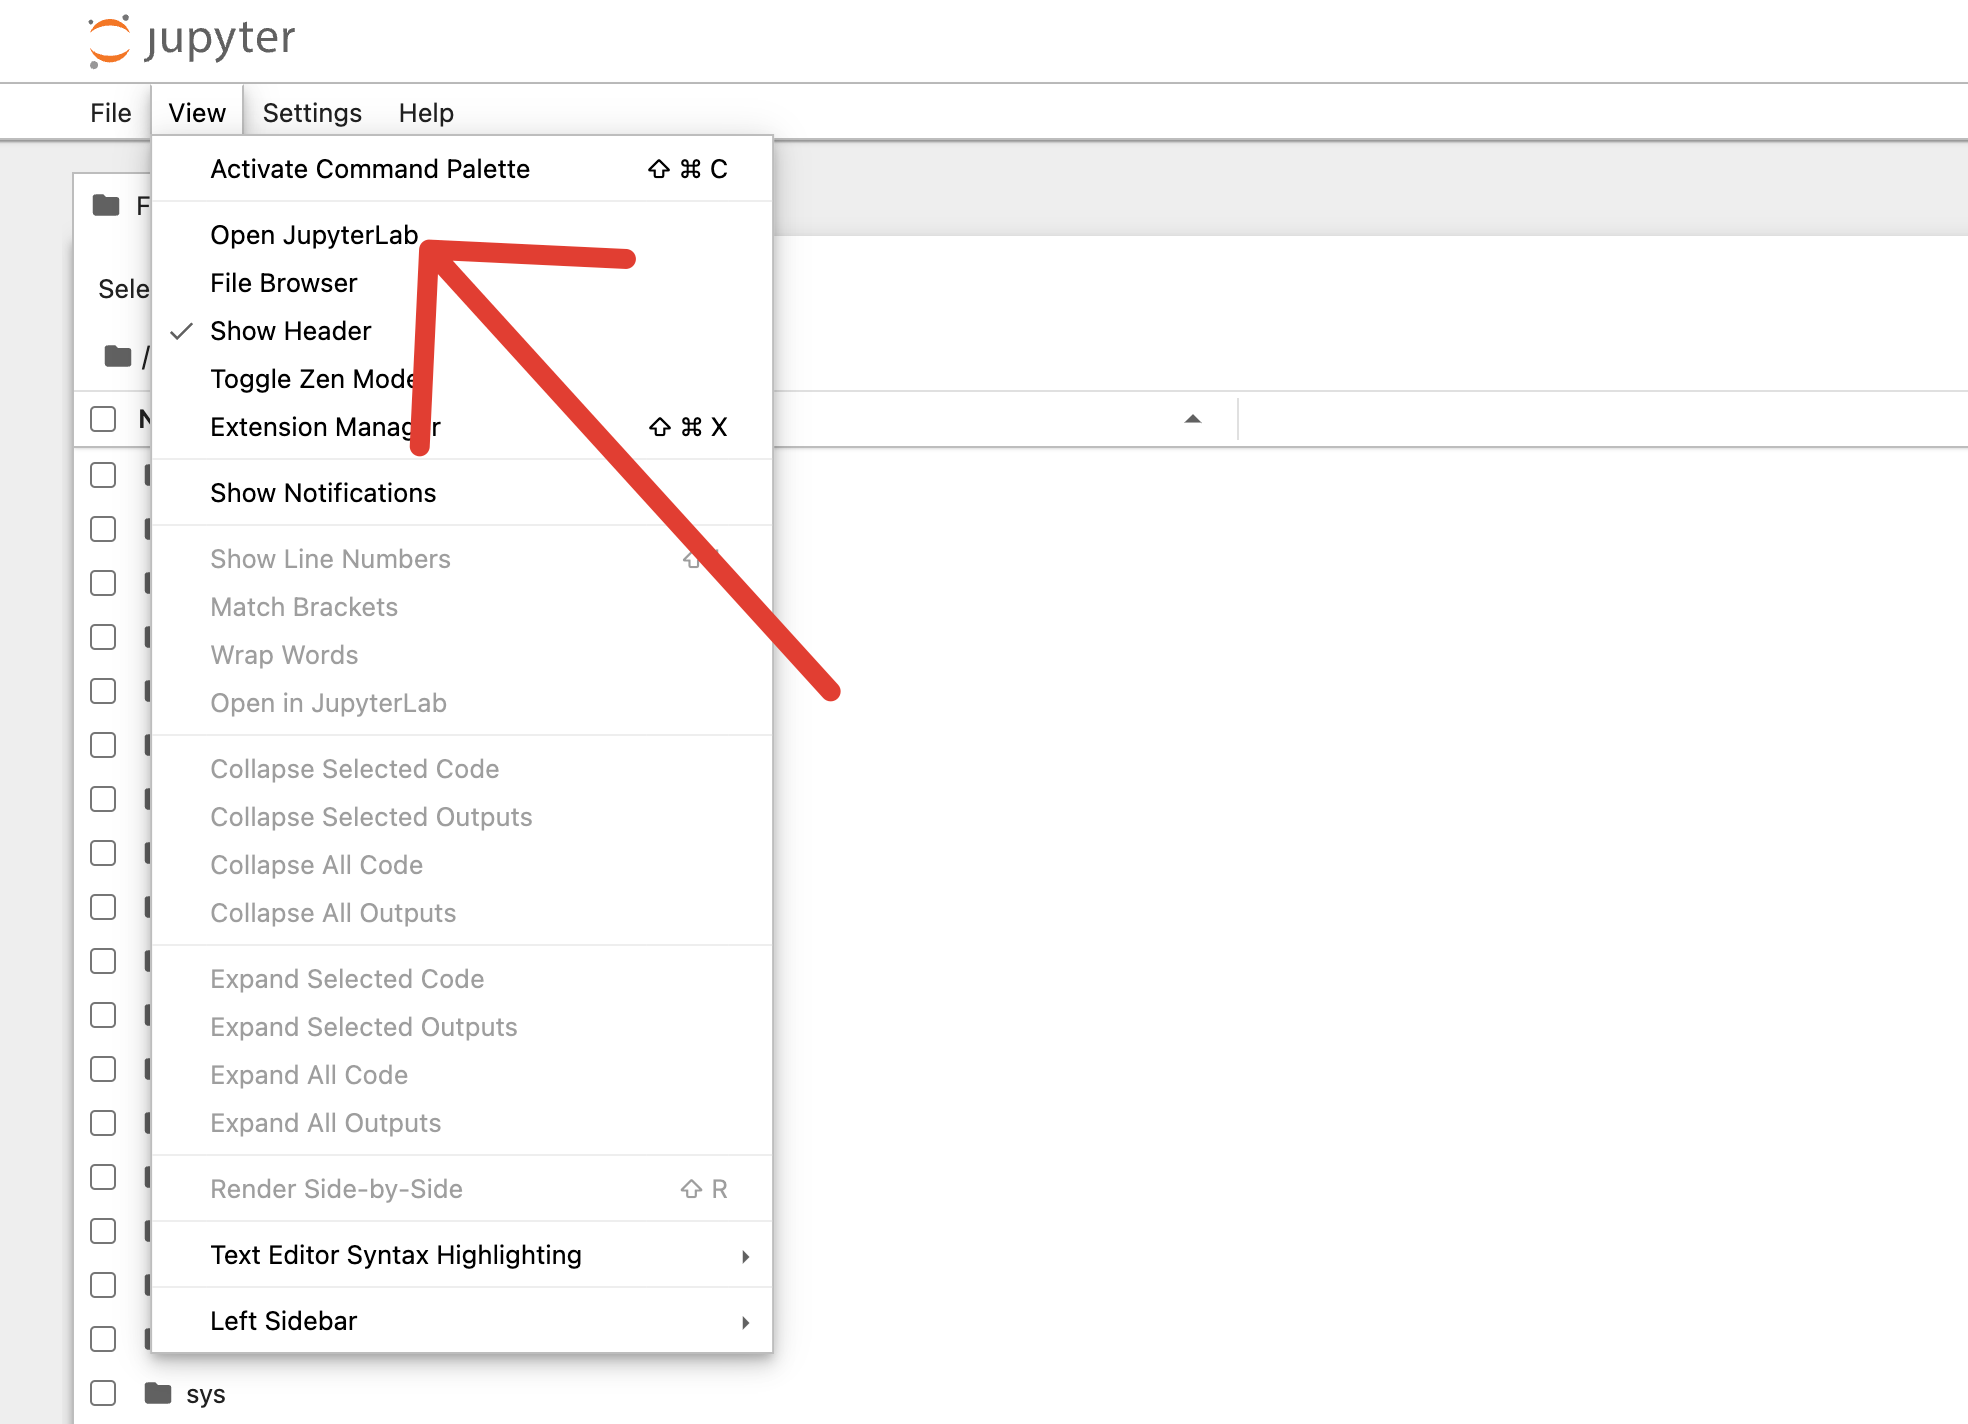
And voila, your GPU-powered editor is up and running.
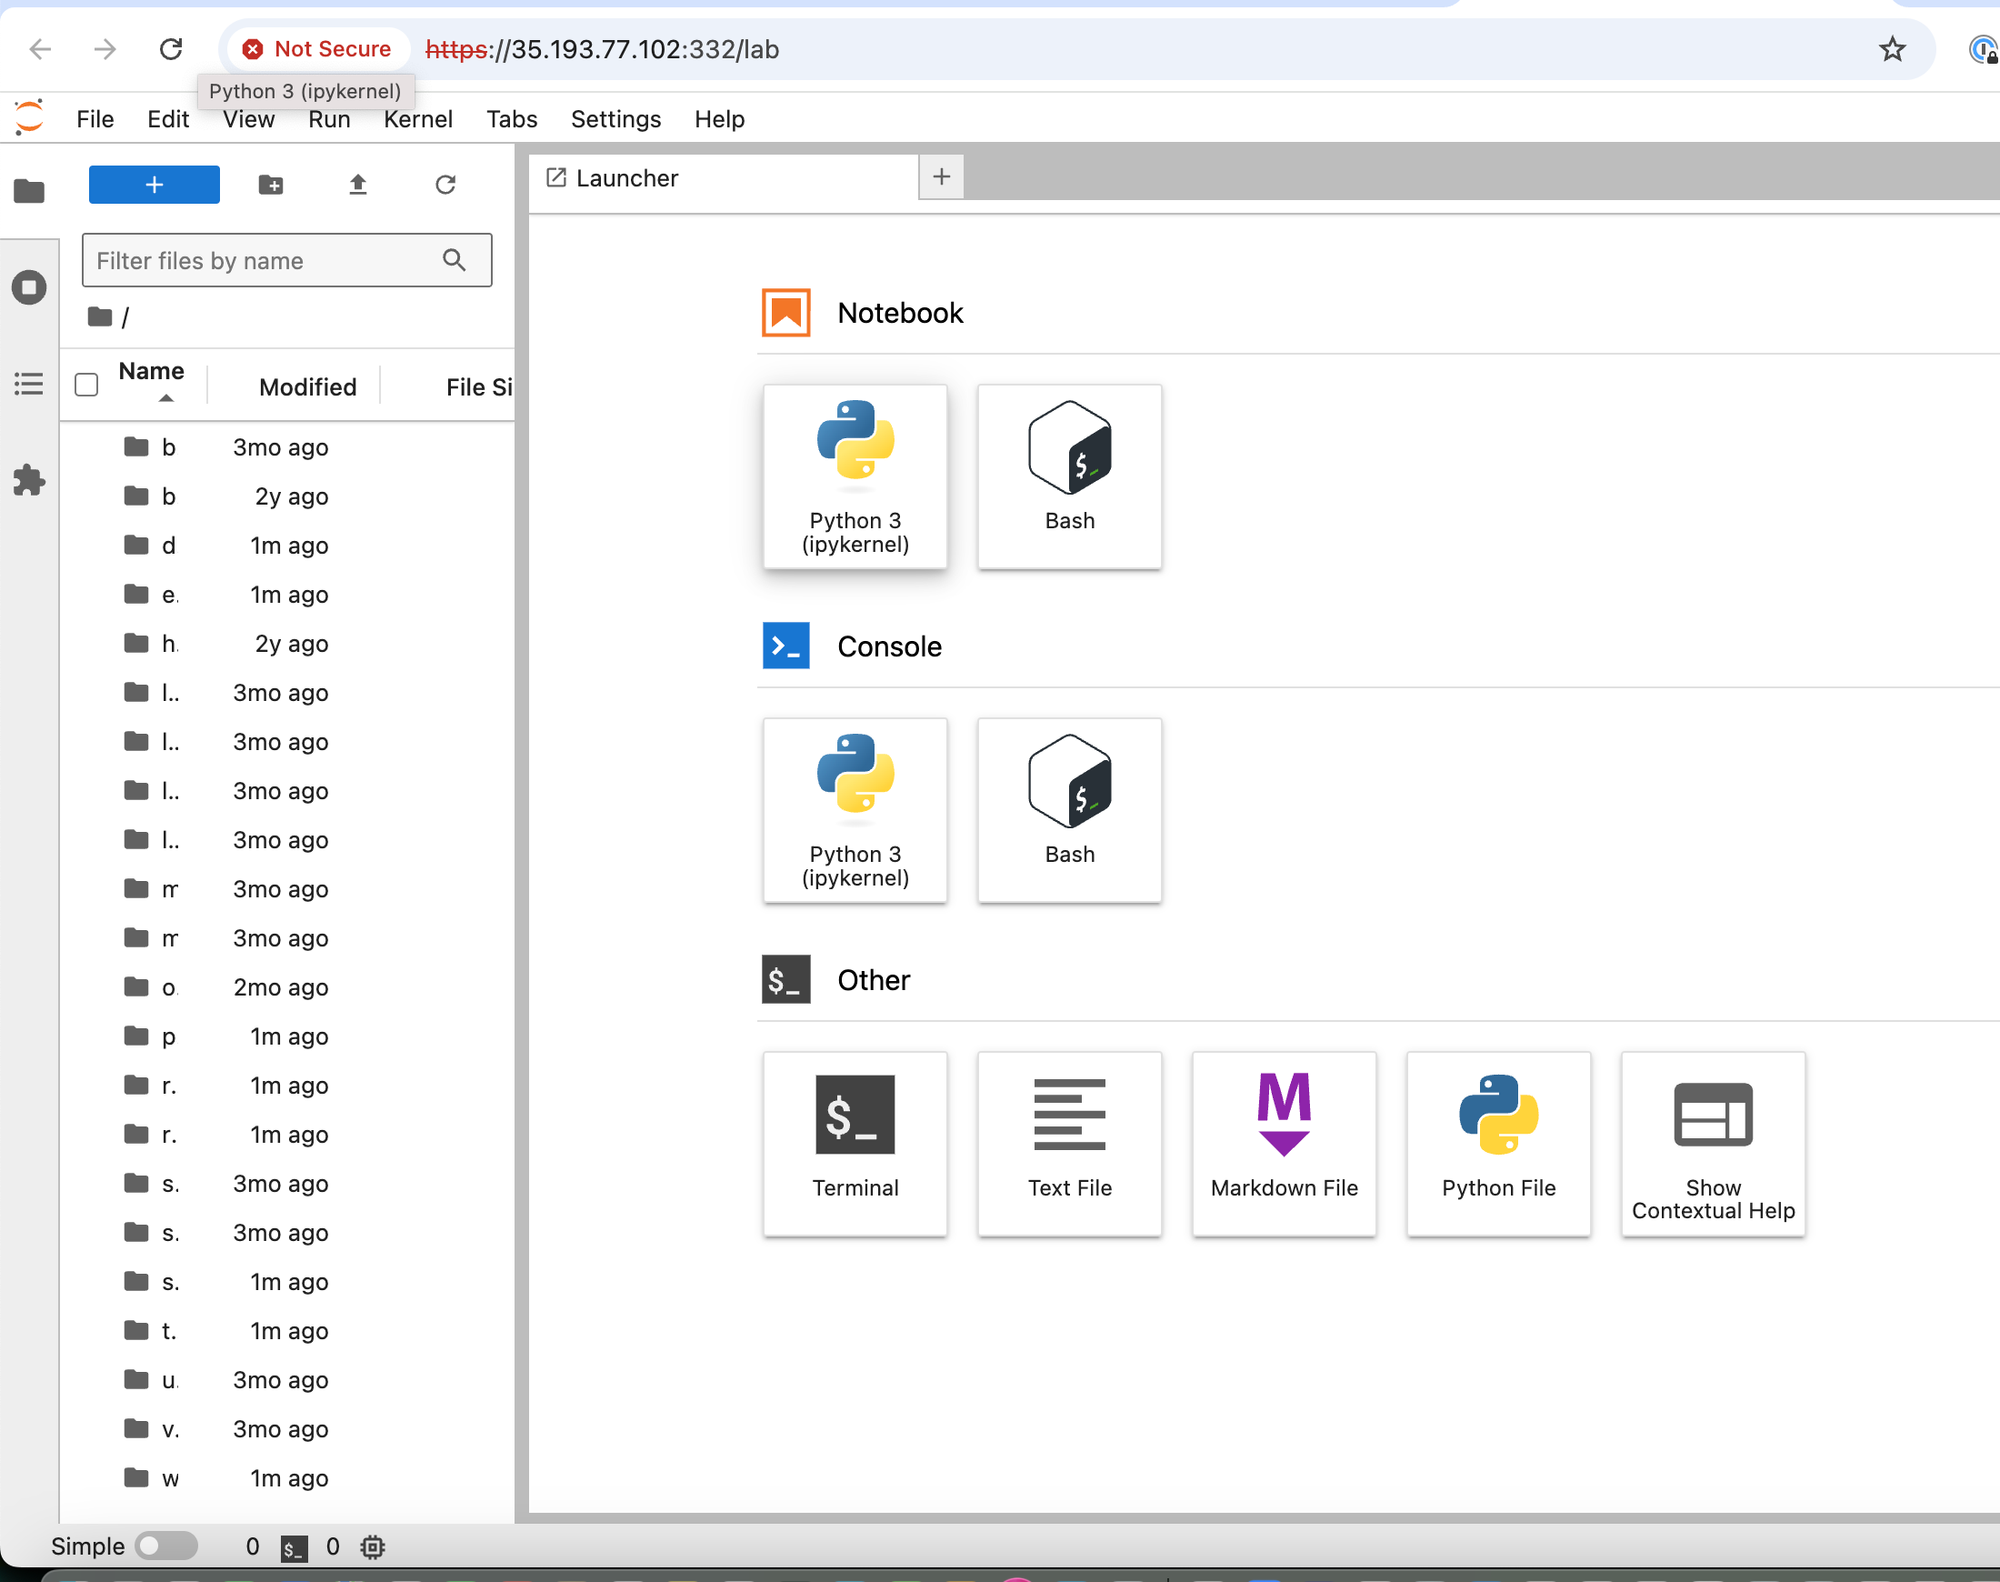
I do a lot of model training in this same editor, and it worked very well.
If you prefer, however, to run it in VSCode instead, please see my other tutorial on how to set this up.
Happy Coding!