From Vercel to Coolify: Effortless Local Deployment for Your Dockerized Apps
Managing multiple Python and JavaScript applications in Docker can be challenging, especially with port mapping. This is where Coolify shines! Similar to Vercel, it runs locally for security-savvy developers. This guide walks you through setting up Coolify in Docker-in-Docker, deploying apps from...

I've got loads of apps in Python and JavaScript running in containers! I find it really helpful for keeping my host clean and separate from my development. But we all know that managing multiple Python and JavaScript applications can be a bit of a challenge, especially when it comes to ports and address mapping in Docker.
Why?
Forwarding specific ports and mapping them to localhost in Docker can quickly become a bit of a headache. While Kubernetes is a great solution for orchestrating containers (and exposing them using Services), there's another exciting option: Coolify.
In a nutshell, Coolify is similar to Vercel, but can be run entirely on your local machine, making it an attractive solution for security-conscious developers.
Outline
- Why run Coolify in Docker?
- Setting up Docker-in-Docker for Coolify
- Install Coolify
- Deploy applications using Coolify
- Deploying a public GitHub repository
- Deploy a private GitHub repository using deployment keys
- Accessing deployed applications
- Wrap-up
Why run Coolify in Docker
I prefer to isolate all applications in containers to keep my host machine clean and secure. Typically, my host only runs office applications, Docker and VSCode. This approach keeps the environment clean and improves security.
However, deploying an application that needs to create its own containers can be challenging when you run it directly on the host (my Mac). To sandbox this Docker-based application, I decided to deploy Coolify in a Docker-in-Docker Container.
You can read more about Docker in Docker here .
After some trial and error, I managed to get it up and running and successfully deployed two applications: one from a public GitHub repository and another from a private GitHub repository.
With this setup, I can deploy anything I develop locally using the Coolify CLI with a single click after testing it locally.
This eliminates the hassle of managing ports and allows me to configure and deploy all applications from a single pane of glass.
Setting up Docker-in-Docker for Coolify
Let's explore how to deploy Coolify in Docker, deploy applications and access them using this infrastructure.
We should have a setup similar to the one below:
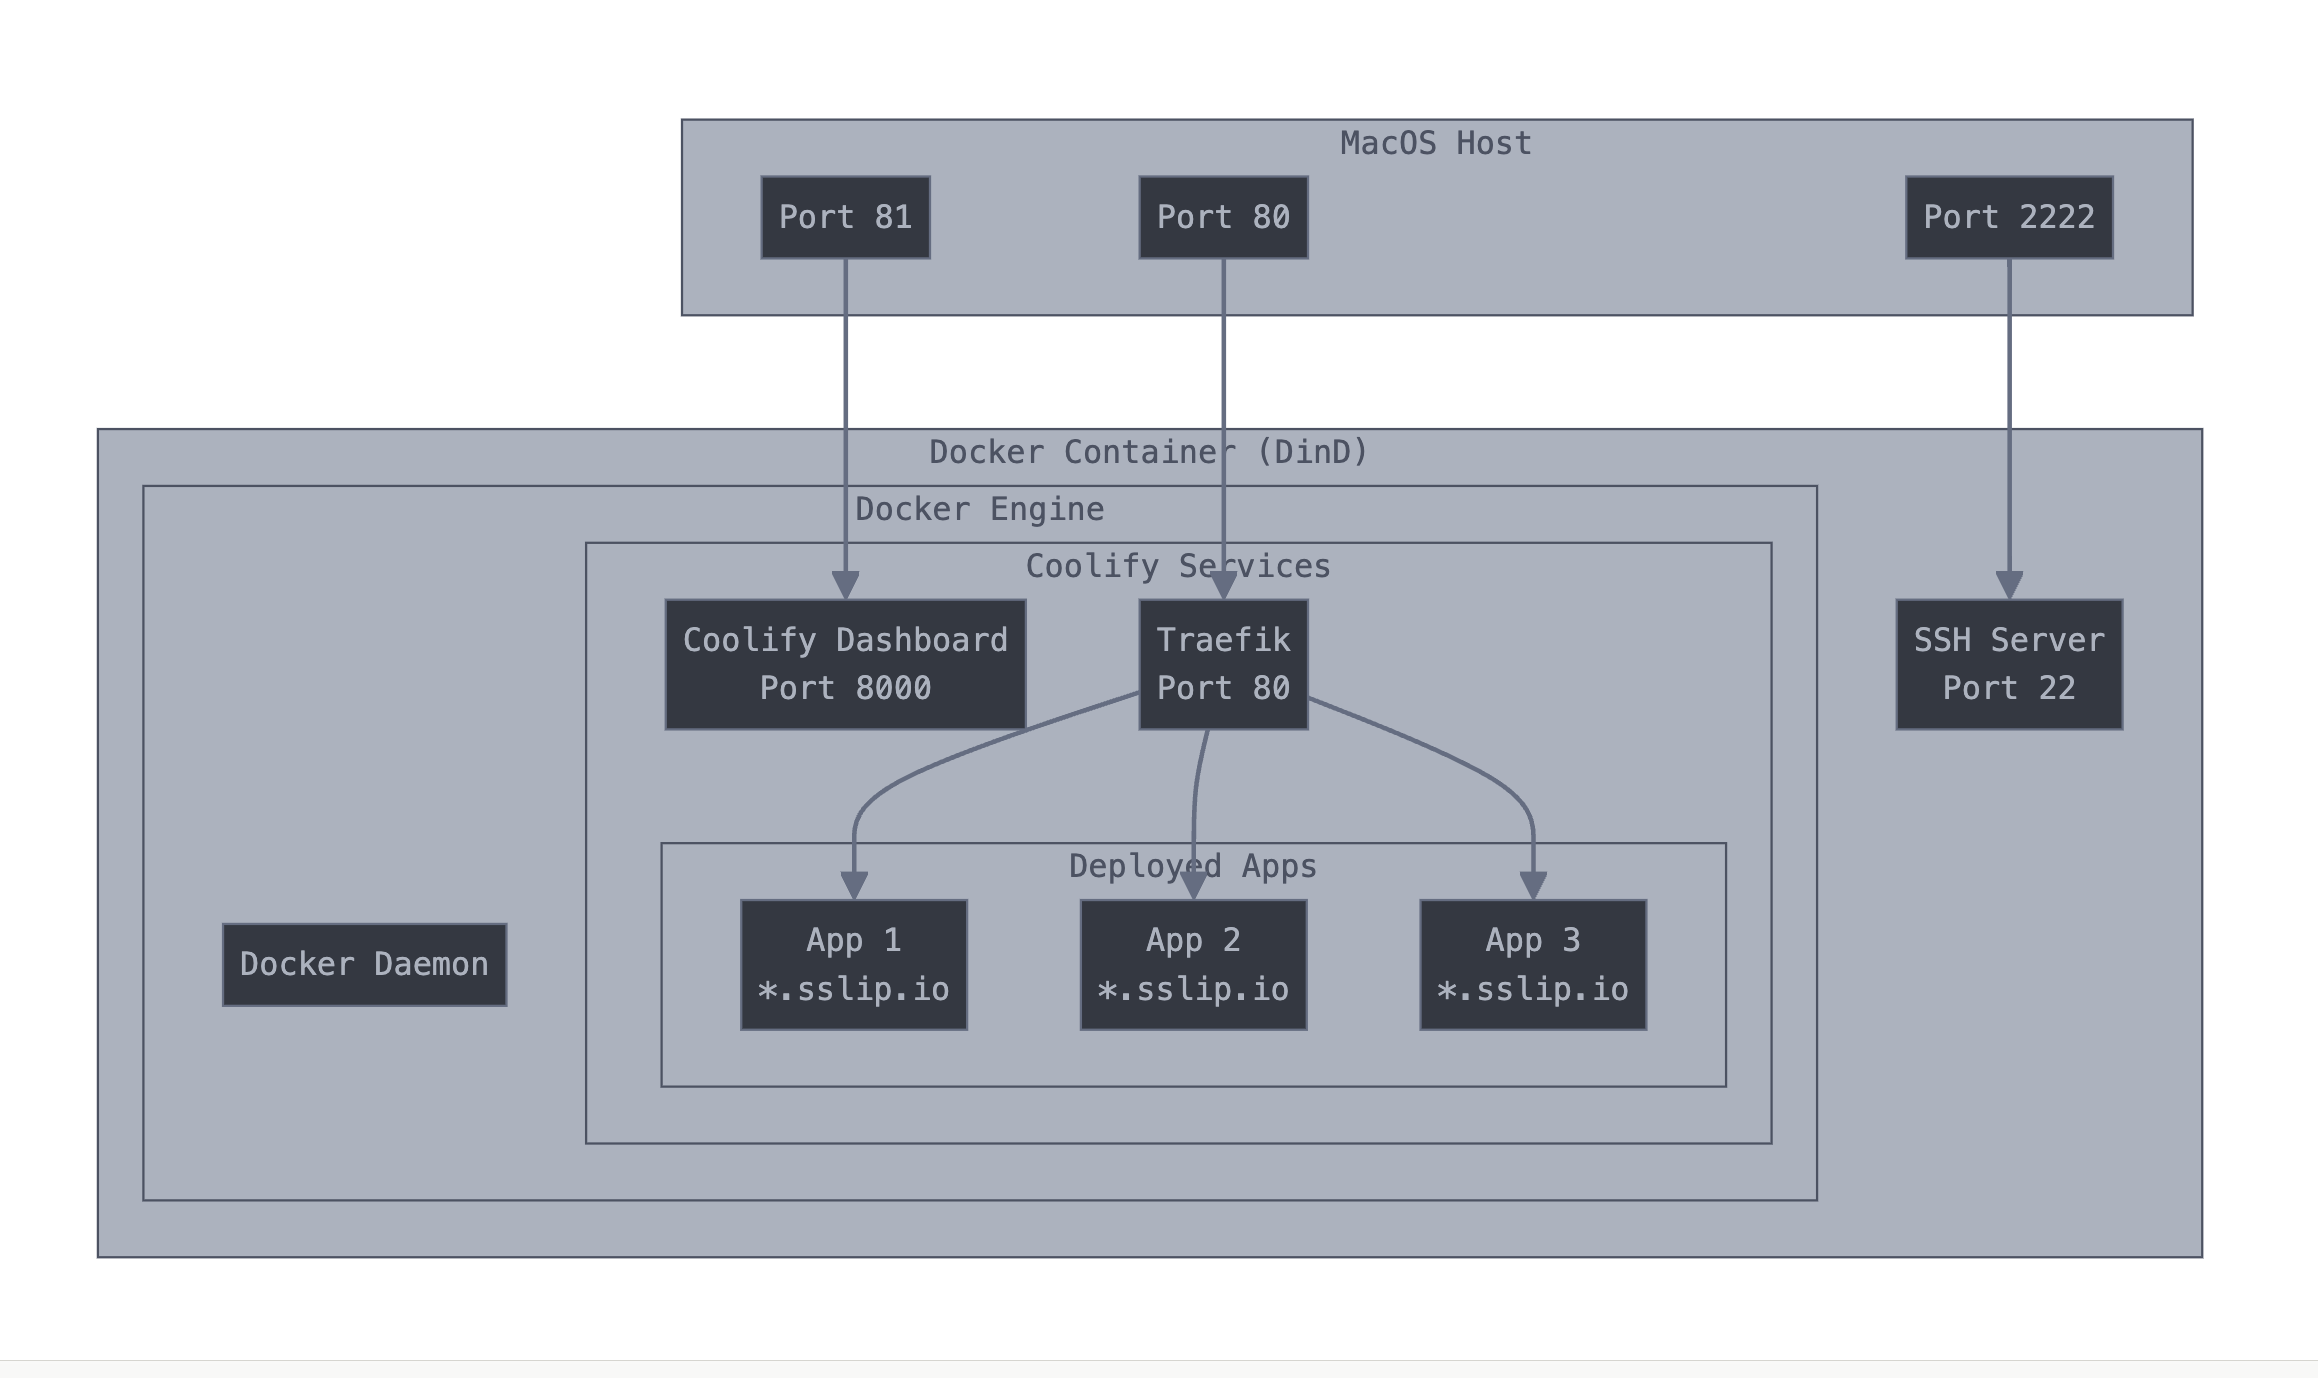
- Port 81 is reserved for the Coolify dashboard. With Docker port forwarding, port 81 on the Docker-in-Docker container points to port 8000 on Coolify.
- Port 80 points to Coolify's port 80, which is the Traefik container inside the Coolify container.
This can get a bit confusing with many containers, but essentially the hierarchy is as follows:
Docker (Mac)
Coolify container (Docker-in-Docker image + installed Coolify): Mapping Port 81 to 8000 and Port 80 to 80
├── Dashboard Container (Port 8000)
├── Traefik container (mapped to port 80)
├── App1 (routed through Traefik)
│ └── App2 (routed through Traefik)
#1 Installing Coolify
First, run the Docker-in-Docker container with the necessary port mappings:
docker run -it --rm --privileged -p 80:80 -p 81:8000 -p 2222:22 --cgroupns=host docker:dind sh
Inside the container, install the required packages:
apk add --no-cache \
    openrc \
    openssh \
    openssl \
    docker \
    docker-cli \
    docker-compose \
    bash \
    curl \
    wget \
    git \
    python3 \
    py3-pip \
    nodejs \
    npm \
    build-base \
    shadow \
    sudo

echo "🔑 Setting up SSH..."
ssh-keygen -A
echo "PermitRootLogin yes" >> /etc/ssh/sshd_config
echo "PasswordAuthentication yes" >> /etc/ssh/sshd_config

echo "⚙️ Setting up init system..."
mkdir -p /run/openrc
touch /run/openrc/softlevel

echo "🚀 Starting SSH service..."
/usr/sbin/sshd

echo "🐳 Starting the Docker daemon..."
dockerd &

echo "✅ Setup complete - keep container alive..."
tail -f /dev/null
Next, access the container's bash shell:
docker exec -ti <container_id> bash
Install Coolify by running the install script twice:
curl -fsSL https://cdn.coollabs.io/coolify/install.sh | bash
Update (Nov/2024):
I just noticed a recent update to the script is causing it to fail. Please use an older version instead; it worked for me.
https://github.com/coollabsio/coolify/blob/51c76c1b47ee9eea3560034772a406856209273e/scripts/install.sh
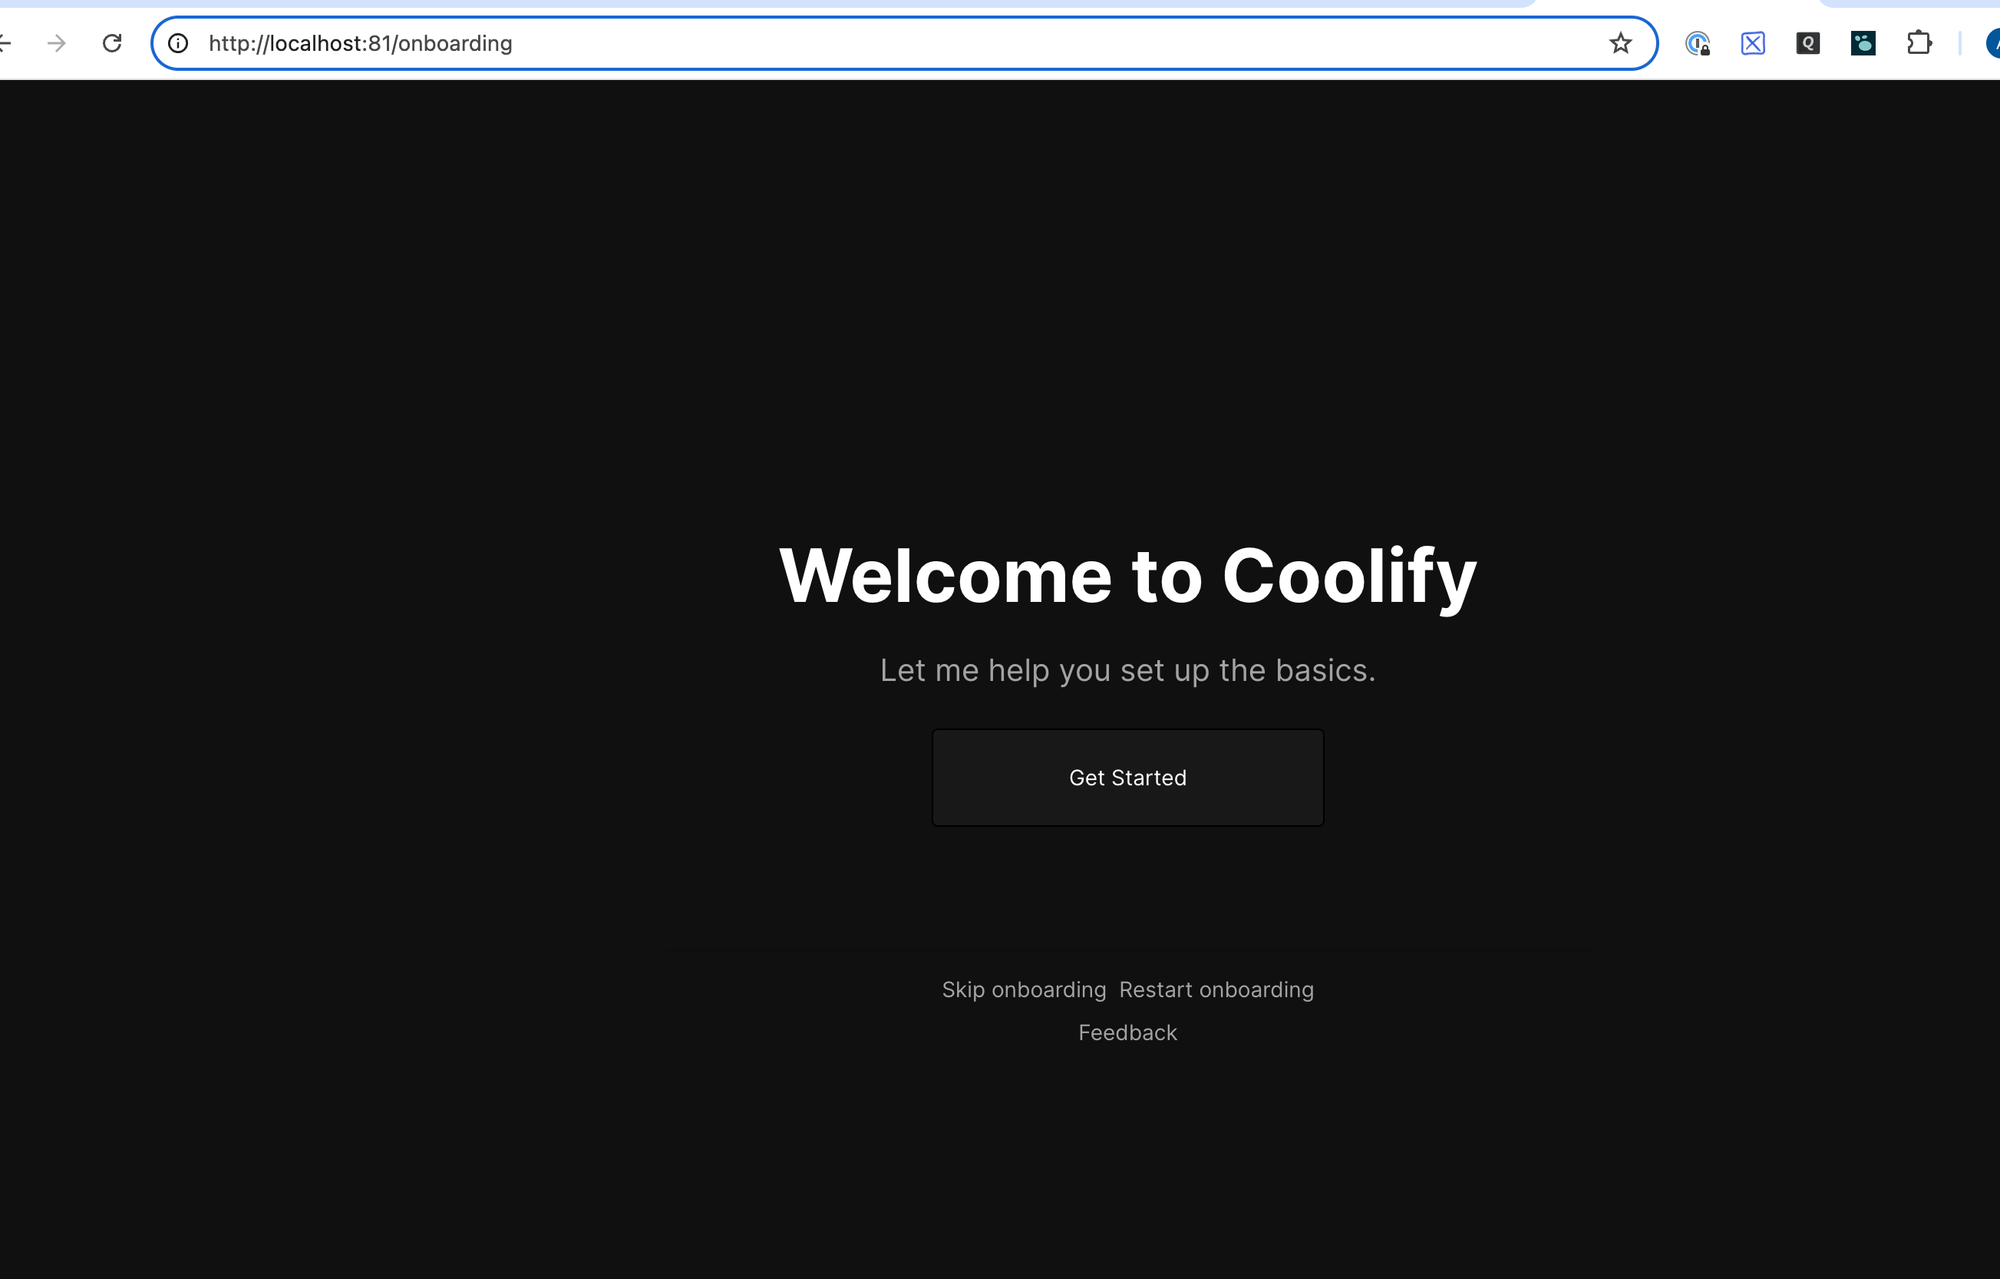
#2 Accessing the Coolify Dashboard
Launch the Coolify dashboard by navigating to localhost:81 in your browser.
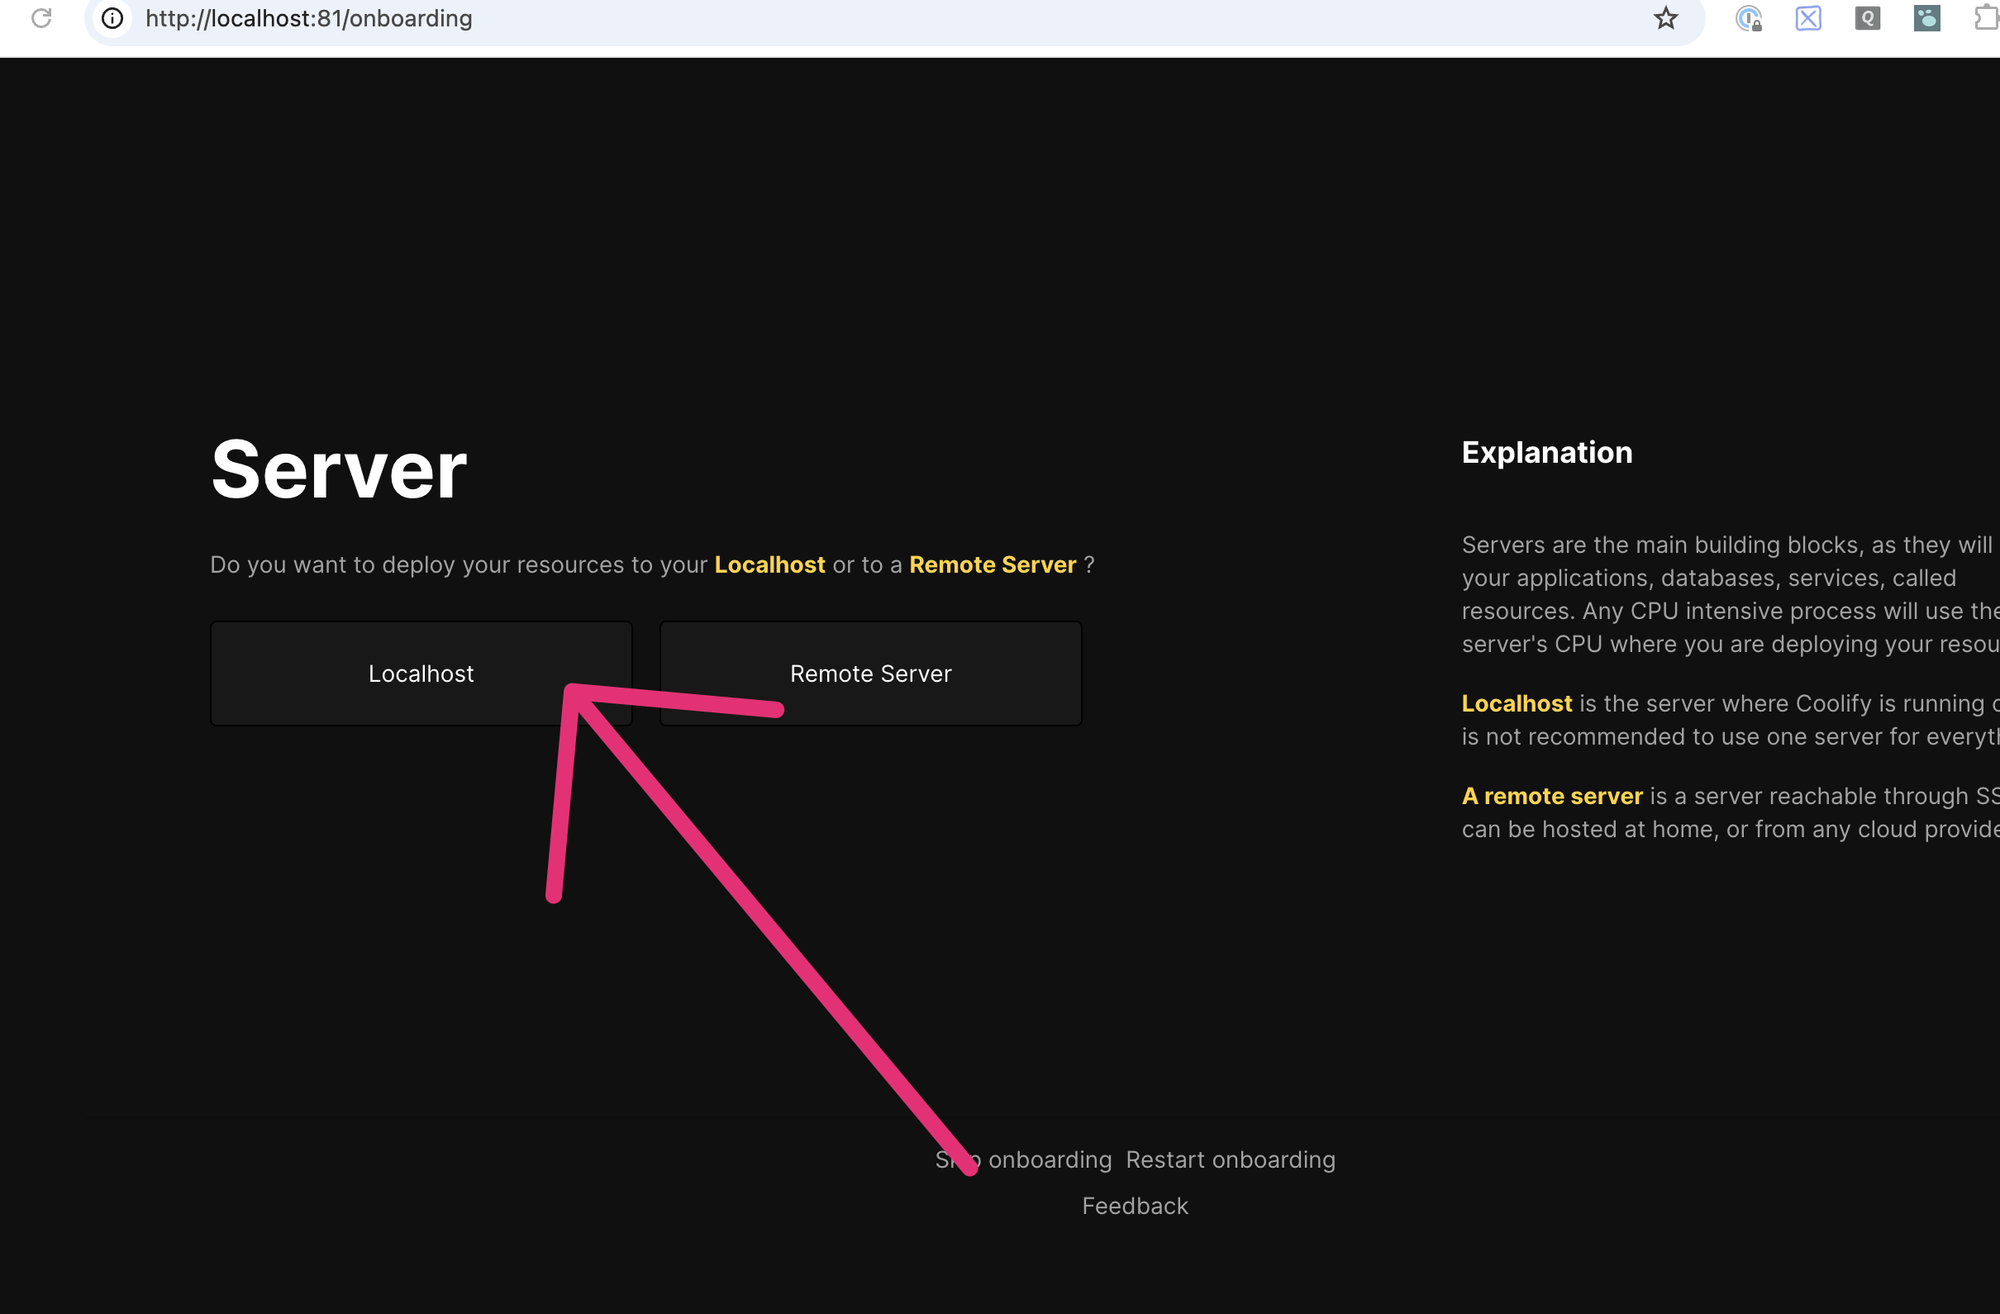
Select localhost as your deployment destination.
After the next step, type the following commands in your container console
apk update && \
apk add --no-cache \
    openssh \
    openrc \
    bash

ssh-keygen -A
echo "PermitRootLogin yes" >> /etc/ssh/sshd_config
echo "PasswordAuthentication yes" >> /etc/ssh/sshd_config
echo "root:your_password" | chpasswd
/usr/sbin/sshd
Click 'Verify again' in the dashboard.
#3 Deploying applications with Coolify
Deploying a public GitHub repository
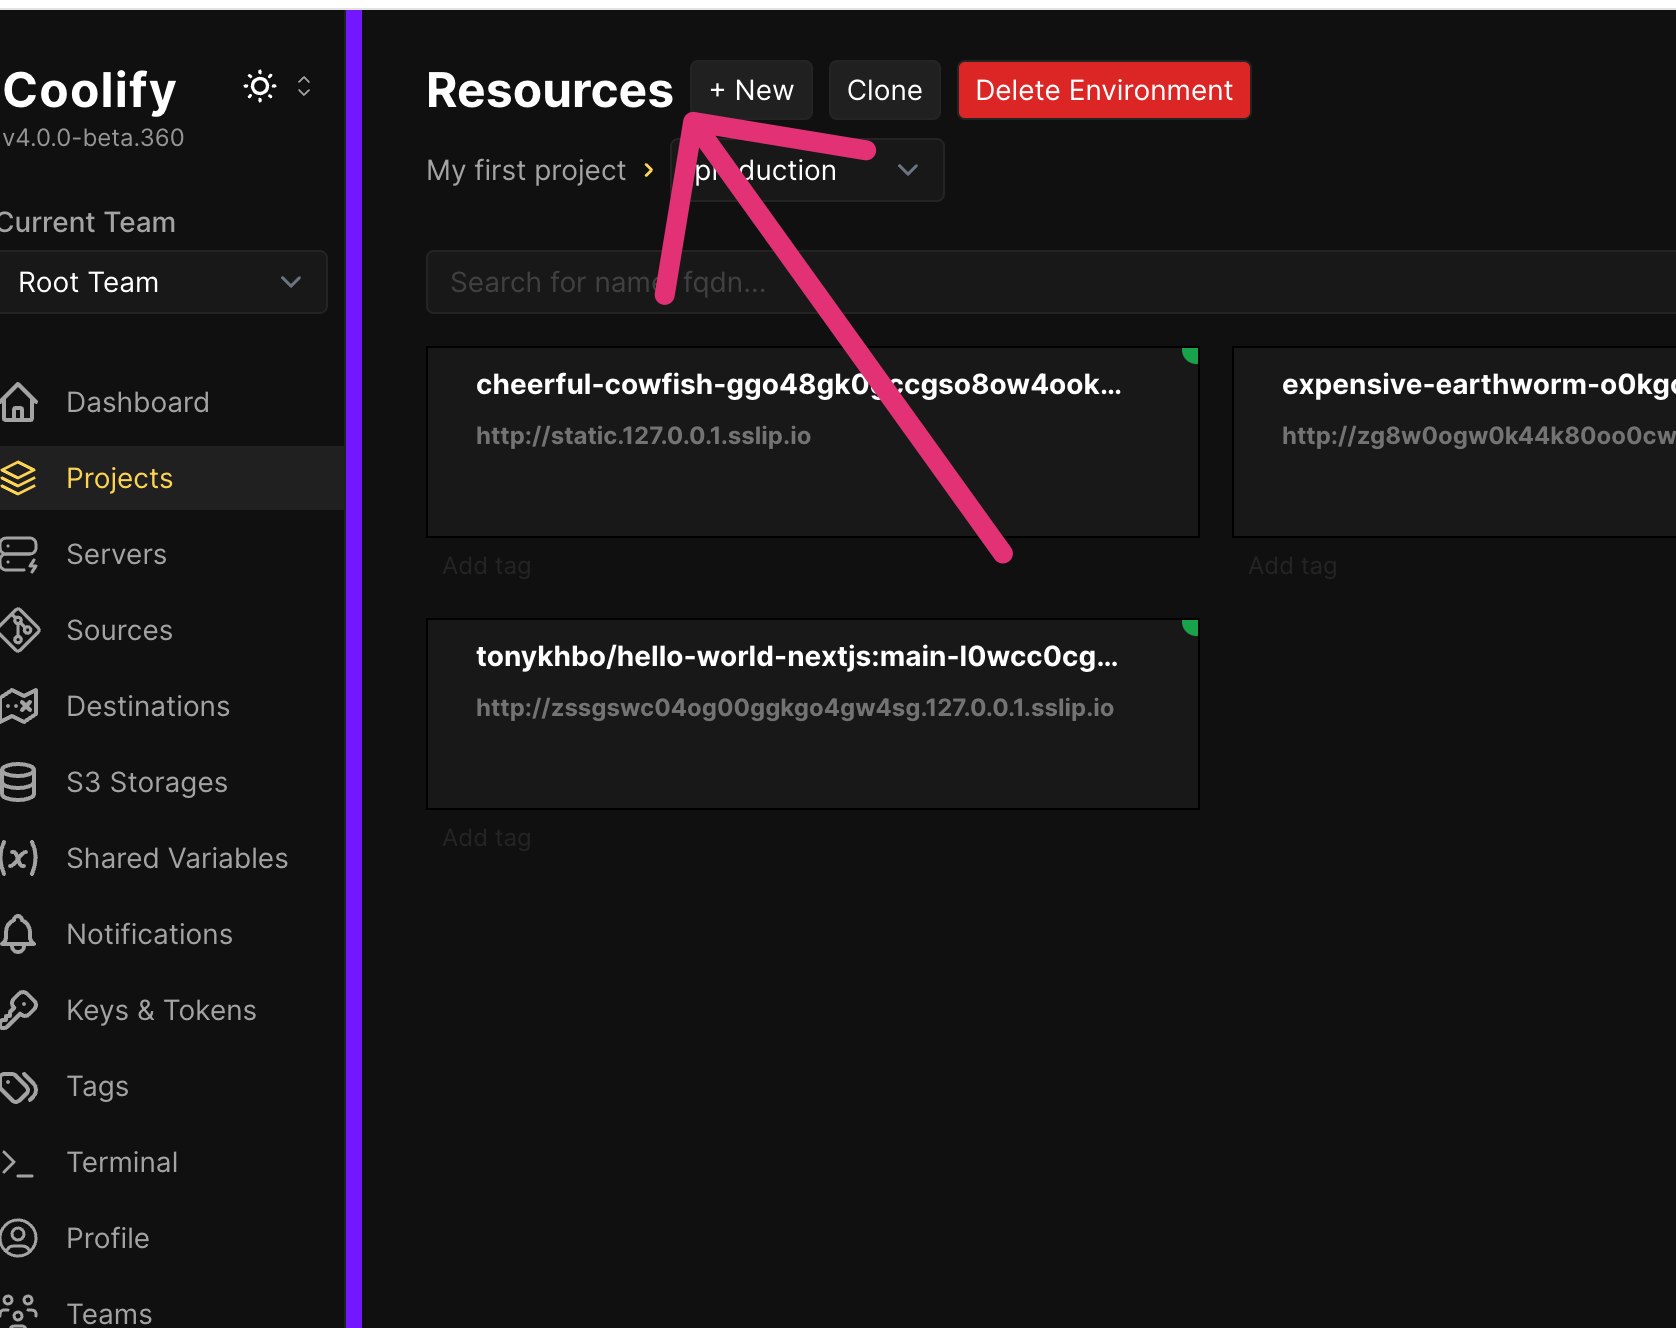
Now let's create a new application:
- Select the default project and click 'Resources' -> 'New'.(https://airabbit.blog/content/images/2024/11/image-2.png)
From 'Applications' select 'Public Repository'.
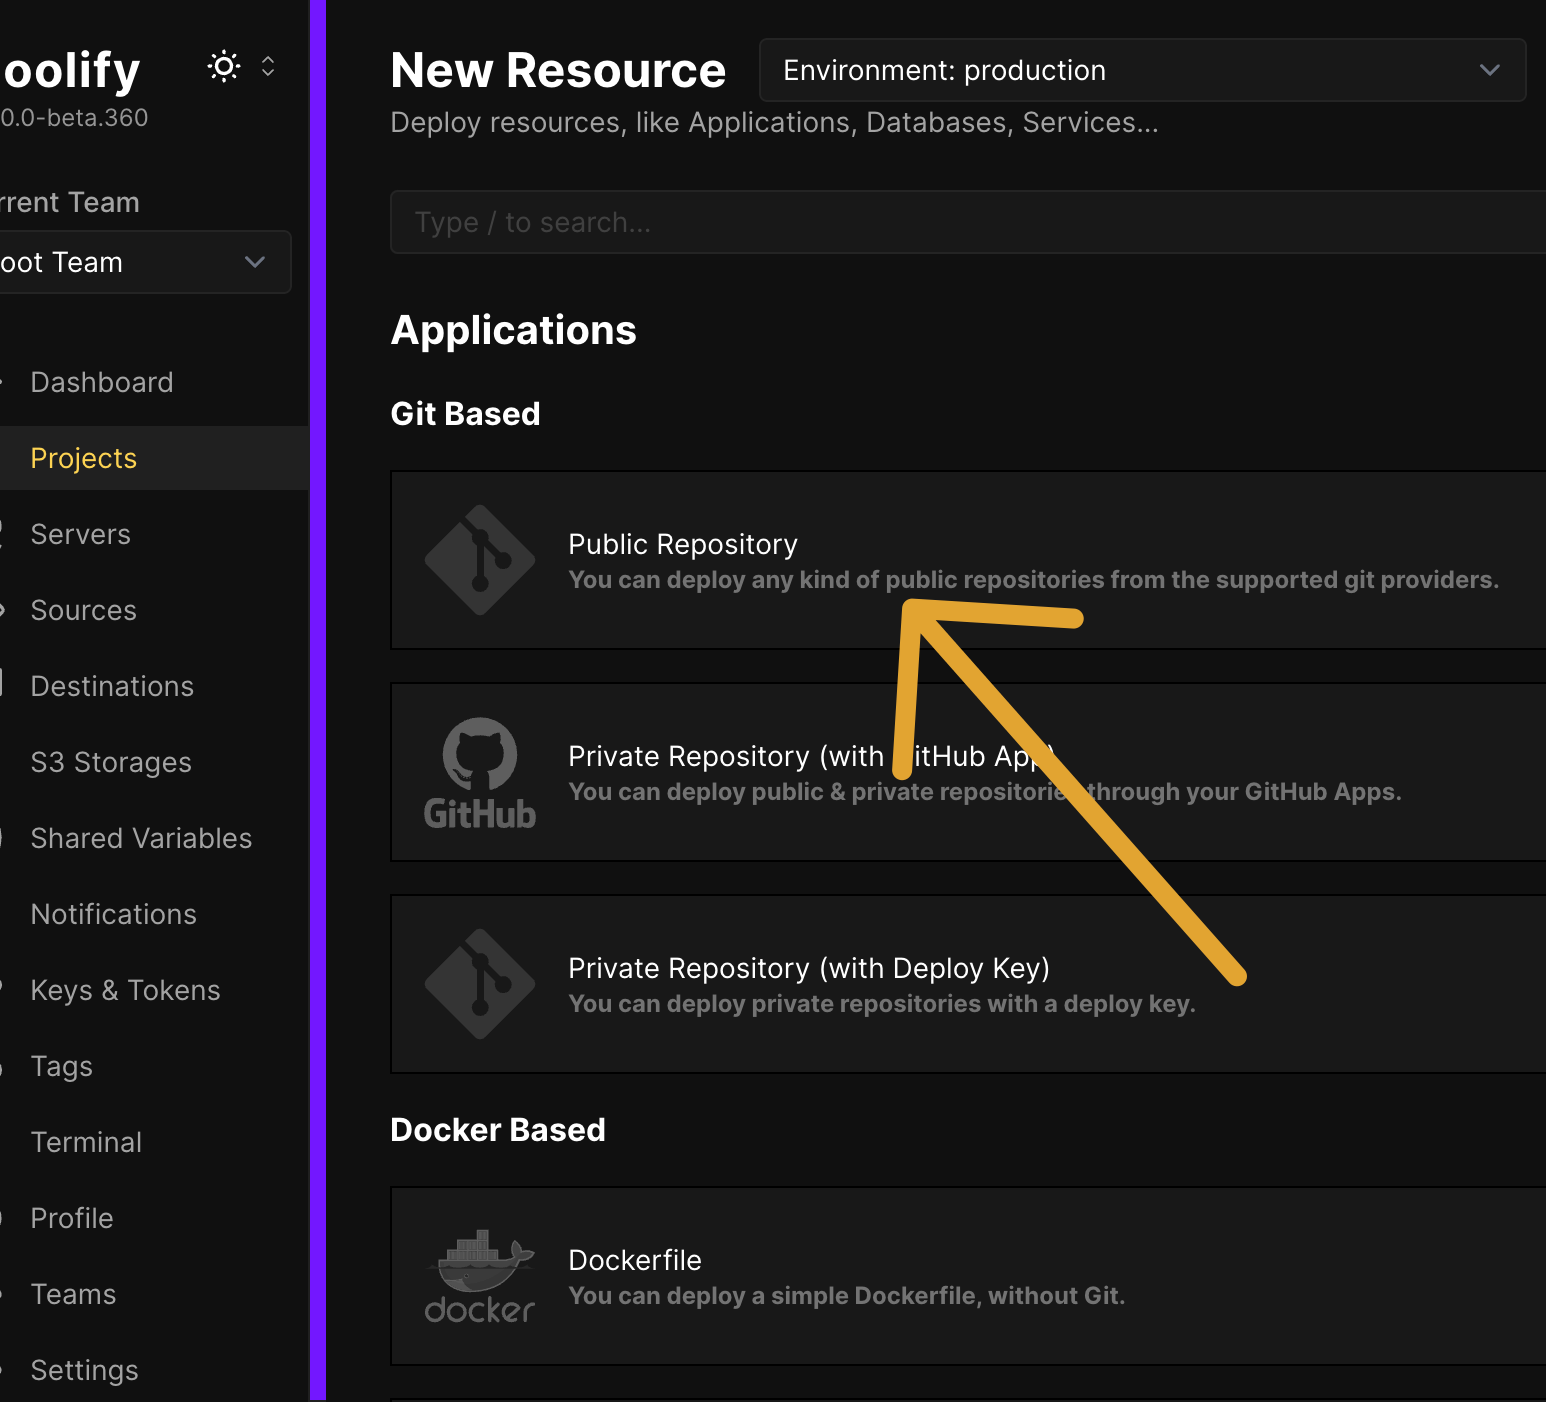
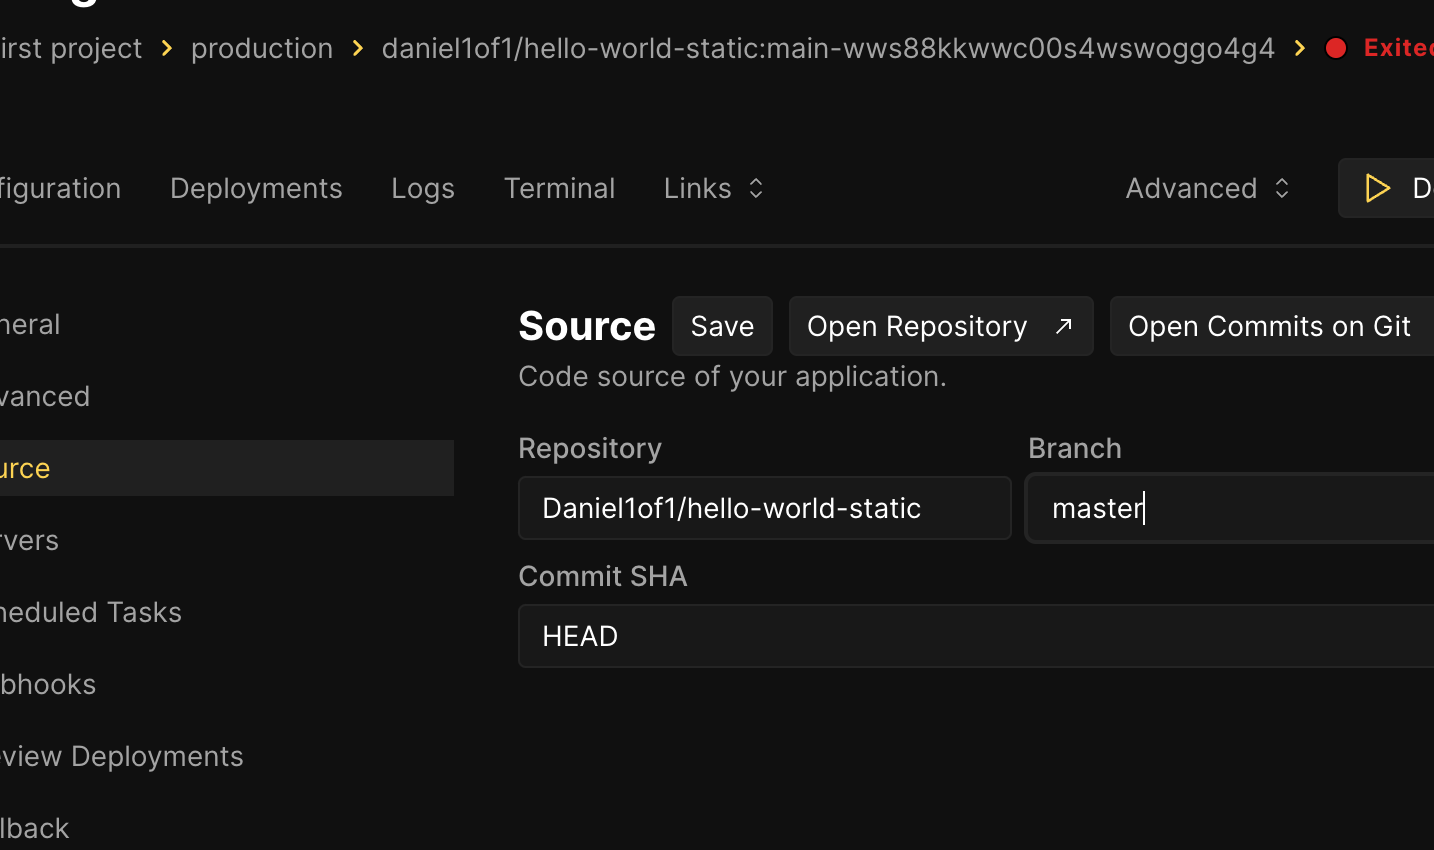
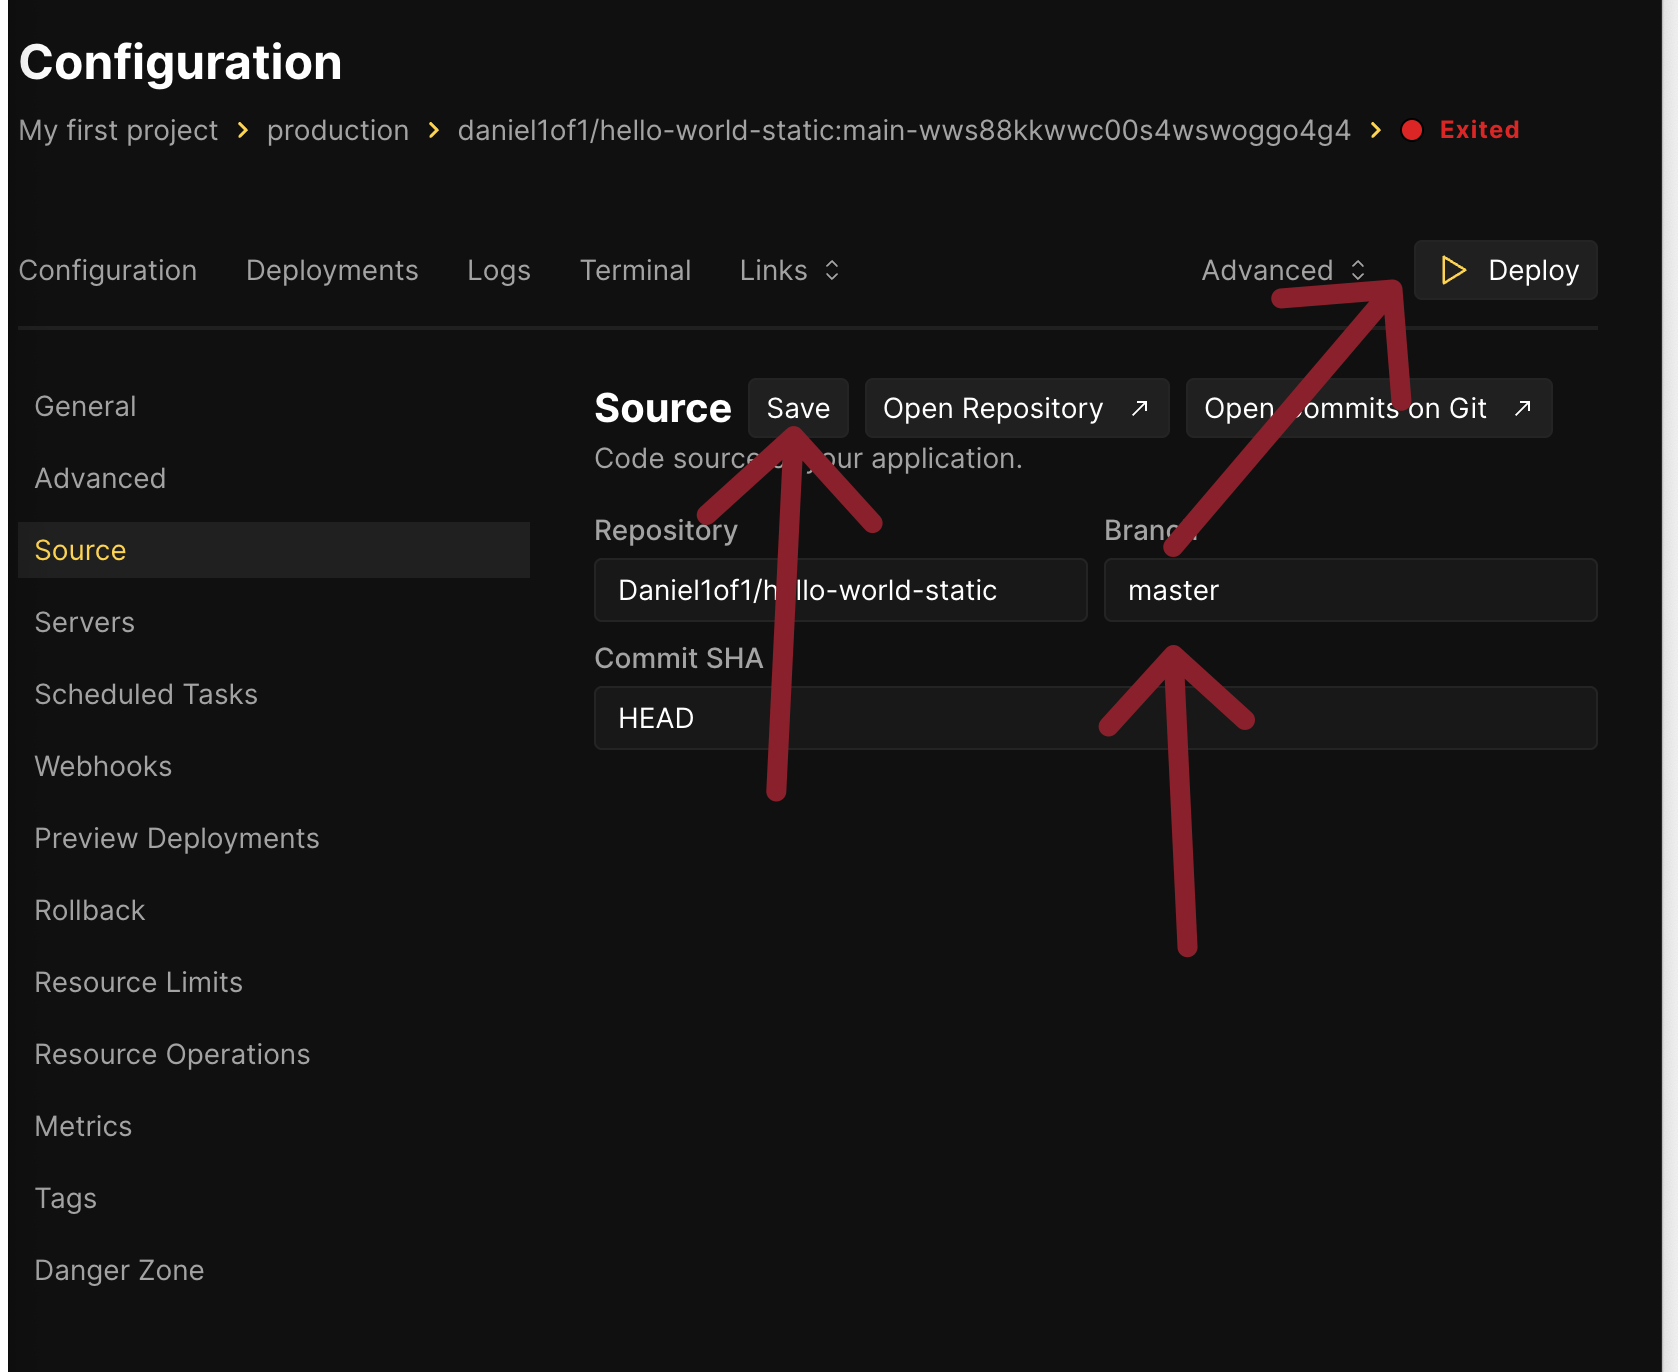
Enter the URL of the repository to deploy to:https://github.com/Daniel1of1/hello-world-static.git
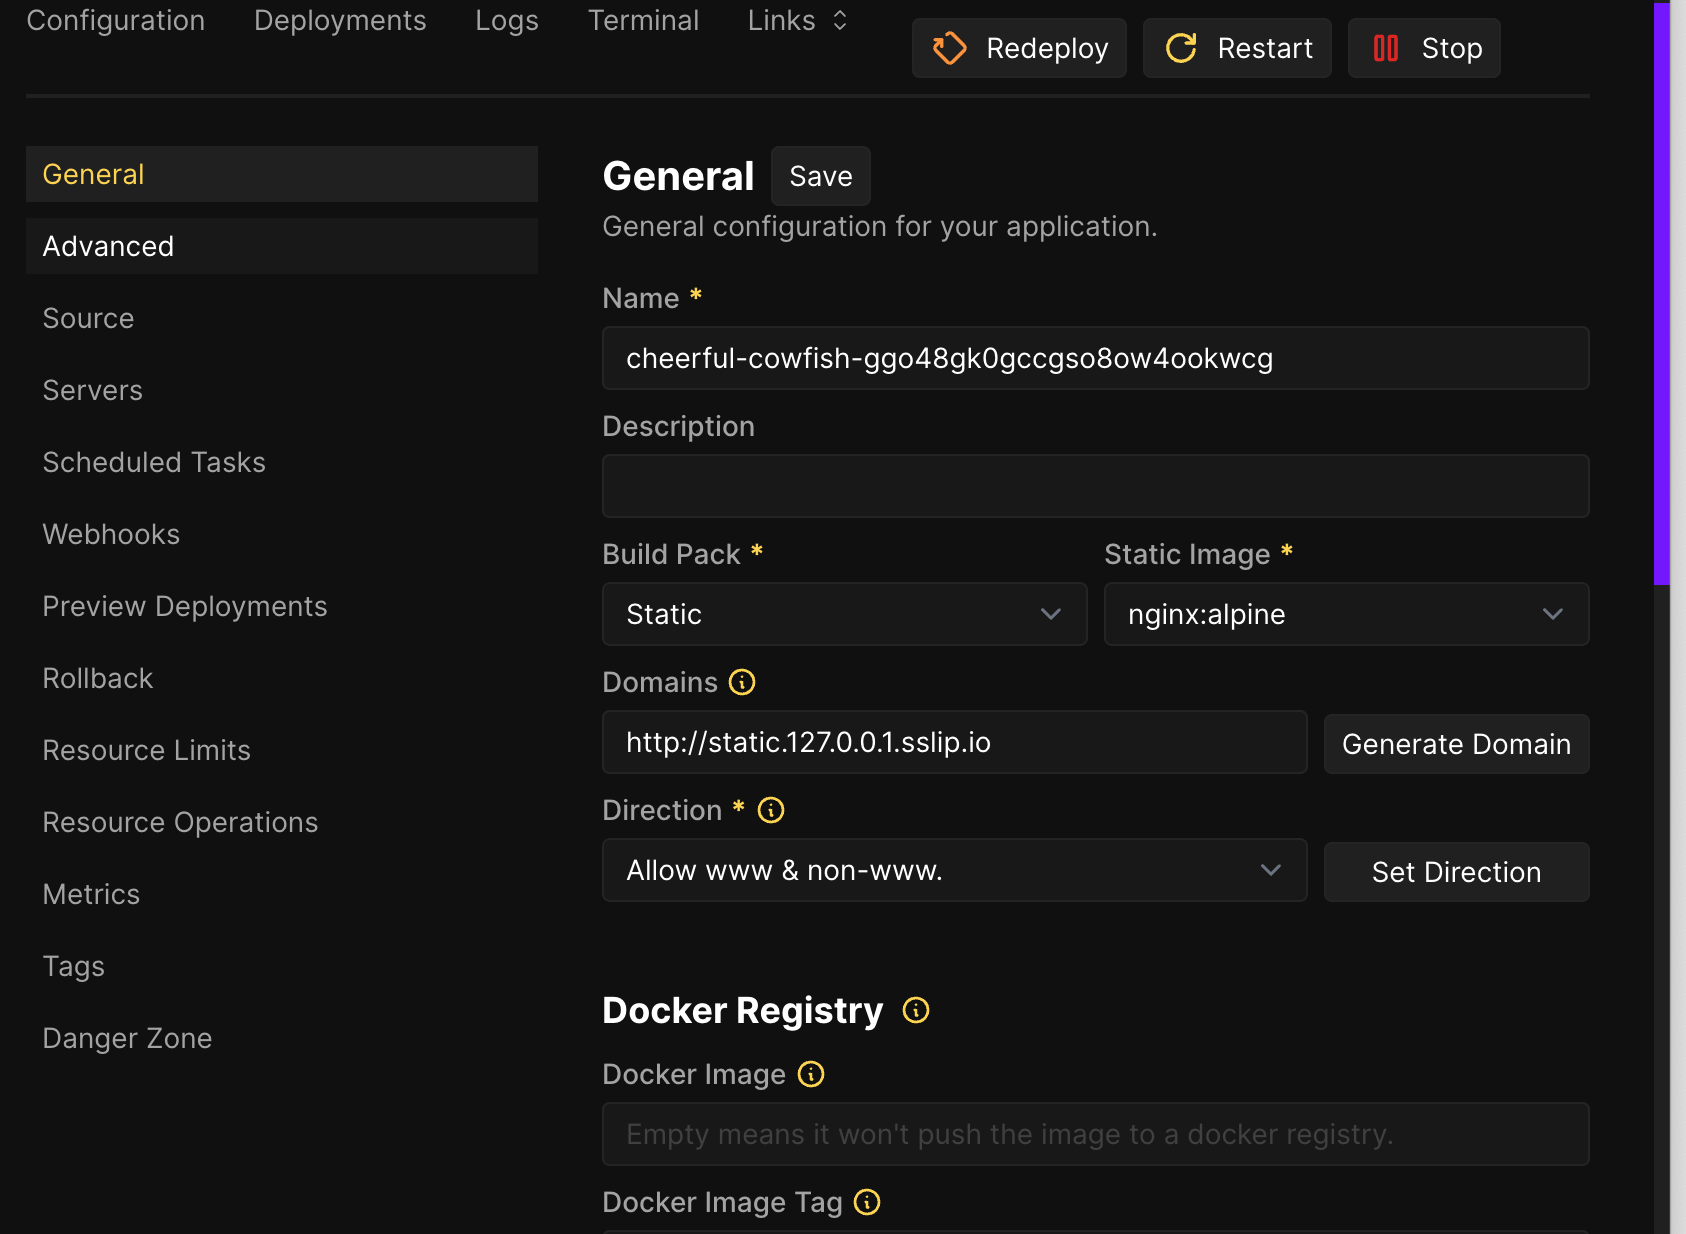
Make sure that the type is set to Static.
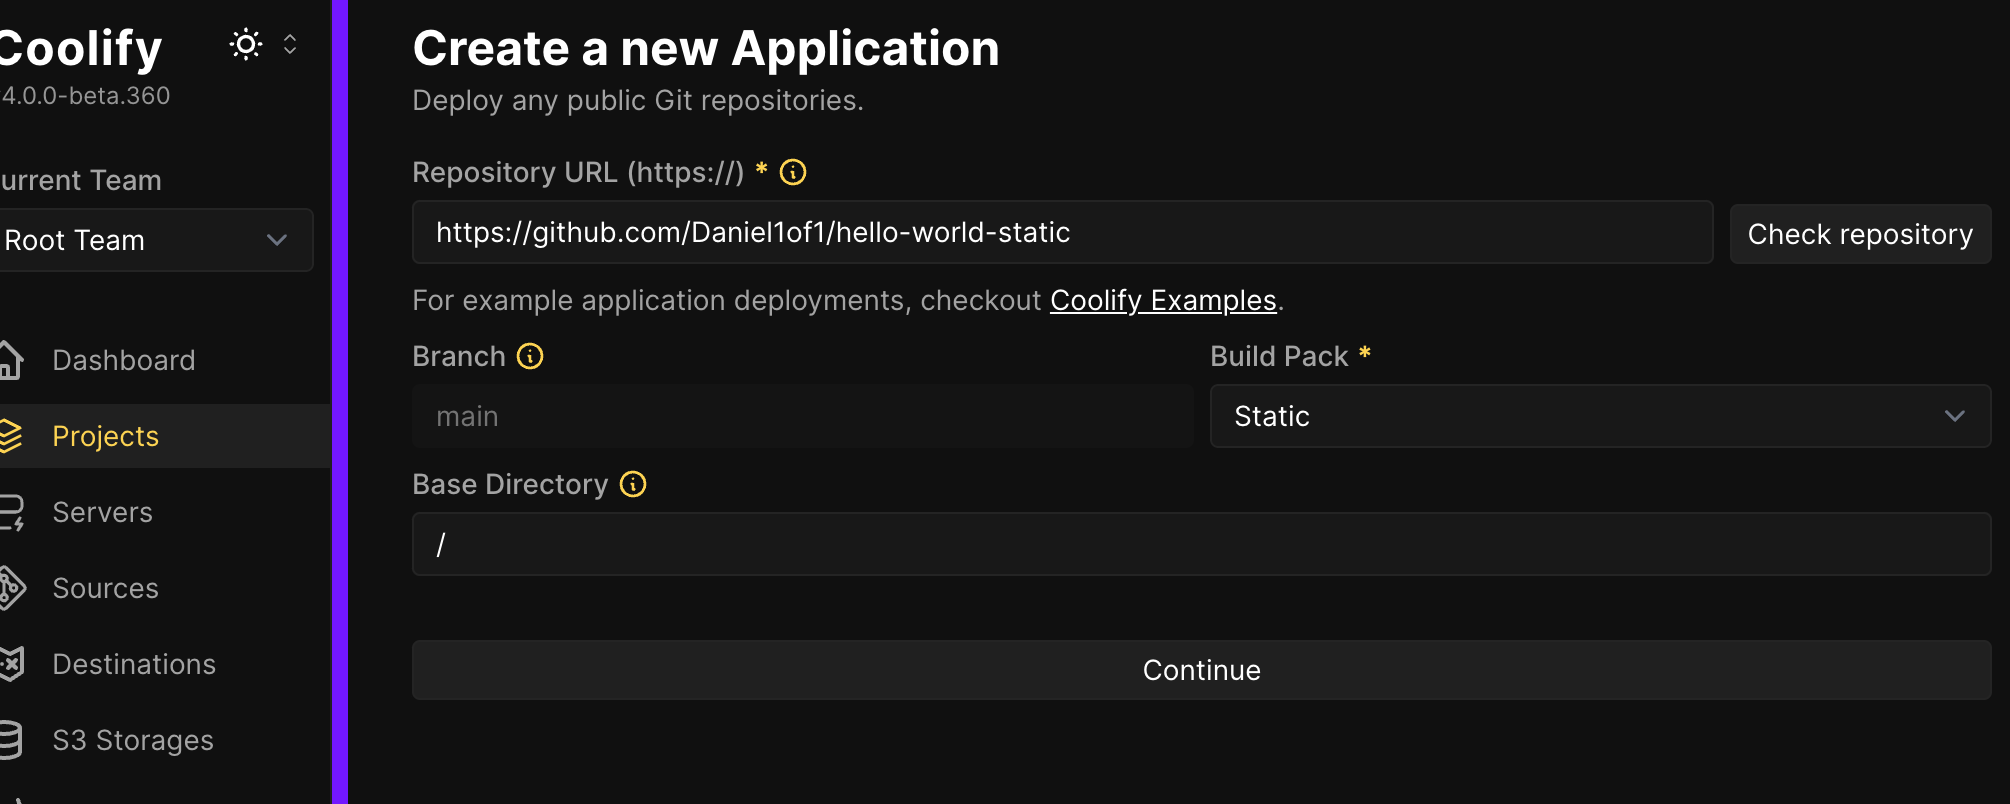
Note: If you are deploying to an older public repository, be aware that the branch may be master' instead of main'. If so, you will need to change it accordingly.Coolify uses Traefik on port 80 (among others) and we've exposed this port directly to the host. If you used the Docker configuration above, it should be accessible via localhost:80. However, to route to your application, it needs a domain name. You can use a domain that resolves to 127.0.0.1, such as
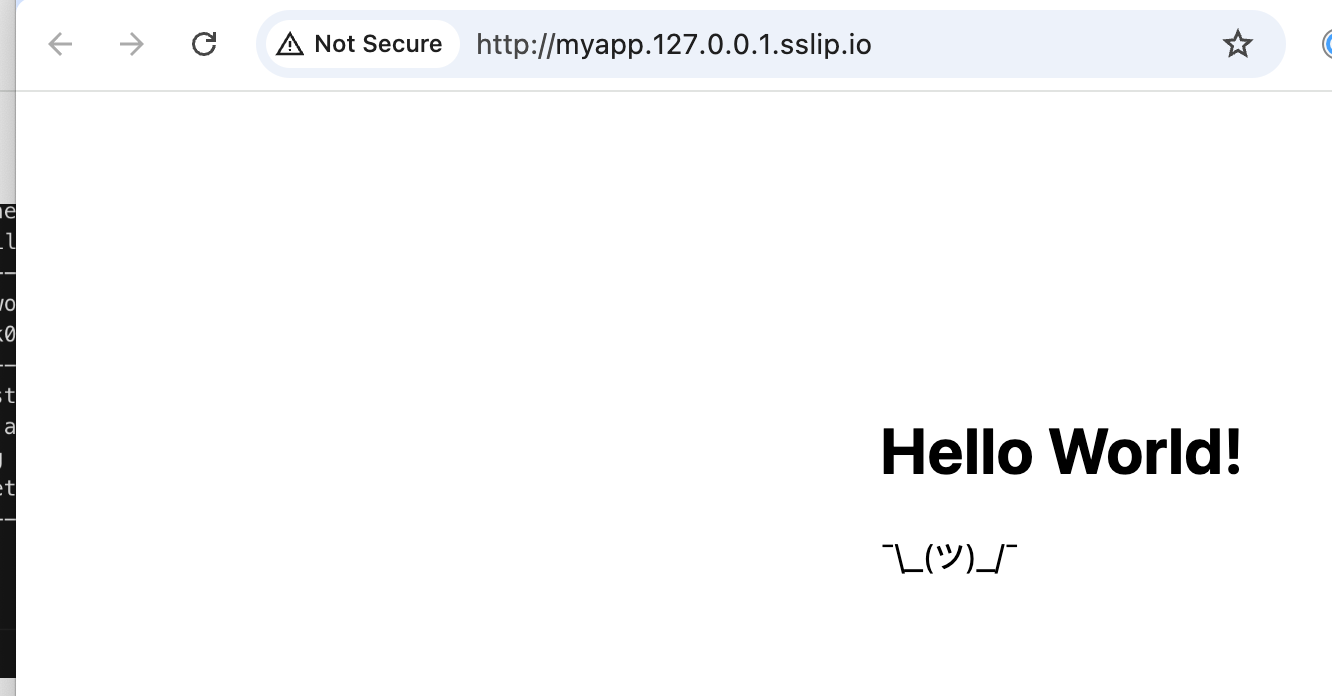
http://myapp.127.0.0.1.sslip.io
This request goes to Traefik with the domain configured for your static application (myapp.127.0.0.1.sslip.io).
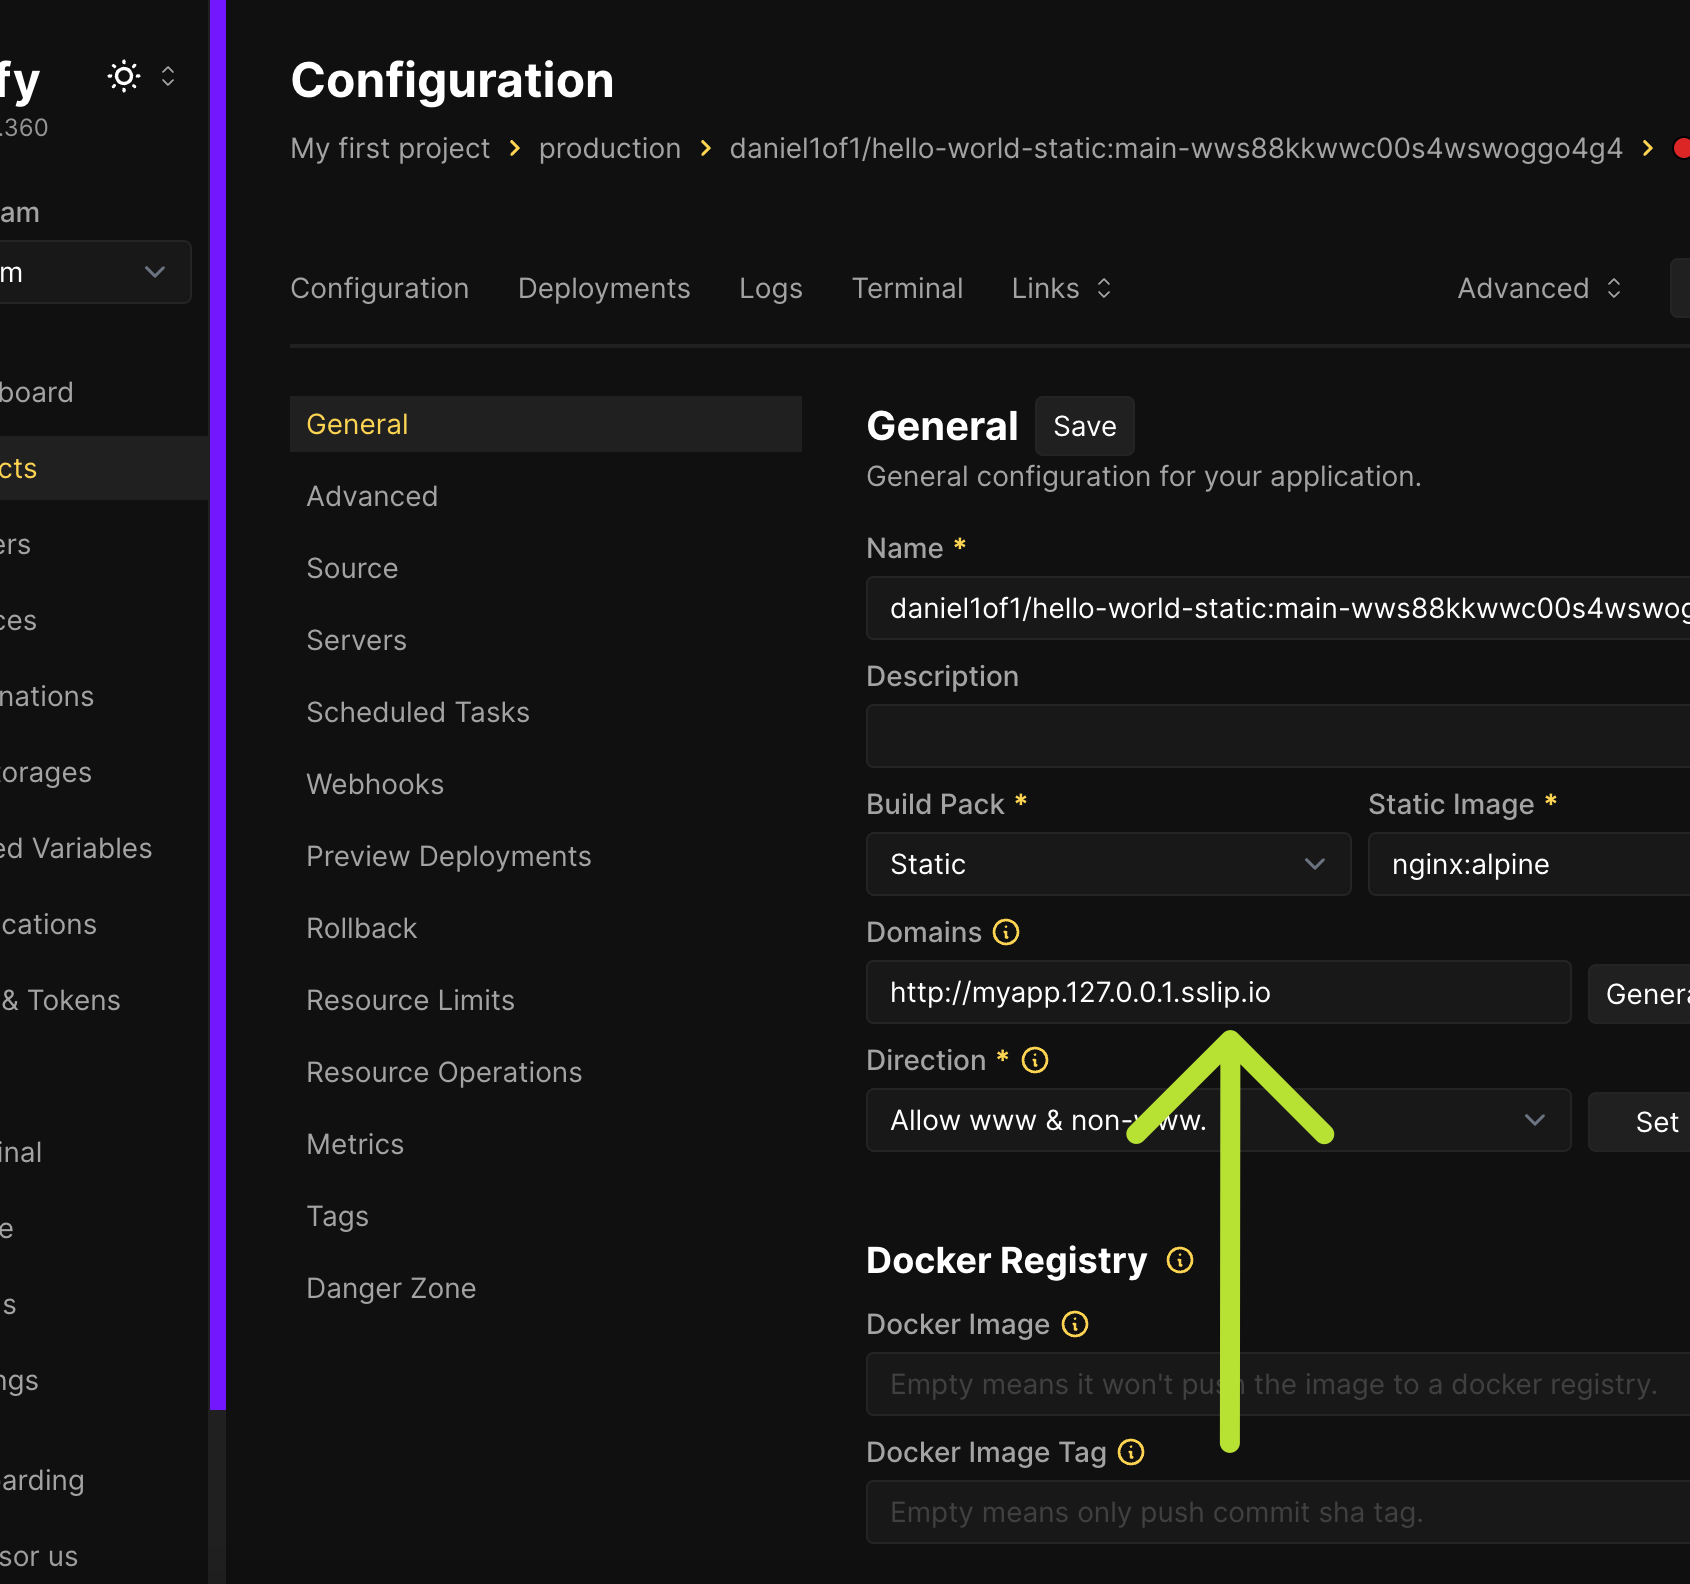
Click 'Save' and 'Deploy'.
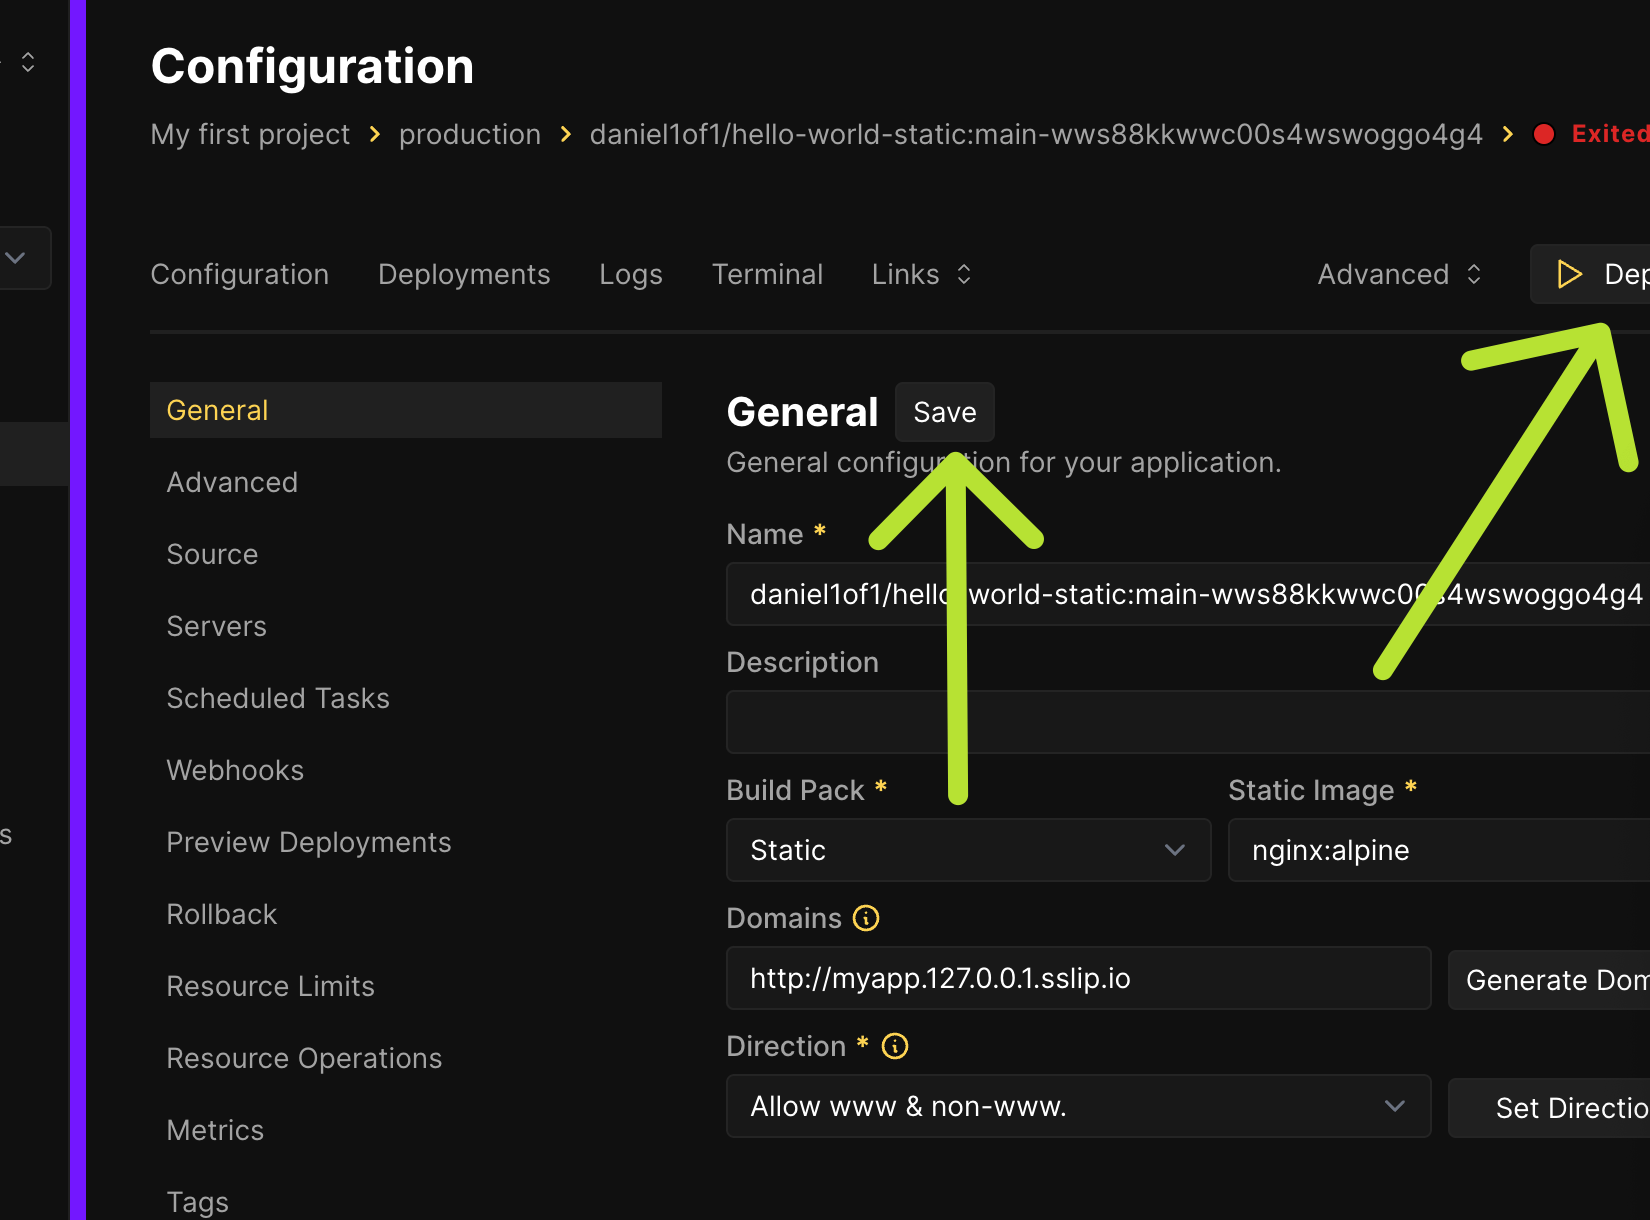
If you encounter any errors, check the source configuration. For example, I had to change the branch to master because main did not exist.
Save and re-deploy.
If all goes well, you should see logs similar to the one below:
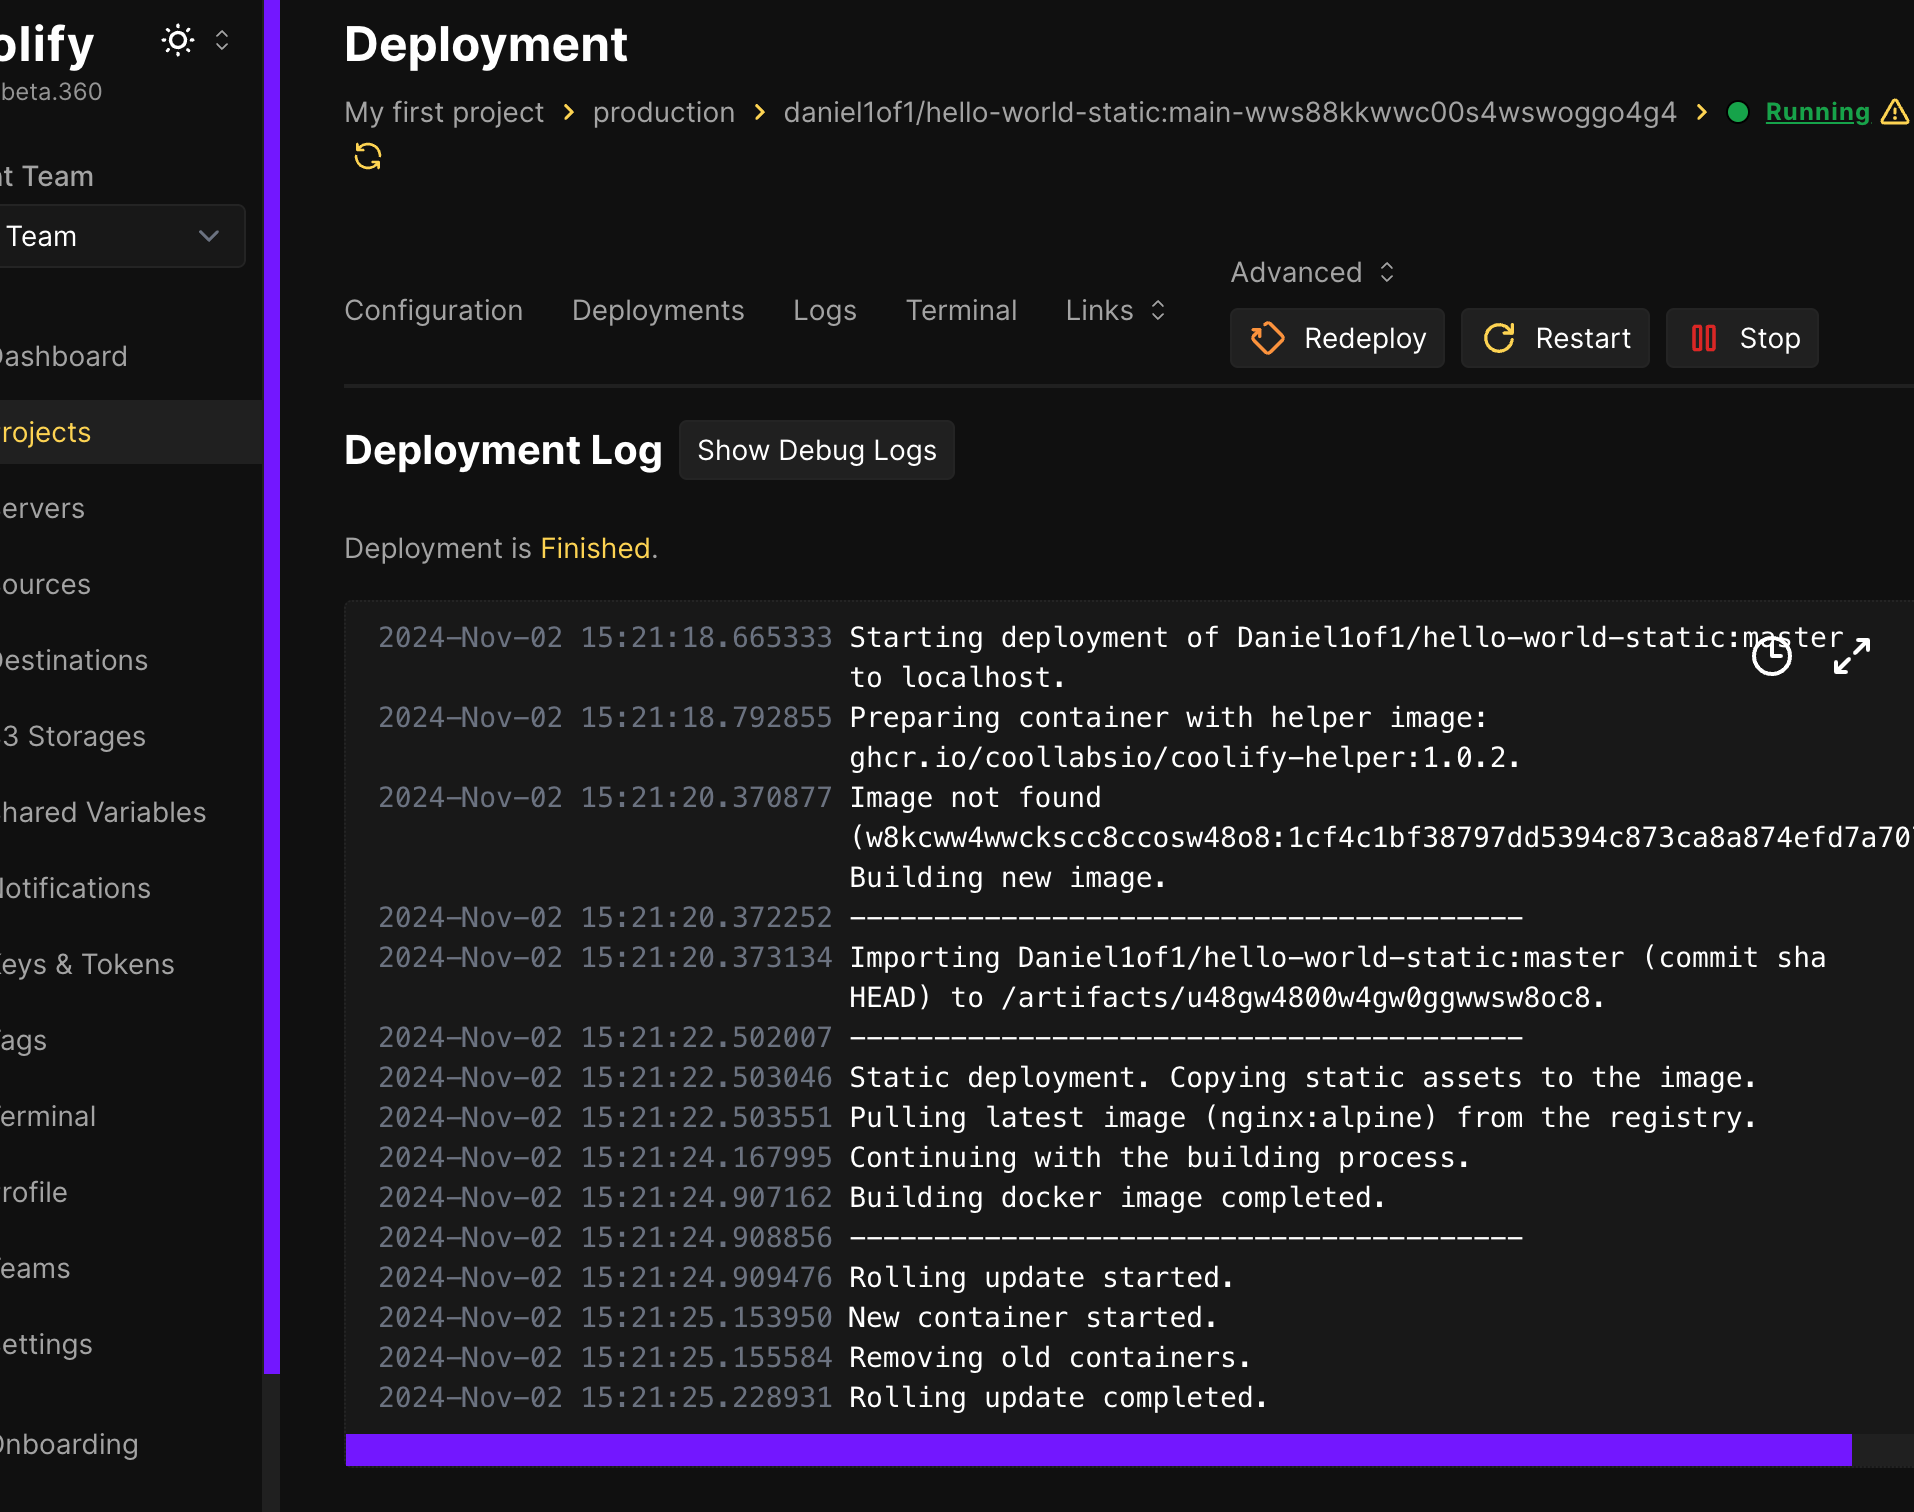
If not, double check the configuration and remember to SAVE and REDEPLOY each time you make changes.
Now you should see the links to your application under Links.
Your application should now be accessible at http://static.localhost.sslip.io.
#4 Deploying a private GitHub repository with deployment keys
What if you want to deploy your private GitHub repository? There are two ways of doing this: either using a GitHub app (which is a bit more complicated if you run it in a local container), or using GitHub Deploy Keys.
Create a Deploy Key: 1.First create a deploy key as shown below:
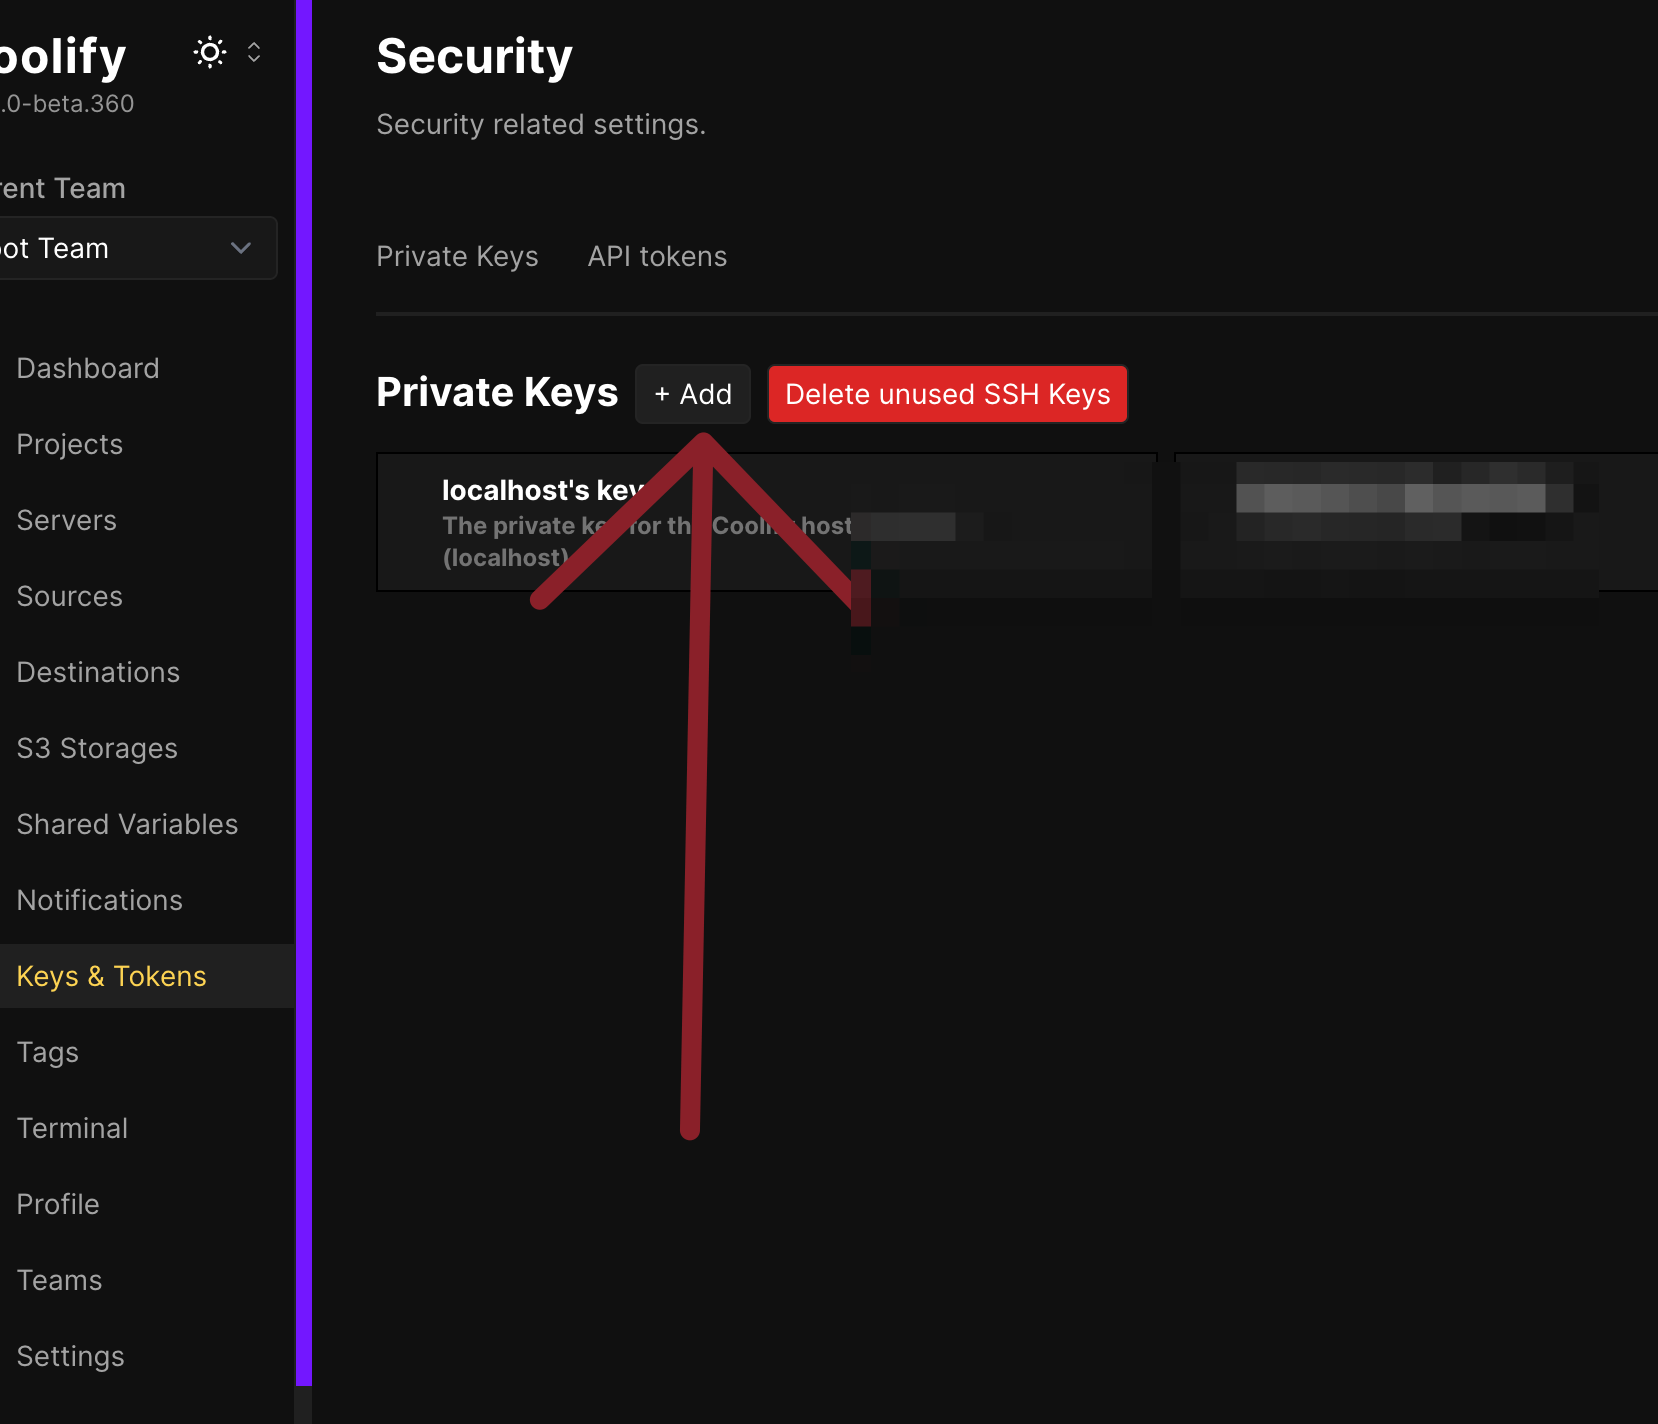
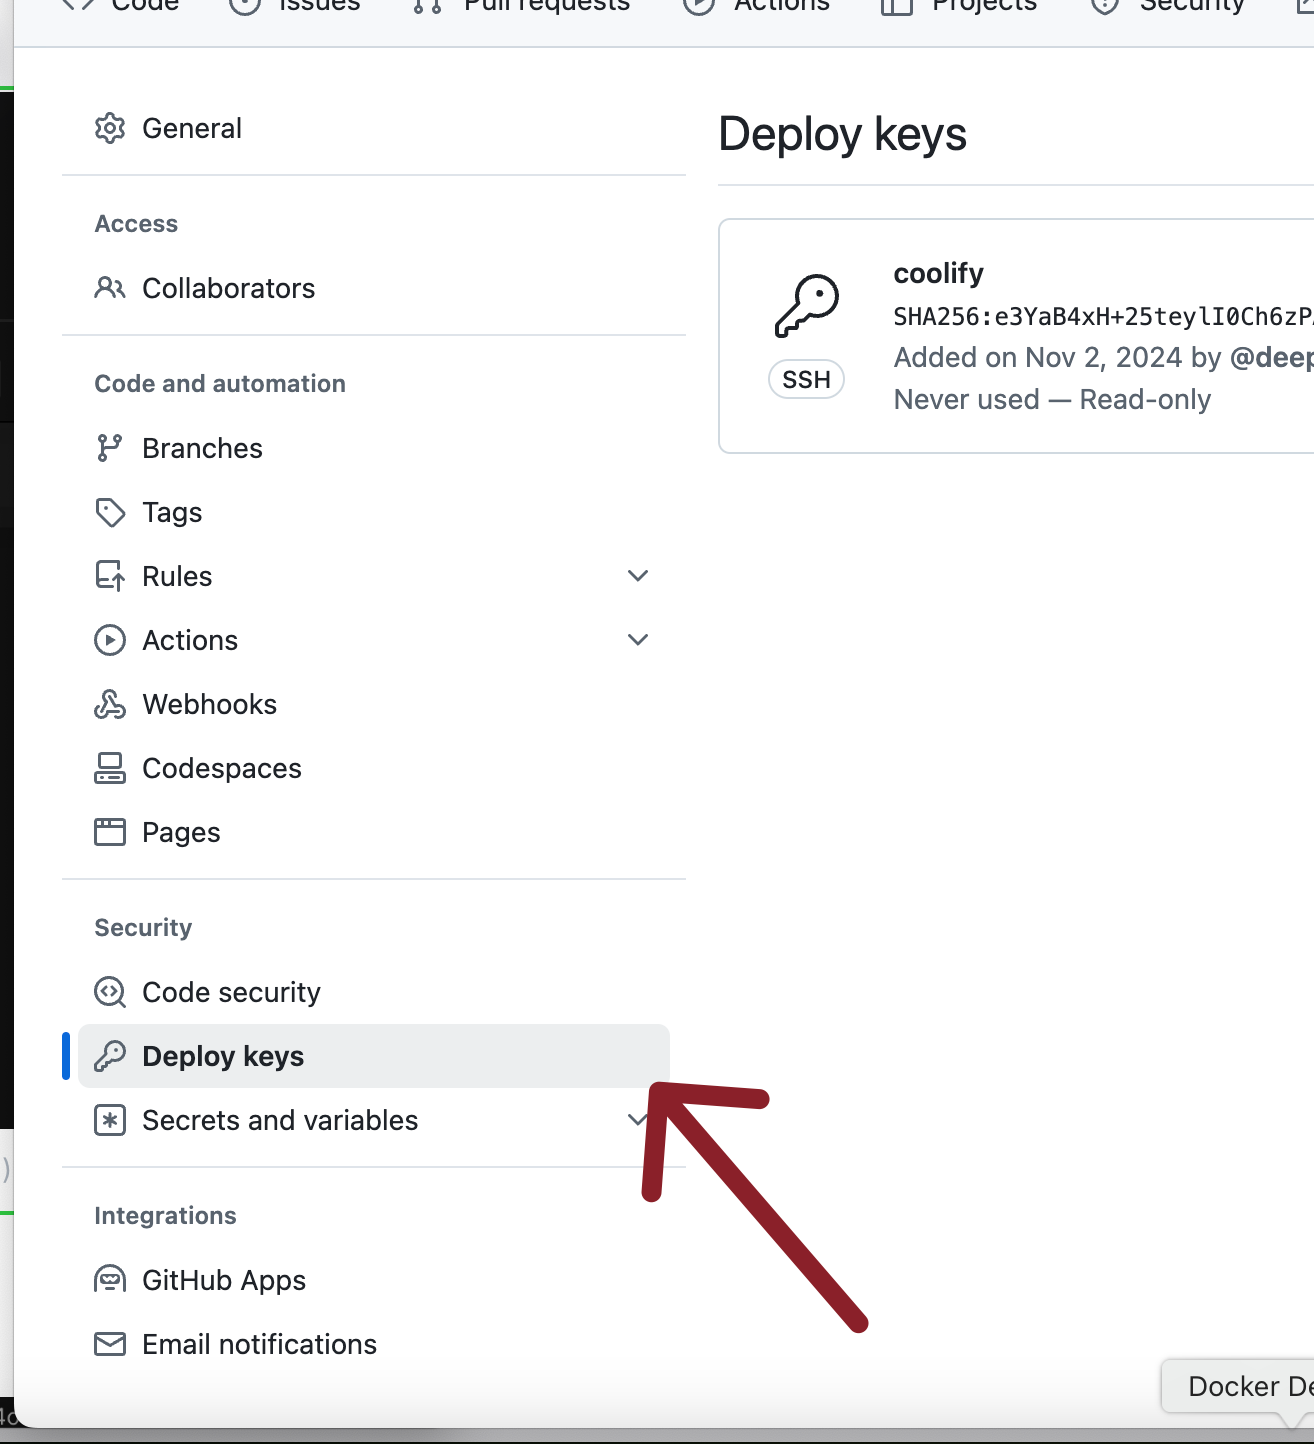
Add the deploy key to your GitHub repository:.Copy the public key you want to use for deployment to your GitHub repository.
Create a new application in Coolify:.Now create a new application that uses this deployment key to fetch and deploy the code. Note that this is a pull-based approach, meaning that if you commit any code, nothing will happen unless you explicitly and manually trigger a deployment.
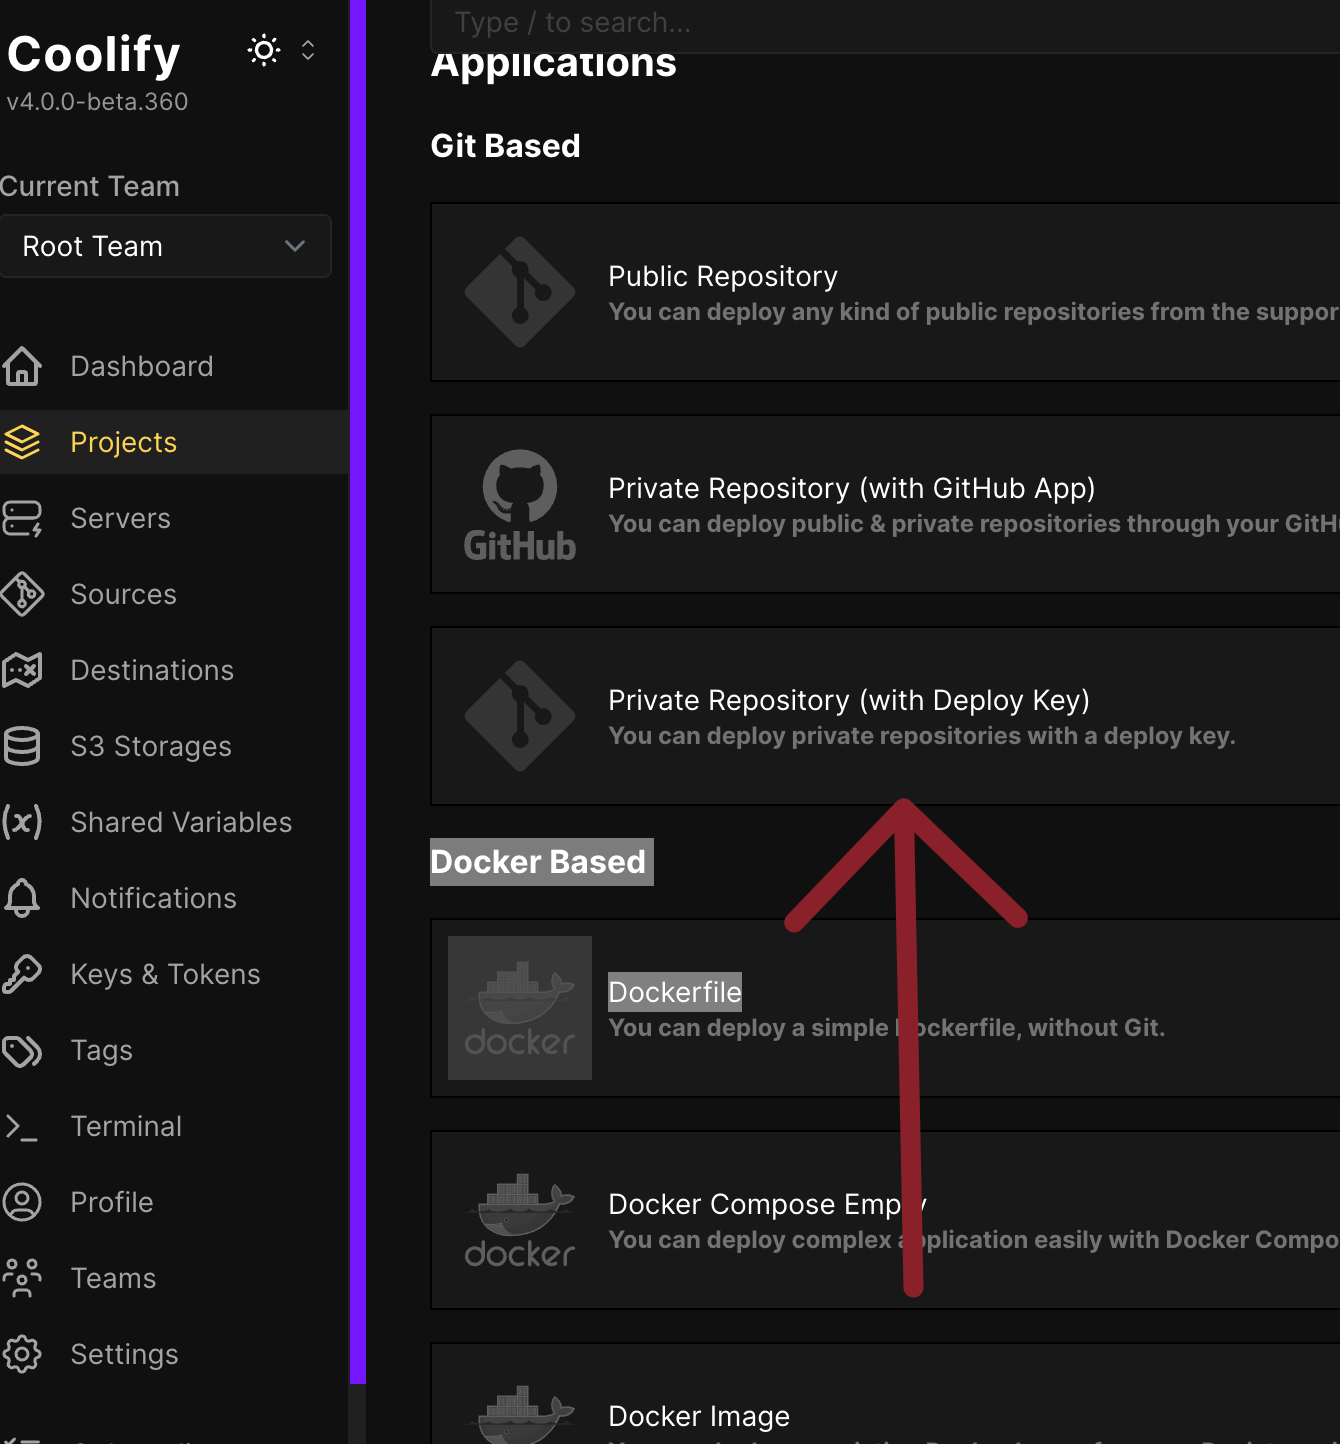
Configure the deployment:.You can follow the same steps as for the public repository, but take care to select the deployment key and make sure the repository pattern matches.
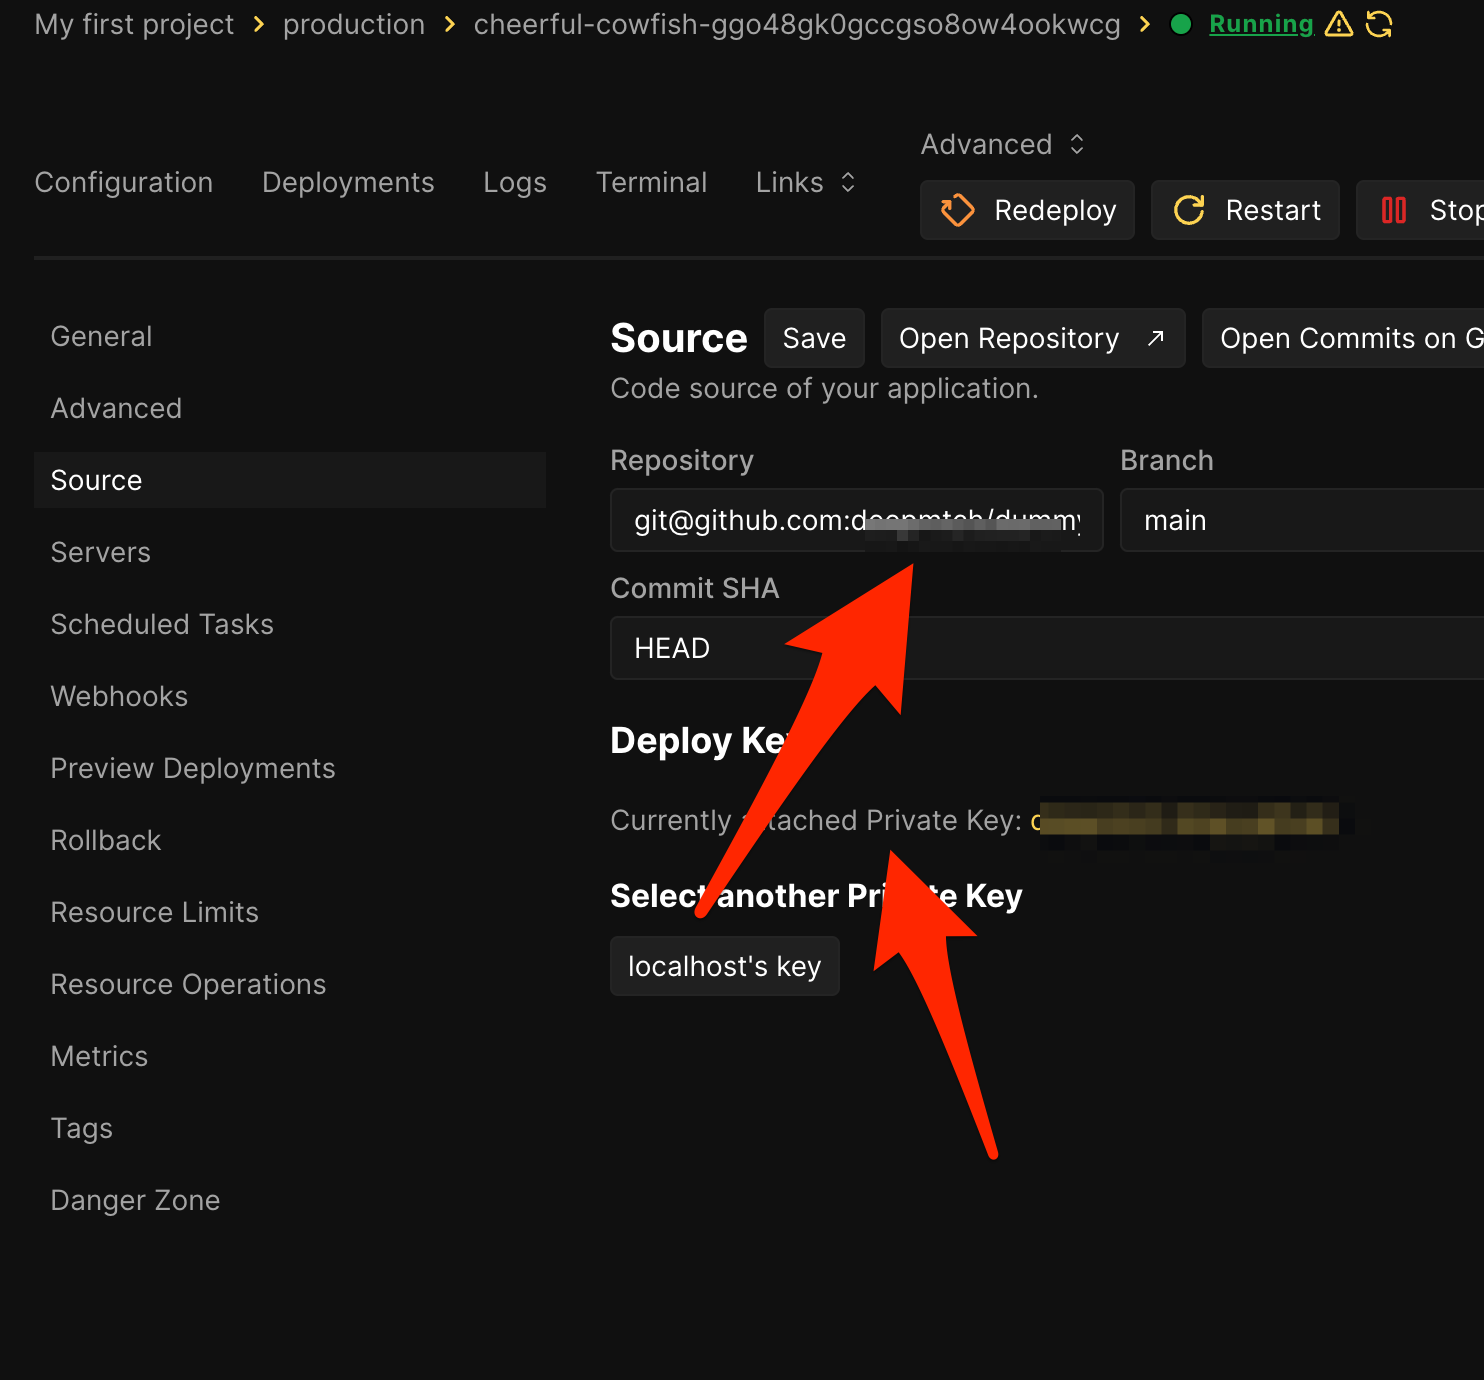
Here I have also used a static application deployed as a private repository.
Deploy the application:.
After deployment:

Troubleshooting
If you encounter a problem where Docker or the server (running the application) is not reachable in the dashboard, make sure you have sshd and Docker running, and that your key in Coolify is set up correctly in the authorised key on the Docker bin container.
/usr/sbin/sshd
dockerd &
And make sure you have the correct public key. If not, copy it from the Coolify Dashboard into the authorized_keys file.
Conclusion
In this tutorial, we deployed Coolify inside a Docker container, which manages both the Coolify application and the Docker containers for the applications it deploys.
We successfully deployed two applications: one from a public repository and another from a private repository using deployment keys. This setup simplifies the deployment process, eliminates port management issues, and allows for easy configuration and deployment from a single interface.
Next steps
You can explore further by setting up a GitHub app to enable automatic deployments whenever you push changes to your GitHub repository, implementing a CI/CD pipeline.
In addition, Coolify offers many other features to improve your deployment workflow. After enabling the Coolify API, you can also access Coolify through the CLI, which can further streamline application deployment. More information can be found here.