Building a GraphQL-powered TODO list AI Agent in n8n (Complete tutorial)
In this tutorial, we’ll create a GraphQL-powered todo list app using Next.js and n8n. You’ll learn how to integrate OpenAI for a chat interface that allows you to create, update, and analyze todos intuitively. Discover the benefits of using GraphQL to streamline API management and enhance user in...

In this tutorial, we will build a GraphQL-powered todo list that you can chat with to create and analyse your todos.
We will use n8n, an open source self-hosted alternative similar to make.com, and OpenAI (gpt-4-0-mini).
But before we dive in:
Why GraphQL
If you've worked with n8n or make.com before, and used APIs in your workflow, you've usually had to add an API component to the workflow for each endpoint - for example, one for fetching todos, one for deleting, and so on.
But what if we could add the whole API in one go and expose it to an API agent that would automatically figure out the right parameters based on the user's request? Wouldn't that be great?
Of course, in a real scenario you'd need to add proper guardrails to prevent it from doing everything (at least it should be restricted to the user's data and allow rollback, etc.).
But let's see what an agent equipped with a GraphQL-powered API can do, using a todo list as an example.
#1 Build the NextJS todo list application
I built a simple Next.js todo list application using GraphQL. Here is the code that can initialise the application for you:
https://gist.github.com/deepmtch/b86990721e449e48ea3c0bd9bc4b727d
Run this script in your favourite environment (I use Docker, but you can also run it in a host environment).
The schema of the todos application is very simple:
type todo {
  id: Int!
  title: String!
  completed: Boolean!
  createdAt: String!
  updatedAt: String!
}

type query {
  todos: [Todo!]!
  todo(id: Int!): Todo
}

type mutation {
  createTodo(title: String!): Todo!
  updateTodo(id: Int!, completed: Boolean!): Todo!
  deleteTodo(id: Int!): Todo!
}
If all goes well, you should be able to open it on your Next.js port (note that I use port 3005 because 3000, the default, is occupied).
Application URL: http://localhost:3000
And with the playground we can test the GraphQL interface for creating and listing todos.
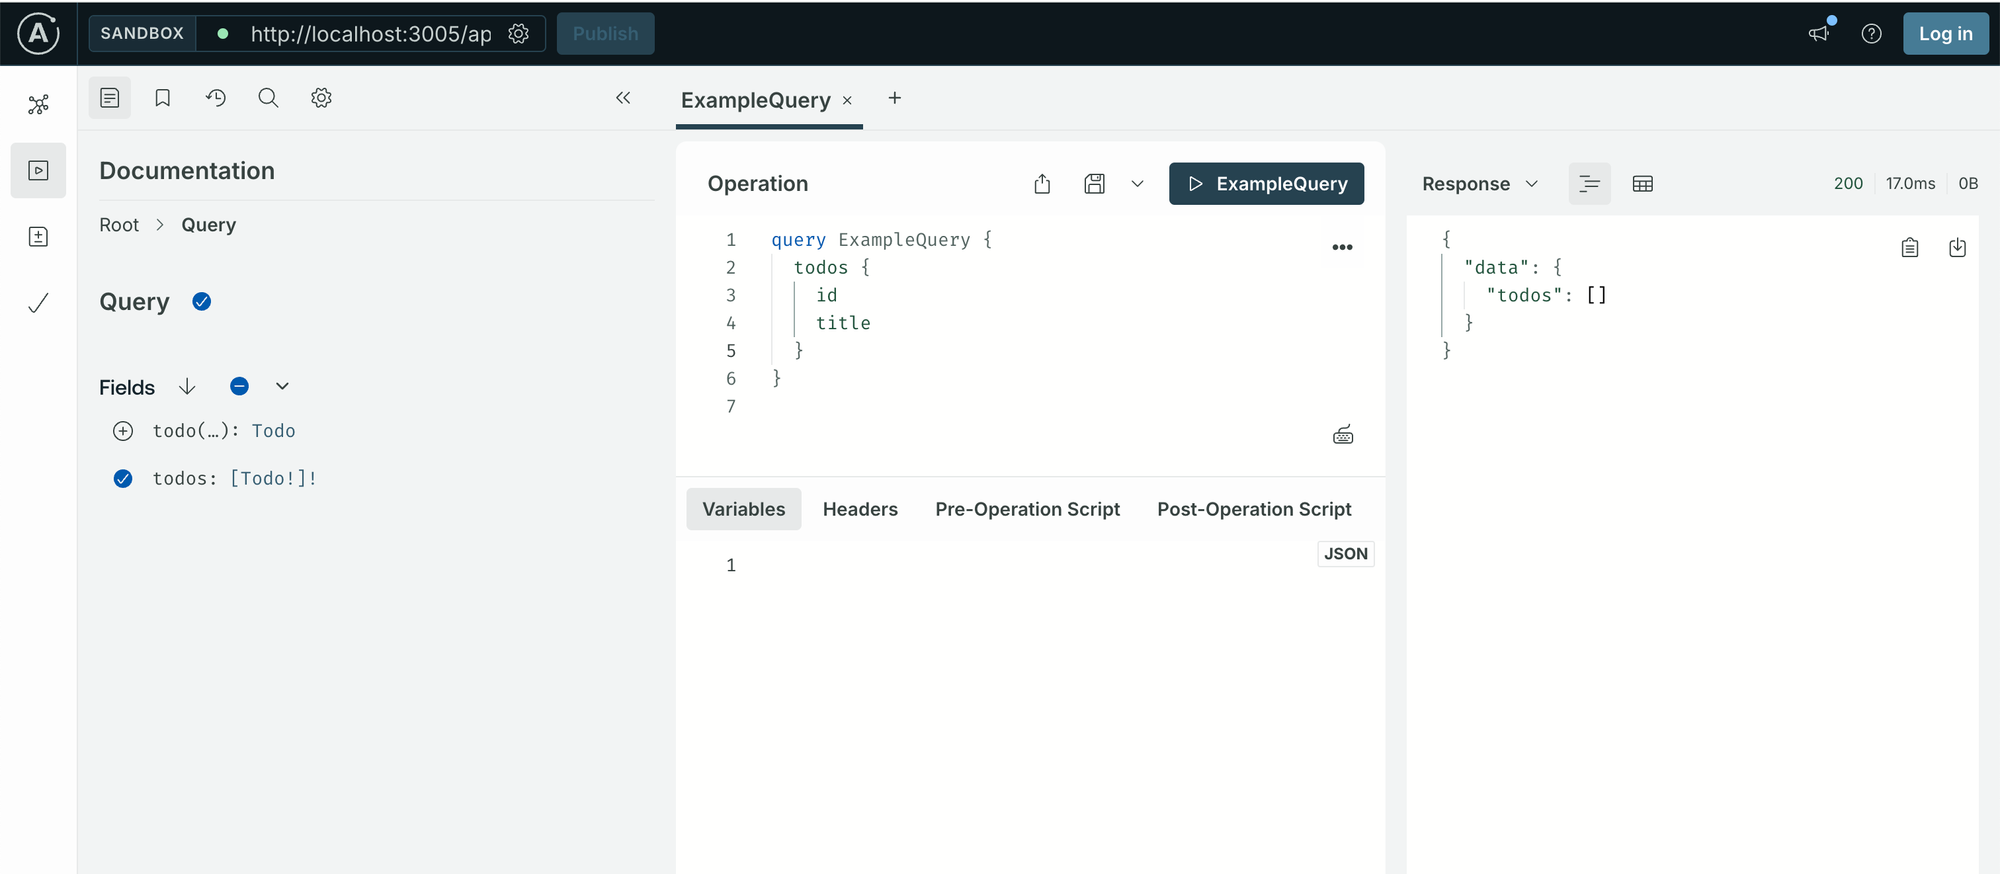
We can also try it with plain curl:
curl -X POST http://localhost:3005/api/graphql \
-H 'Content-Type: application/json' \
-d '{"query": "query { todos { id title completed createdAt } }"}'

curl -X POST http://localhost:3005/api/graphql \
-H 'Content-Type: application/json' \
-d '{"query": "mutation { createTodo(title: \"Buy groceries\") { id title completed } }"}'

curl -X POST http://localhost:3005/api/graphql \
-H 'Content-Type: application/json' \
-d '{"query": "mutation { updateTodo(id: 1, completed: true) { id completed } }"}'

curl -X POST http://localhost:3005/api/graphql \
-H 'Content-Type: application/json' \
-d '{"request": "mutation { deleteTodo(id: 1) }"}'
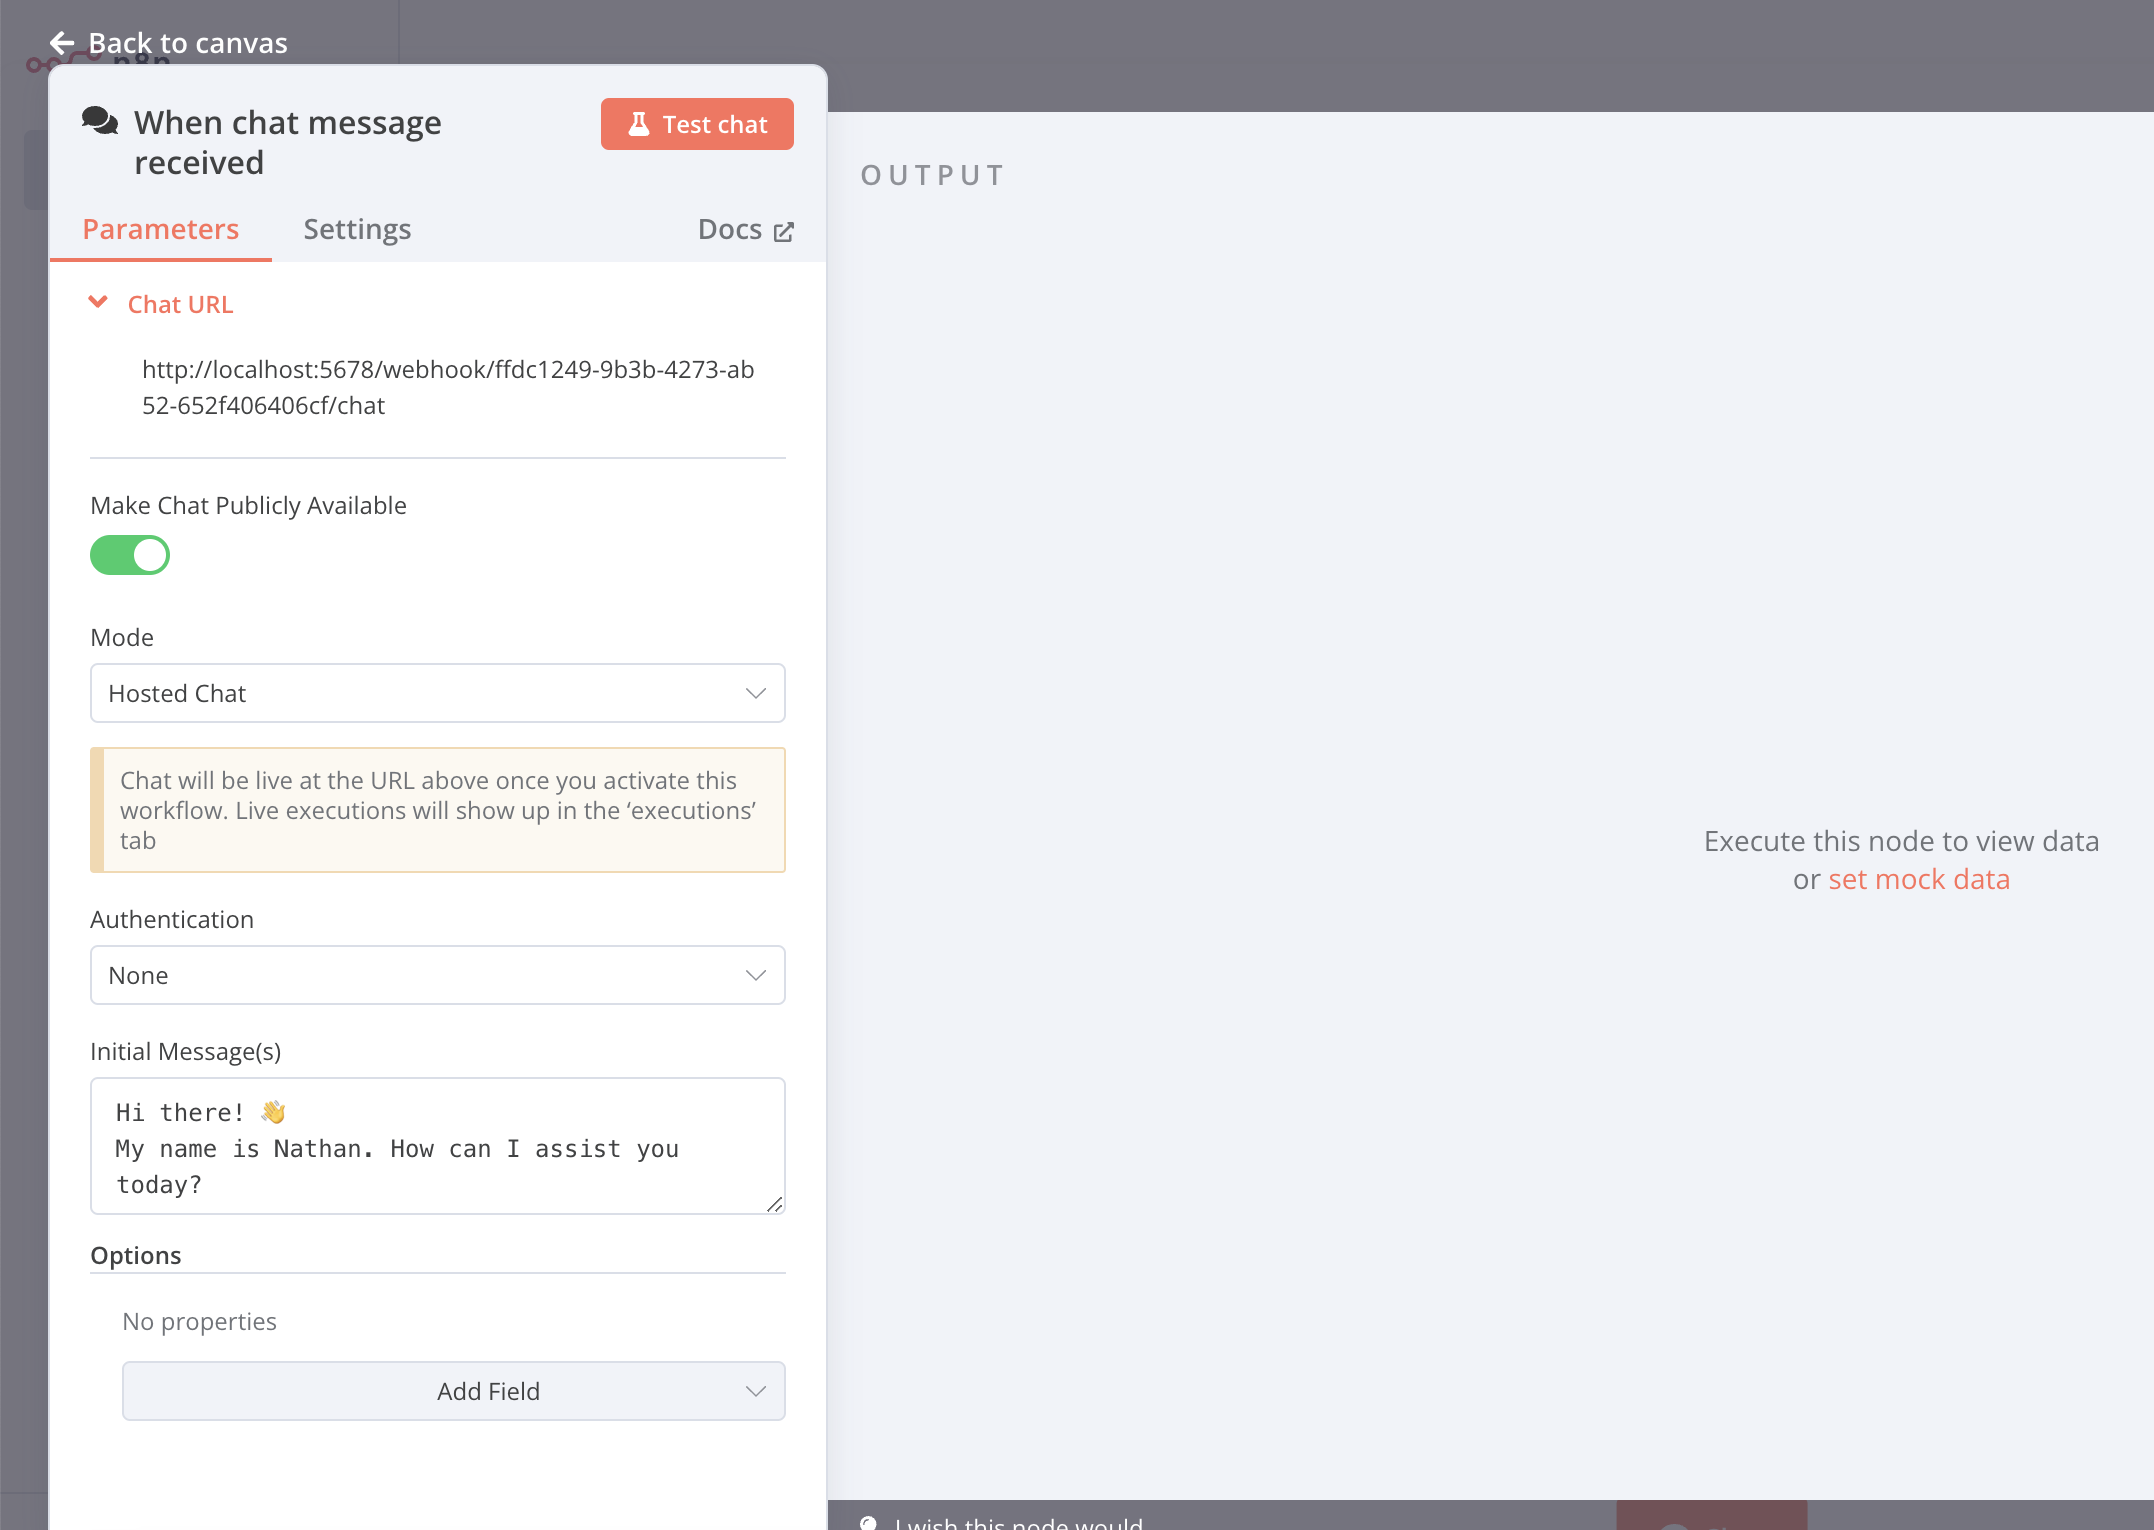
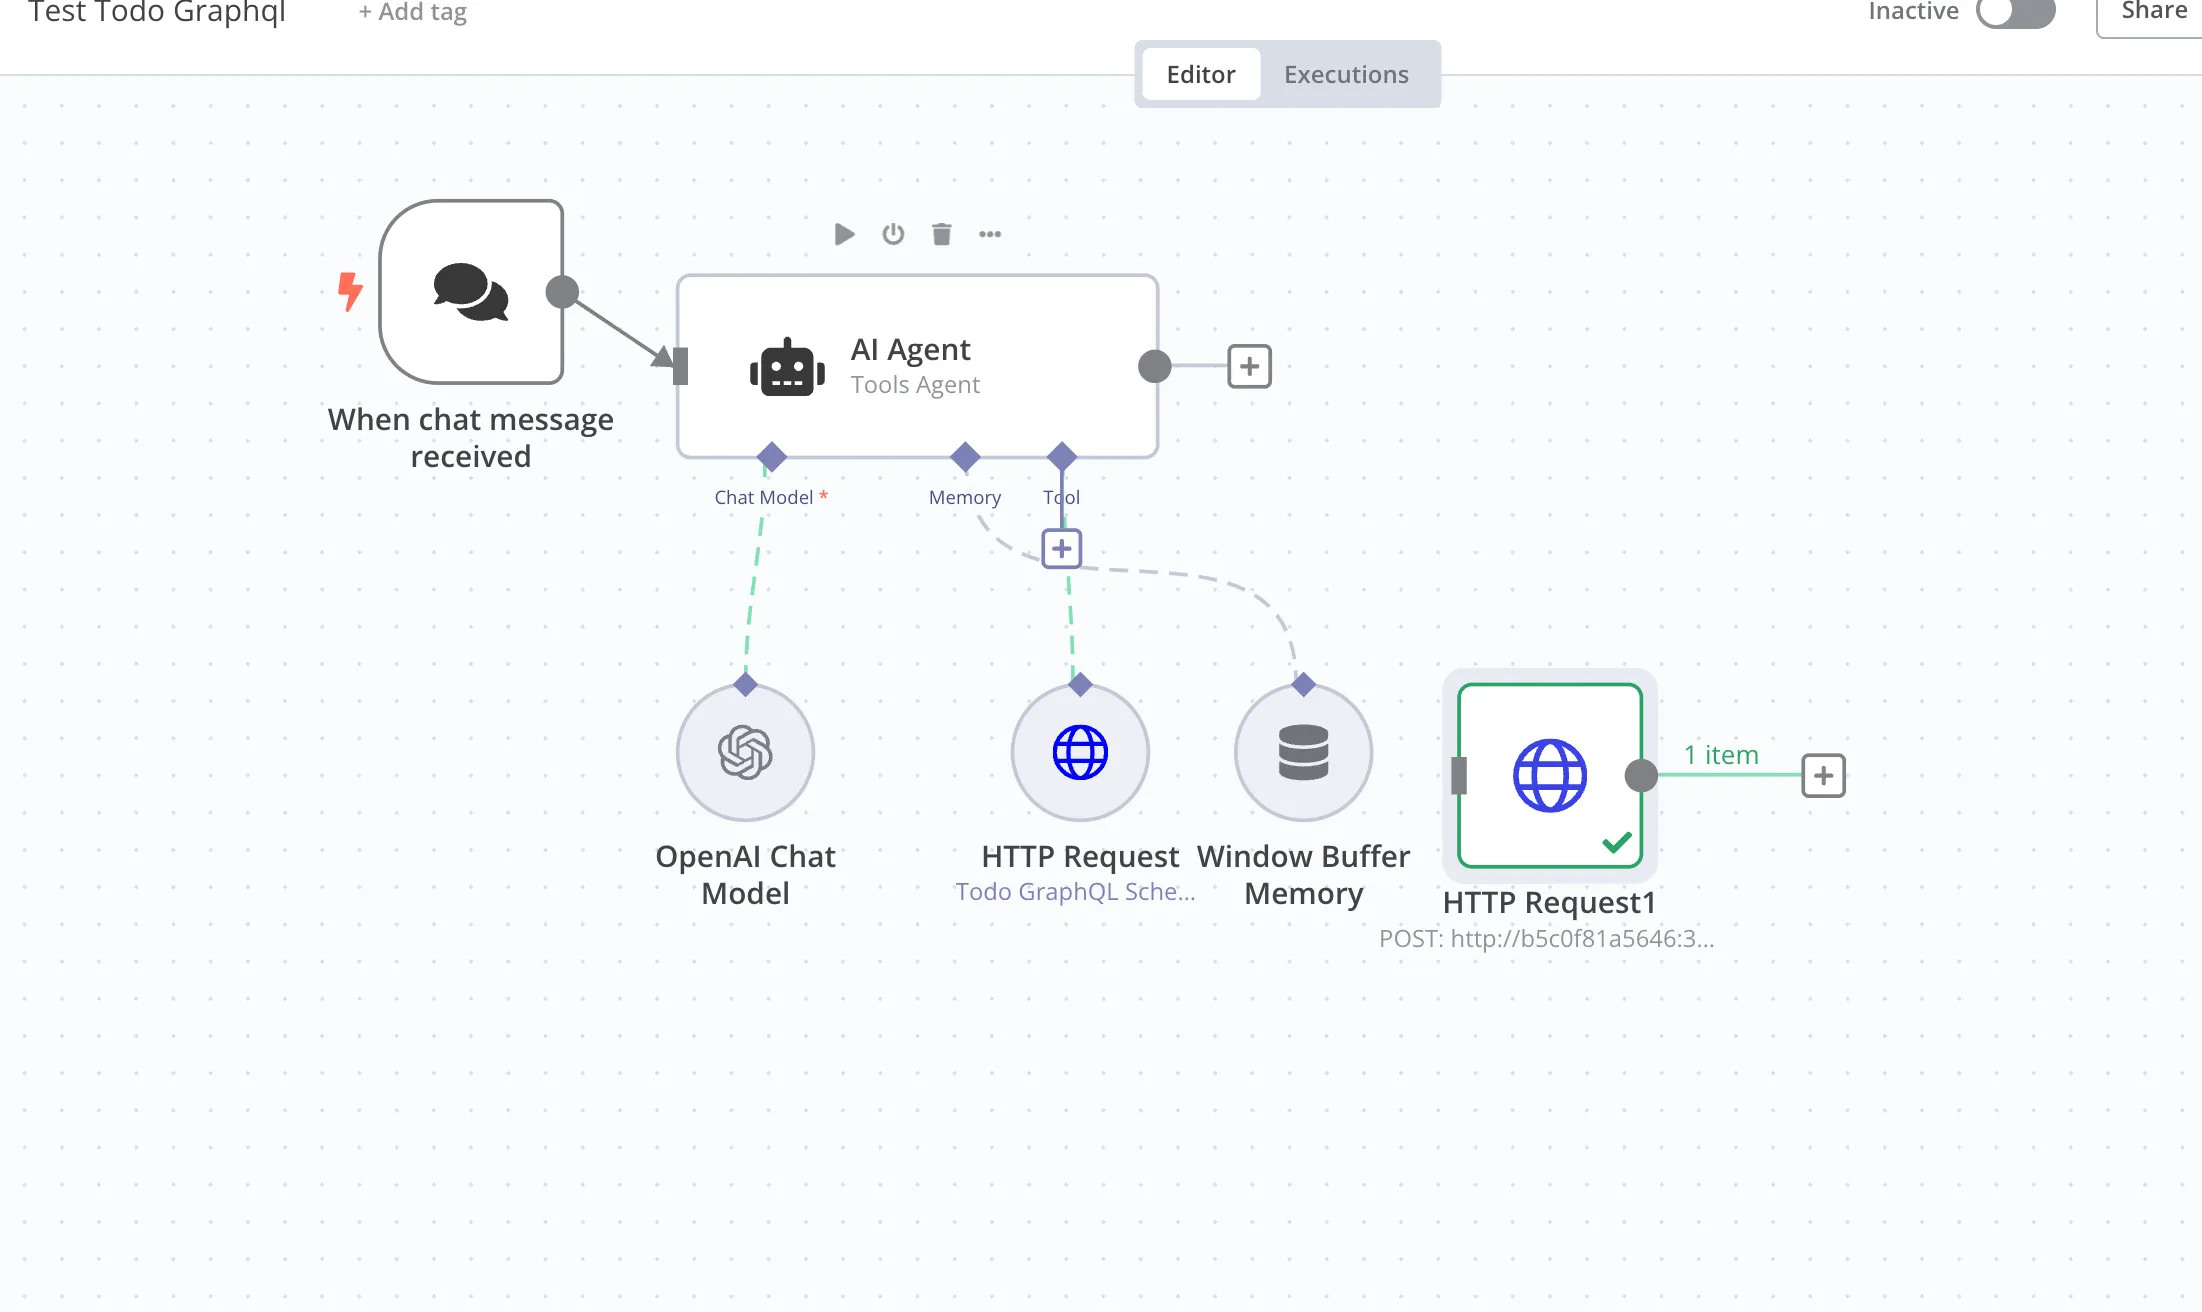
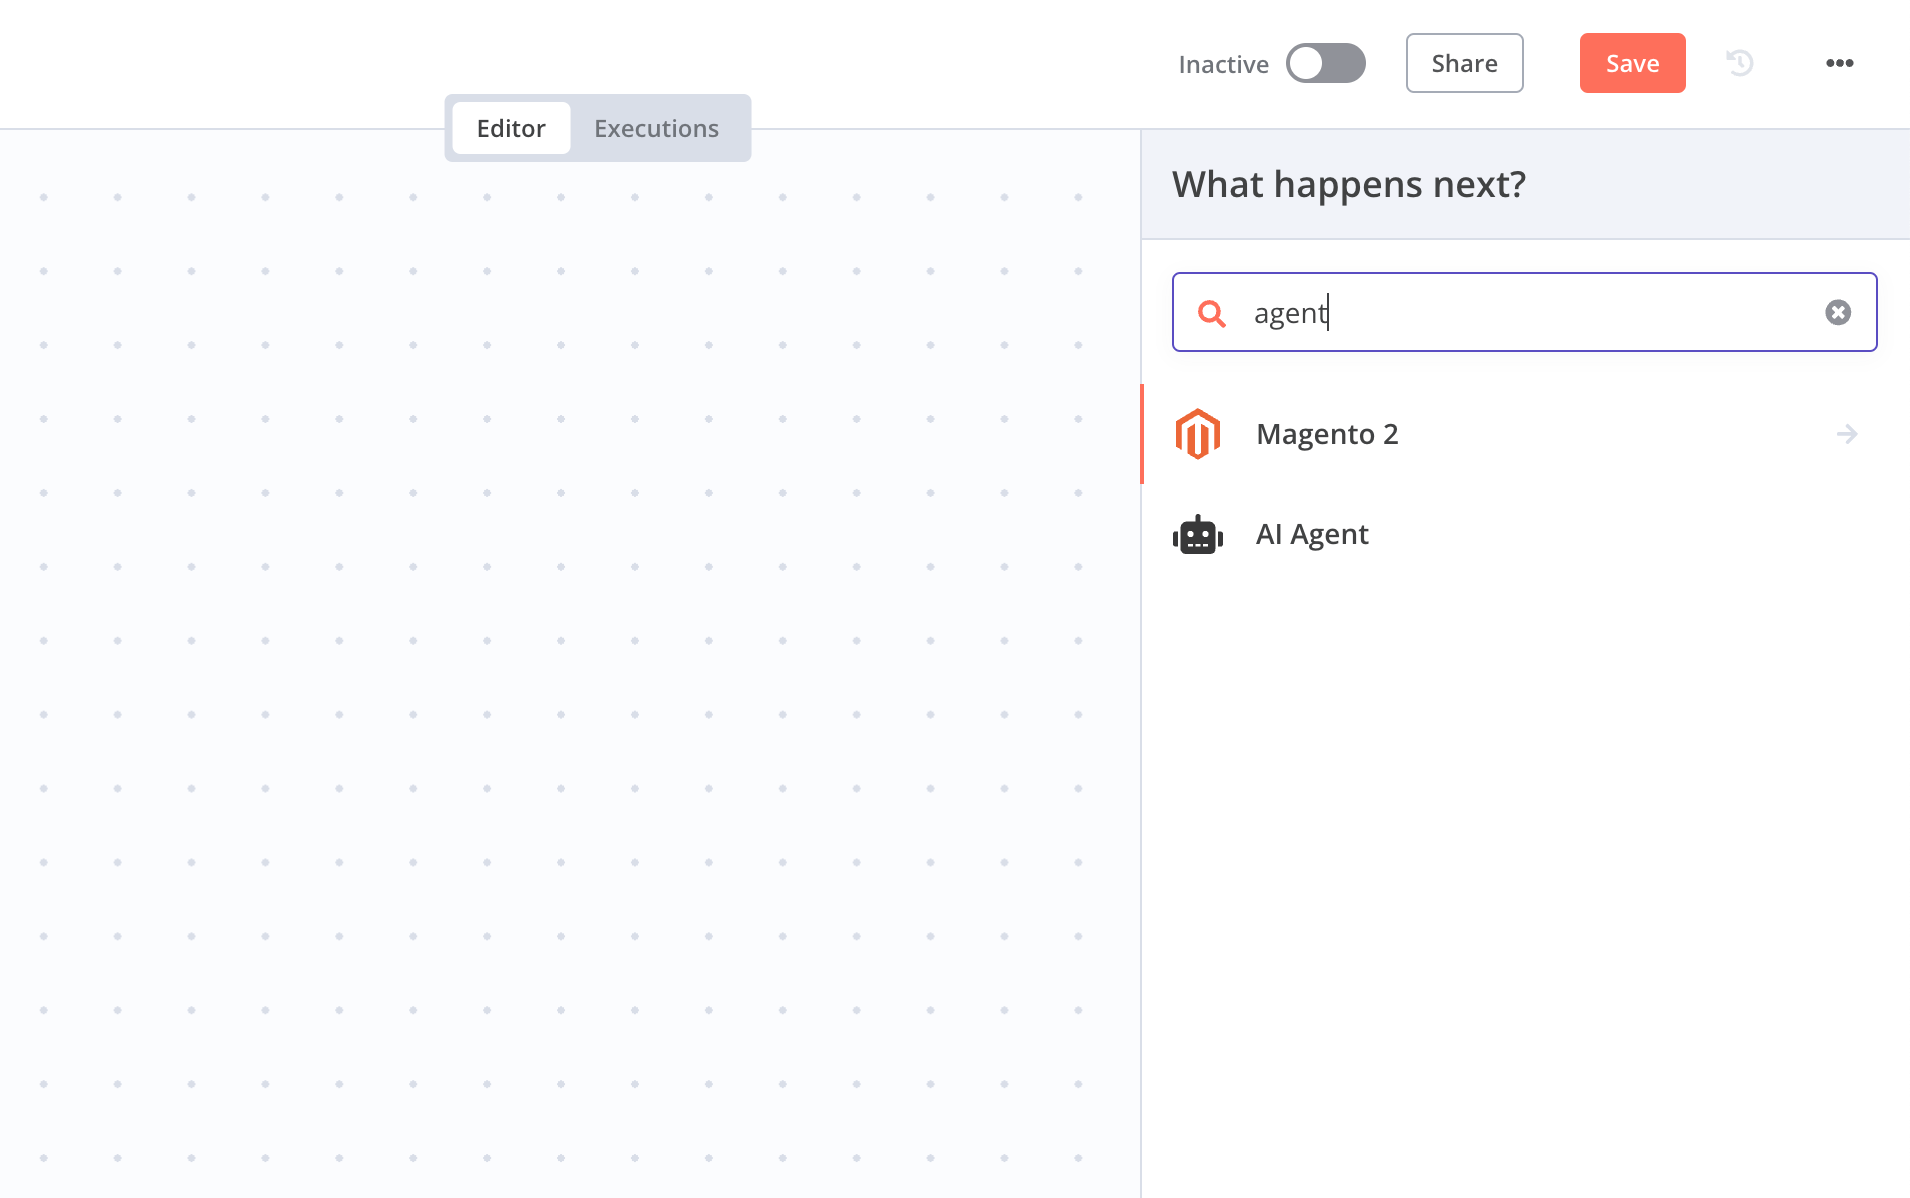
#2 Build the agent workflwo in n8n
Now let's build the agent using the GraphQL Todo API. We'll create a new workflow in n8n, which should end up looking like this.
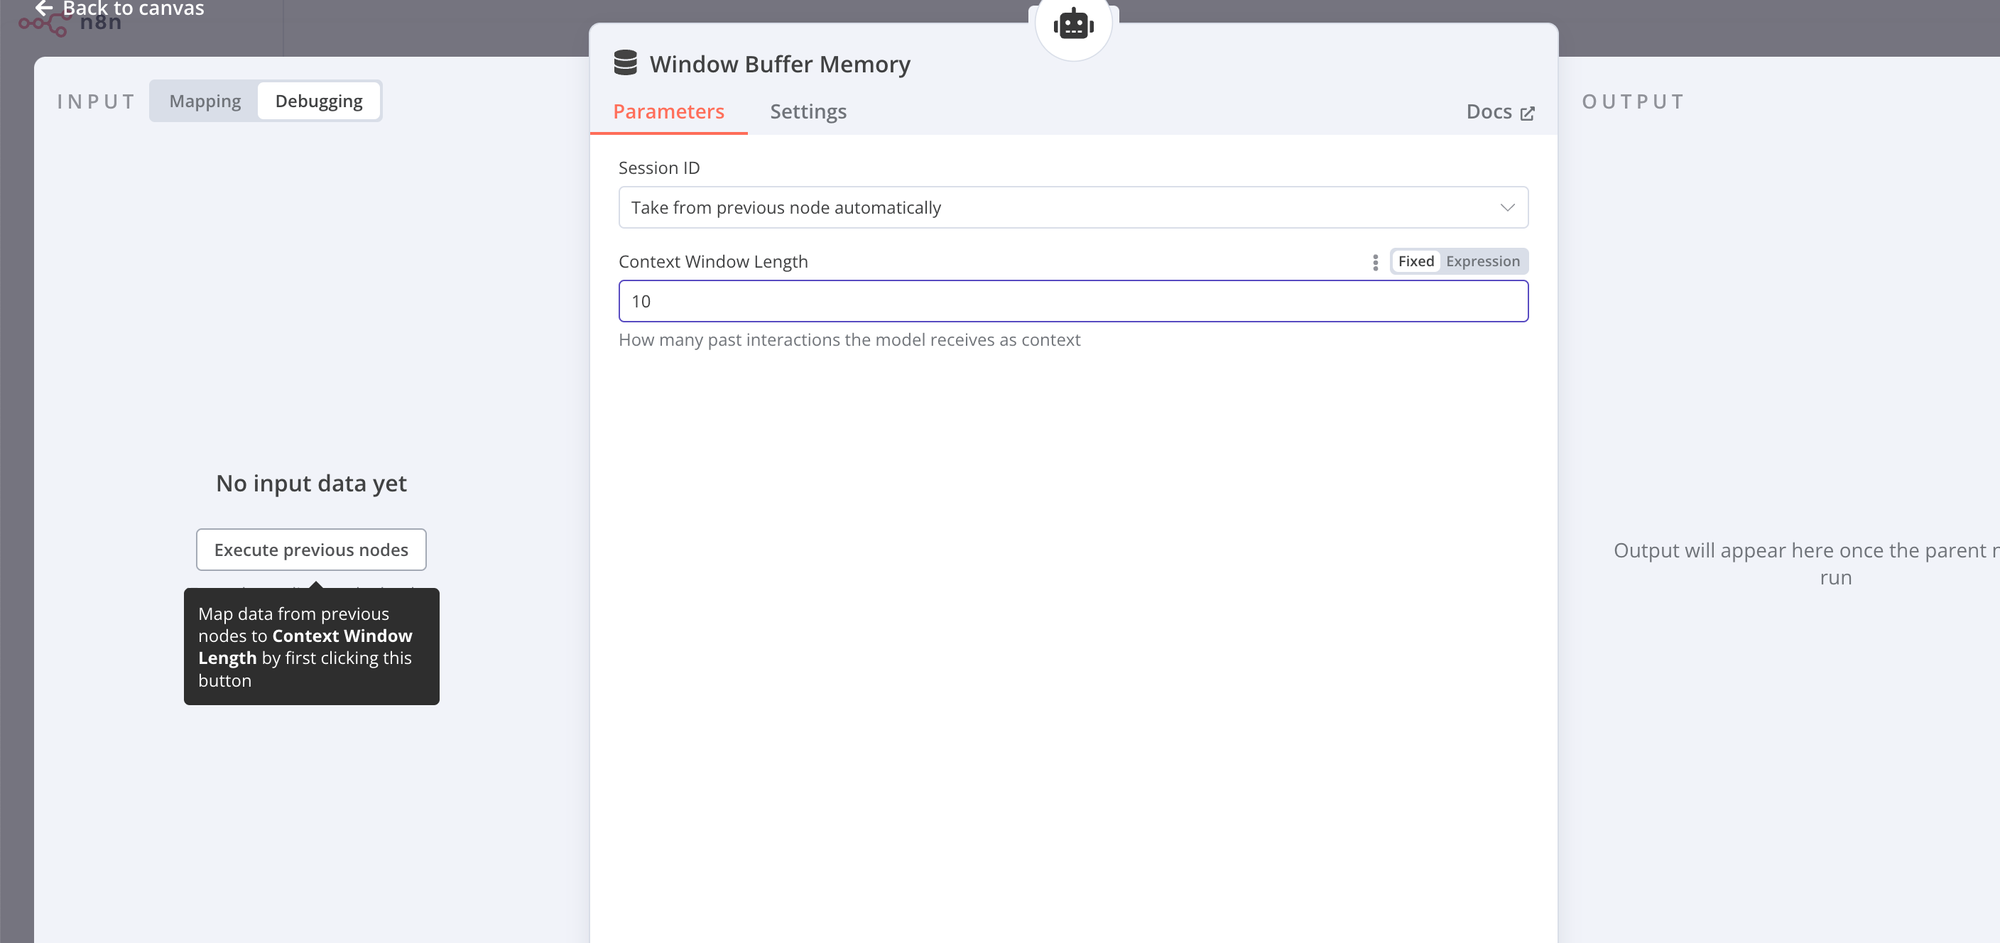
In a nutshell, it has just one agent with three core components: the LLM model OpenAI, a buffer memory to store the conversation history, and the most important part, the API with GraphQL.
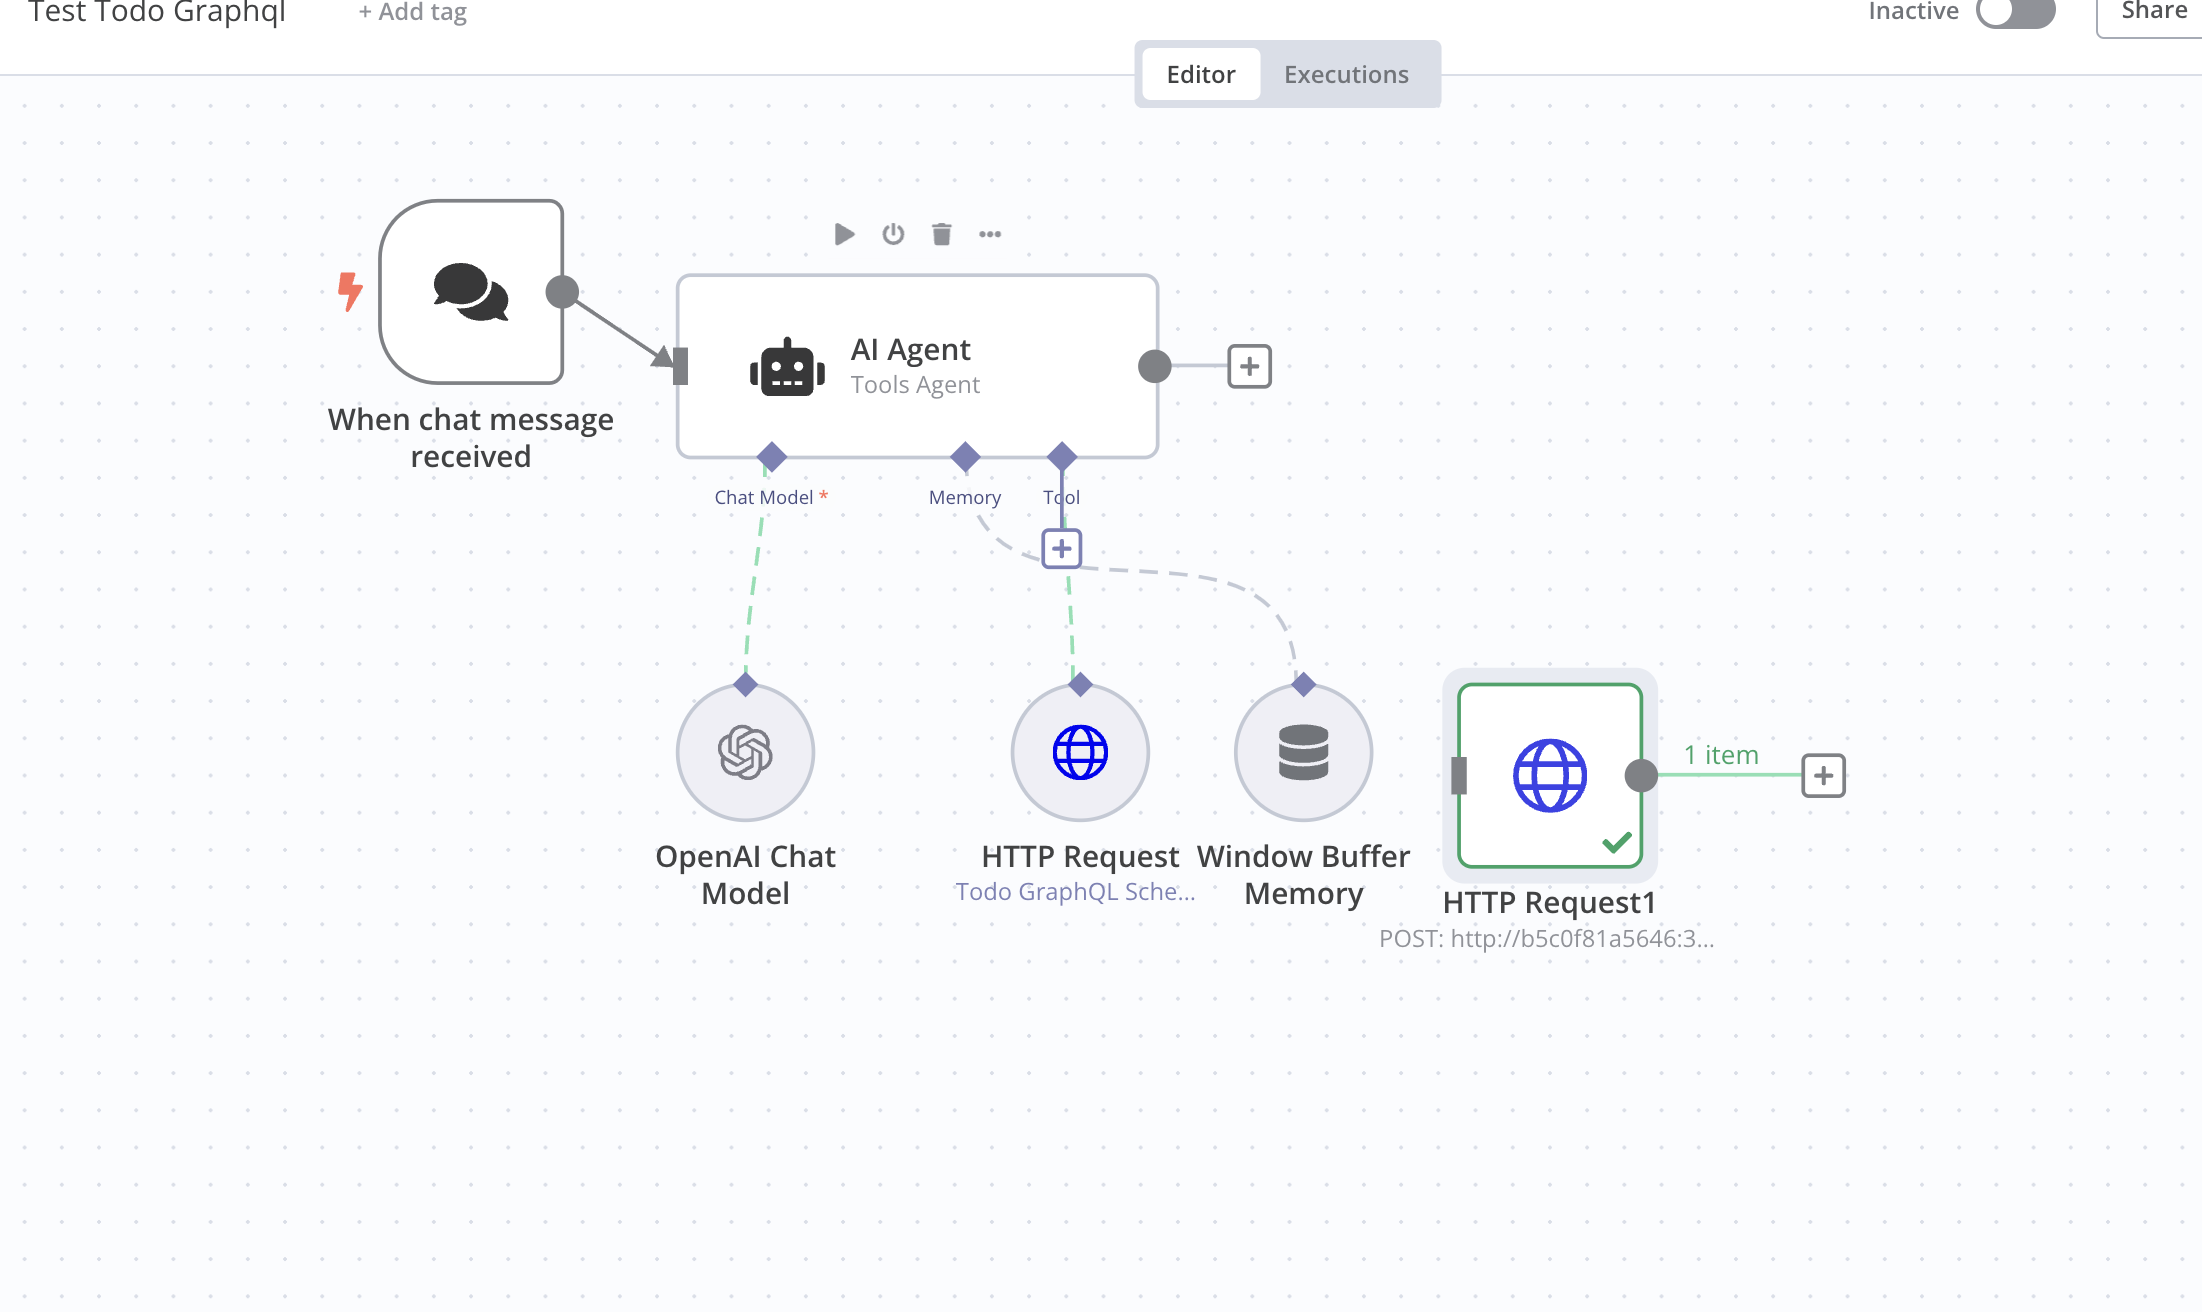
Here's how to configure the cache:
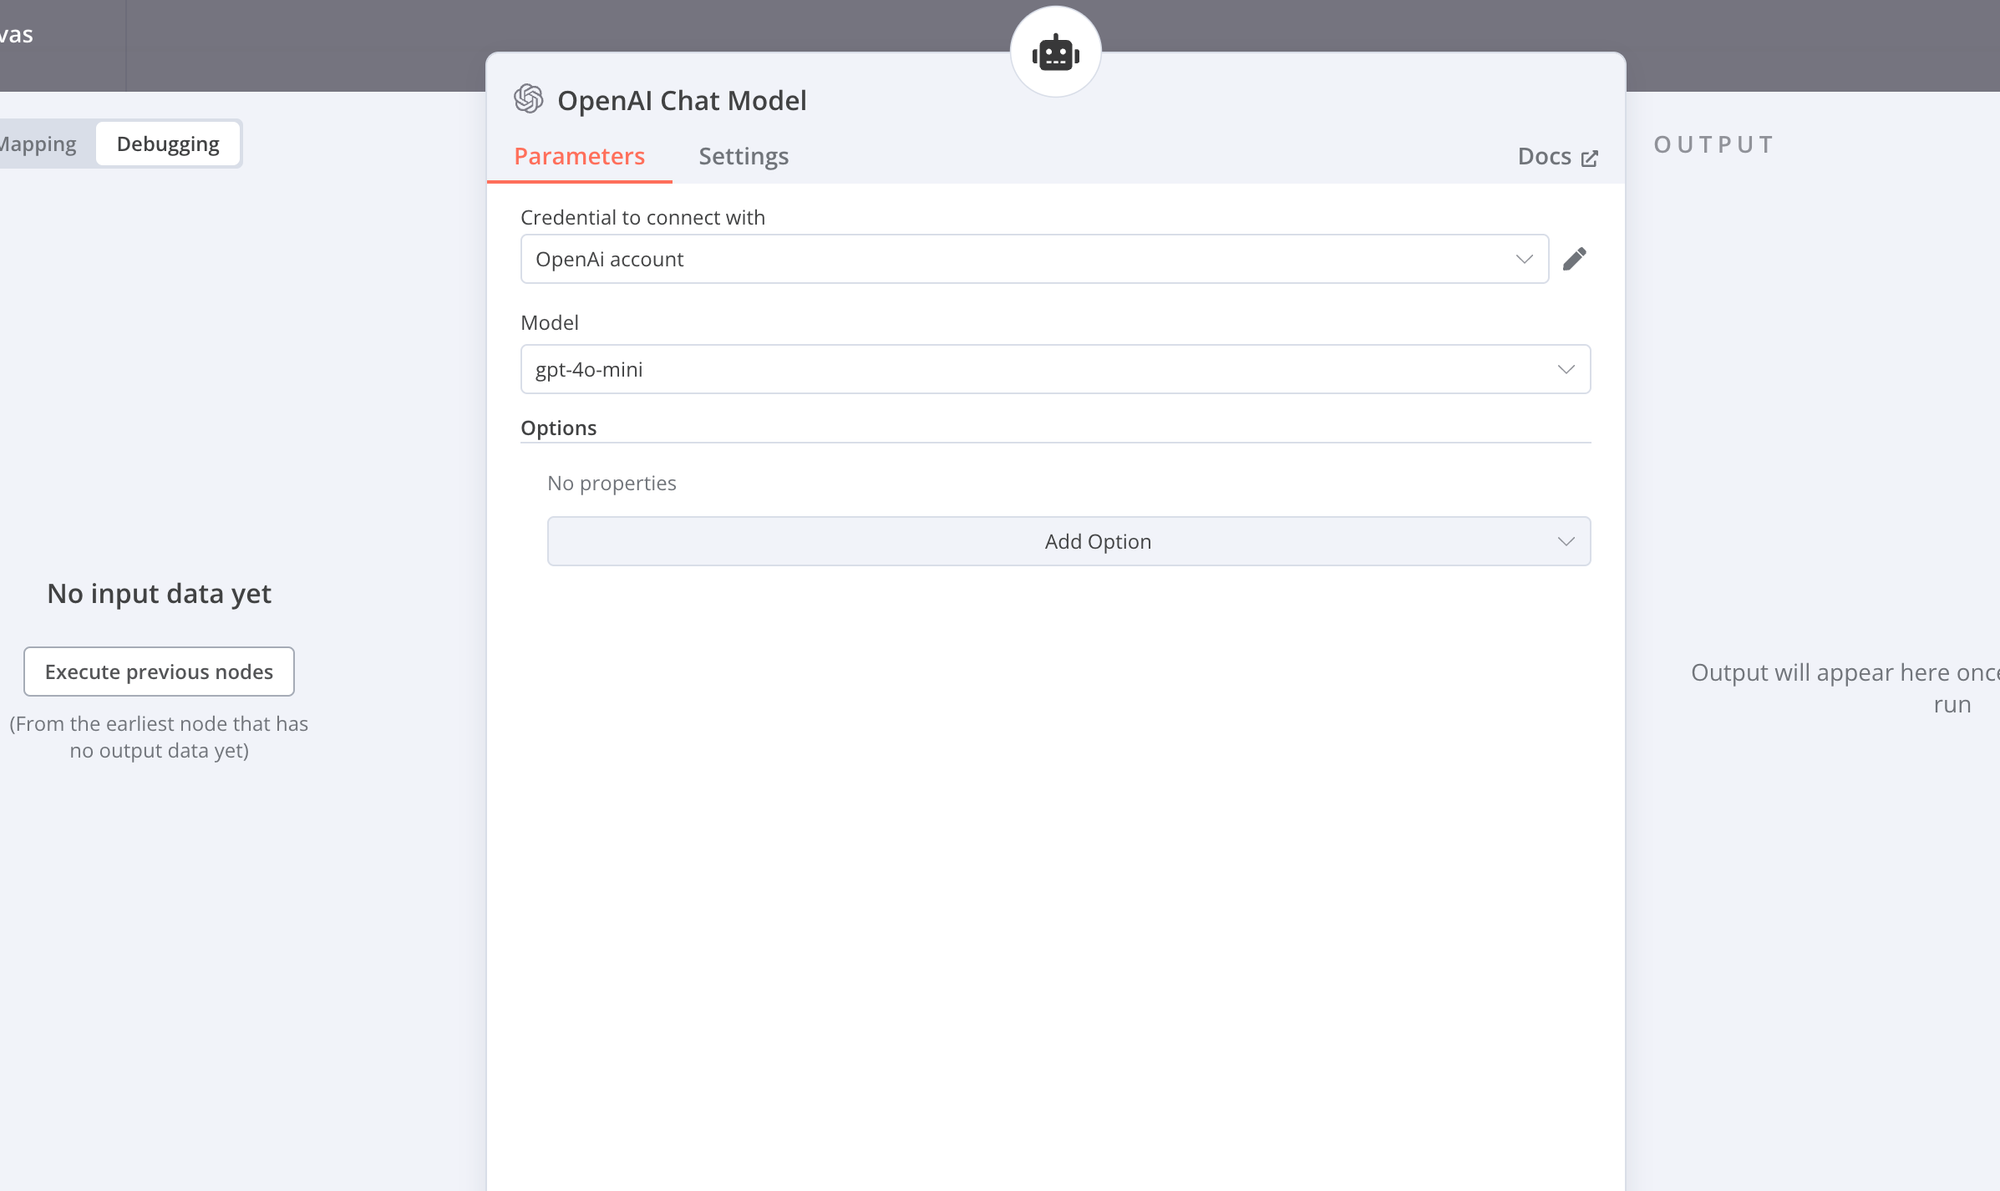
For the configuration of the LLM (OpenAI) component we can use the cheap small model 4-0-mini as shown here:
Finally, we configure the HTTP request component (i.e. the API).
Please make sure you enter the correct URL to your Next.js server (I have a somewhat cryptic URL here because I use containers; yours will surely be different).
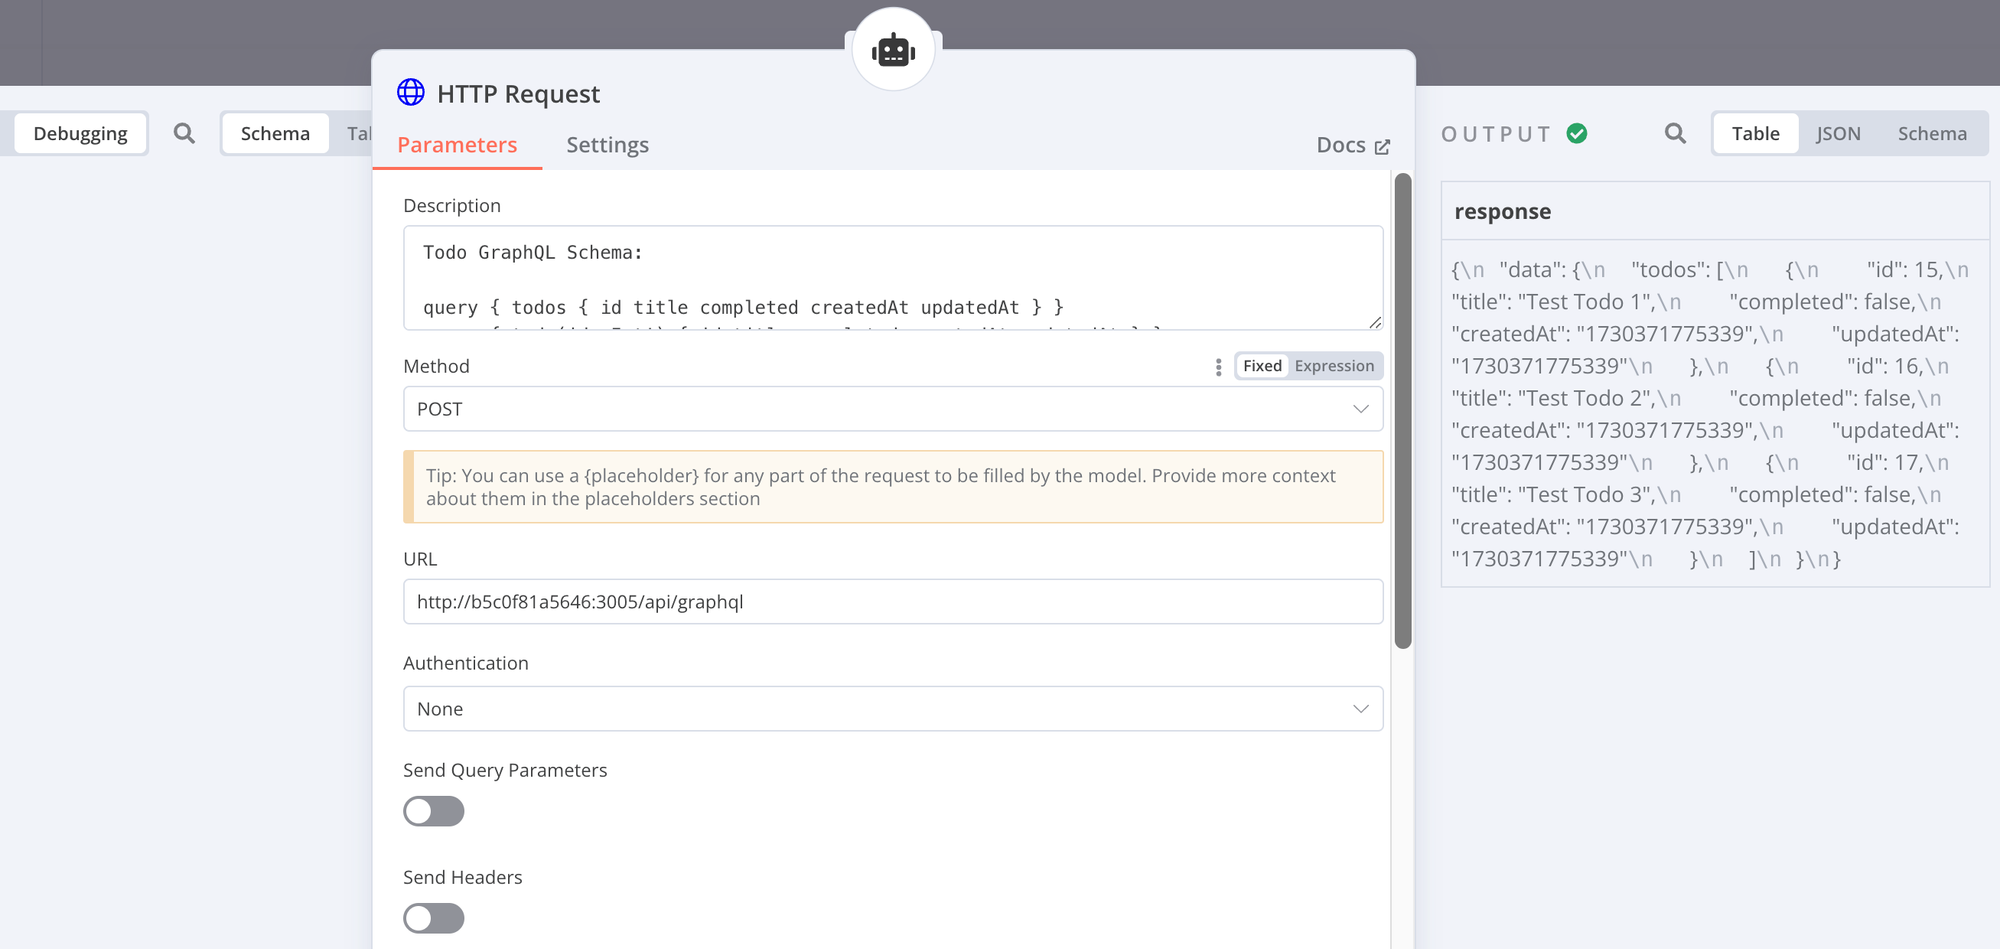
To do this, enter the following text in the description field
Todo GraphQL Schema:
query { todos { id title completed createdAt updatedAt } }
query { todo(id: Int!) { id title done createdAt updatedAt } }
mutation {
  createTodo(title: String!) { id title done }
  updateTodo(id: Int!, completed: Boolean!) { id completed }
  deleteTodo(id: Int!) { id }
}
Fields: id (Int), title (String), completed (Boolean), createdAt/updatedAt (String)
Example query: query {
  todos {
    id
    title
    completed
  }
}
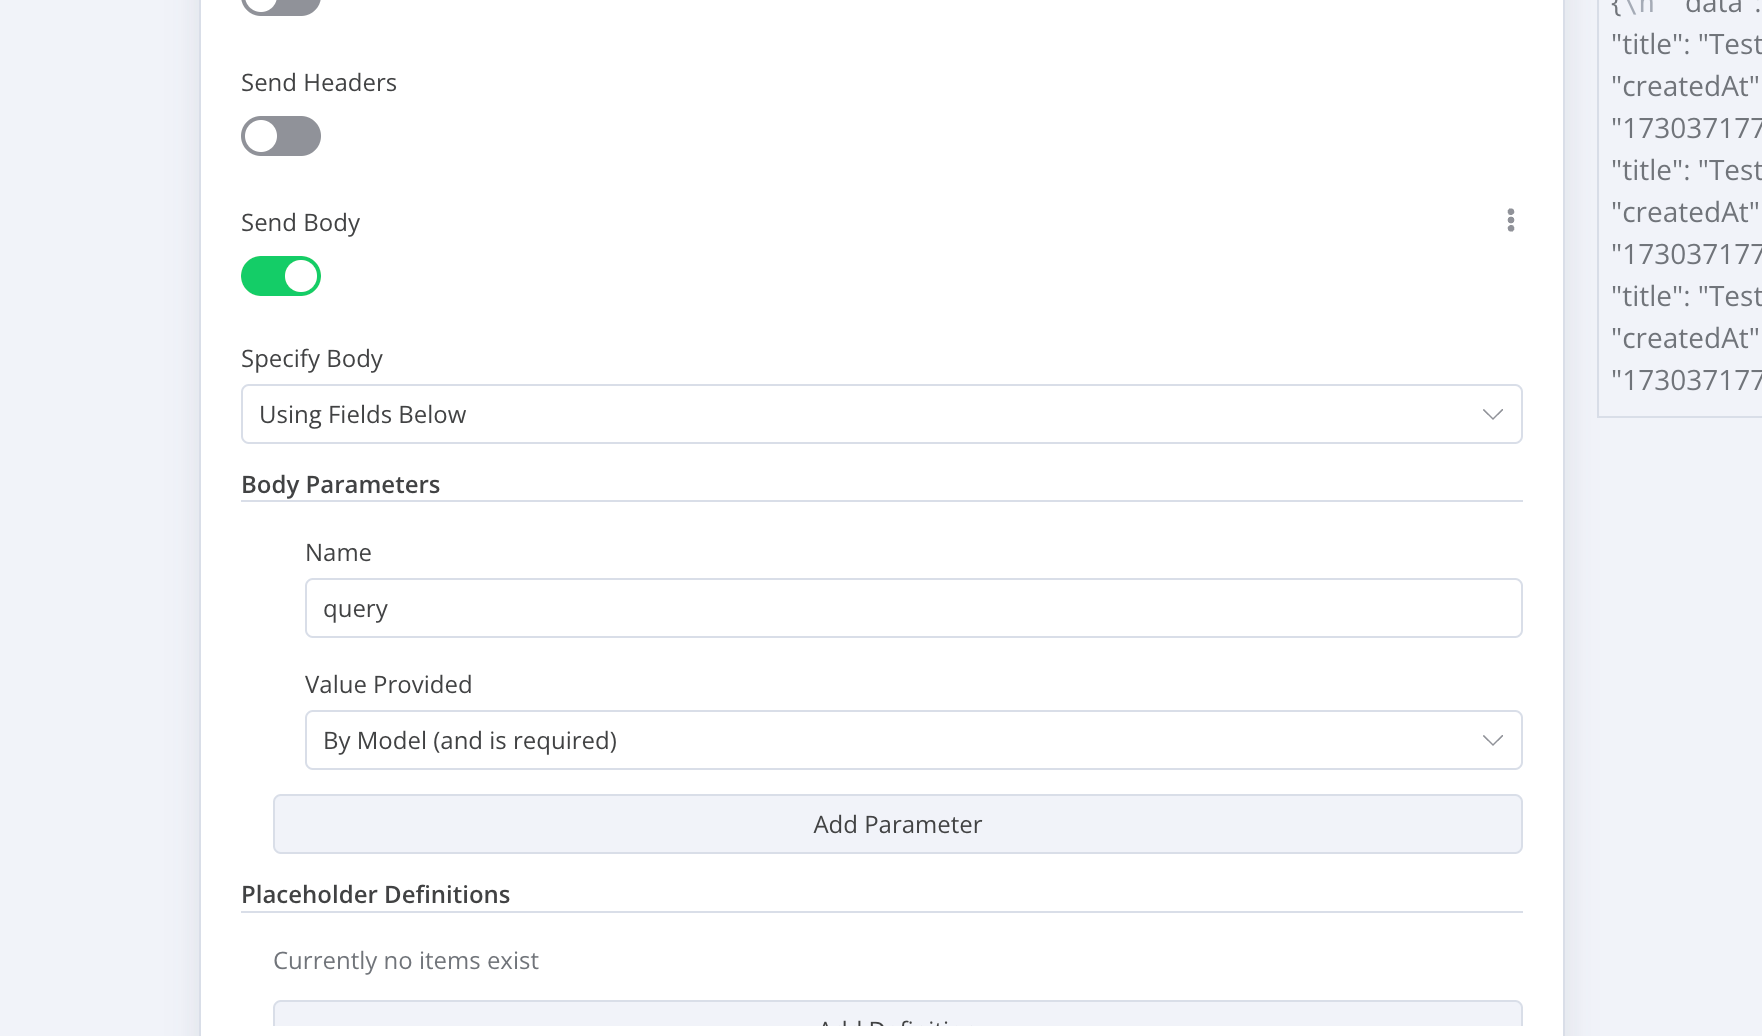
And select the "Send Body" with one paramter query option at the bottom:
That's it, now we can start having fun :)
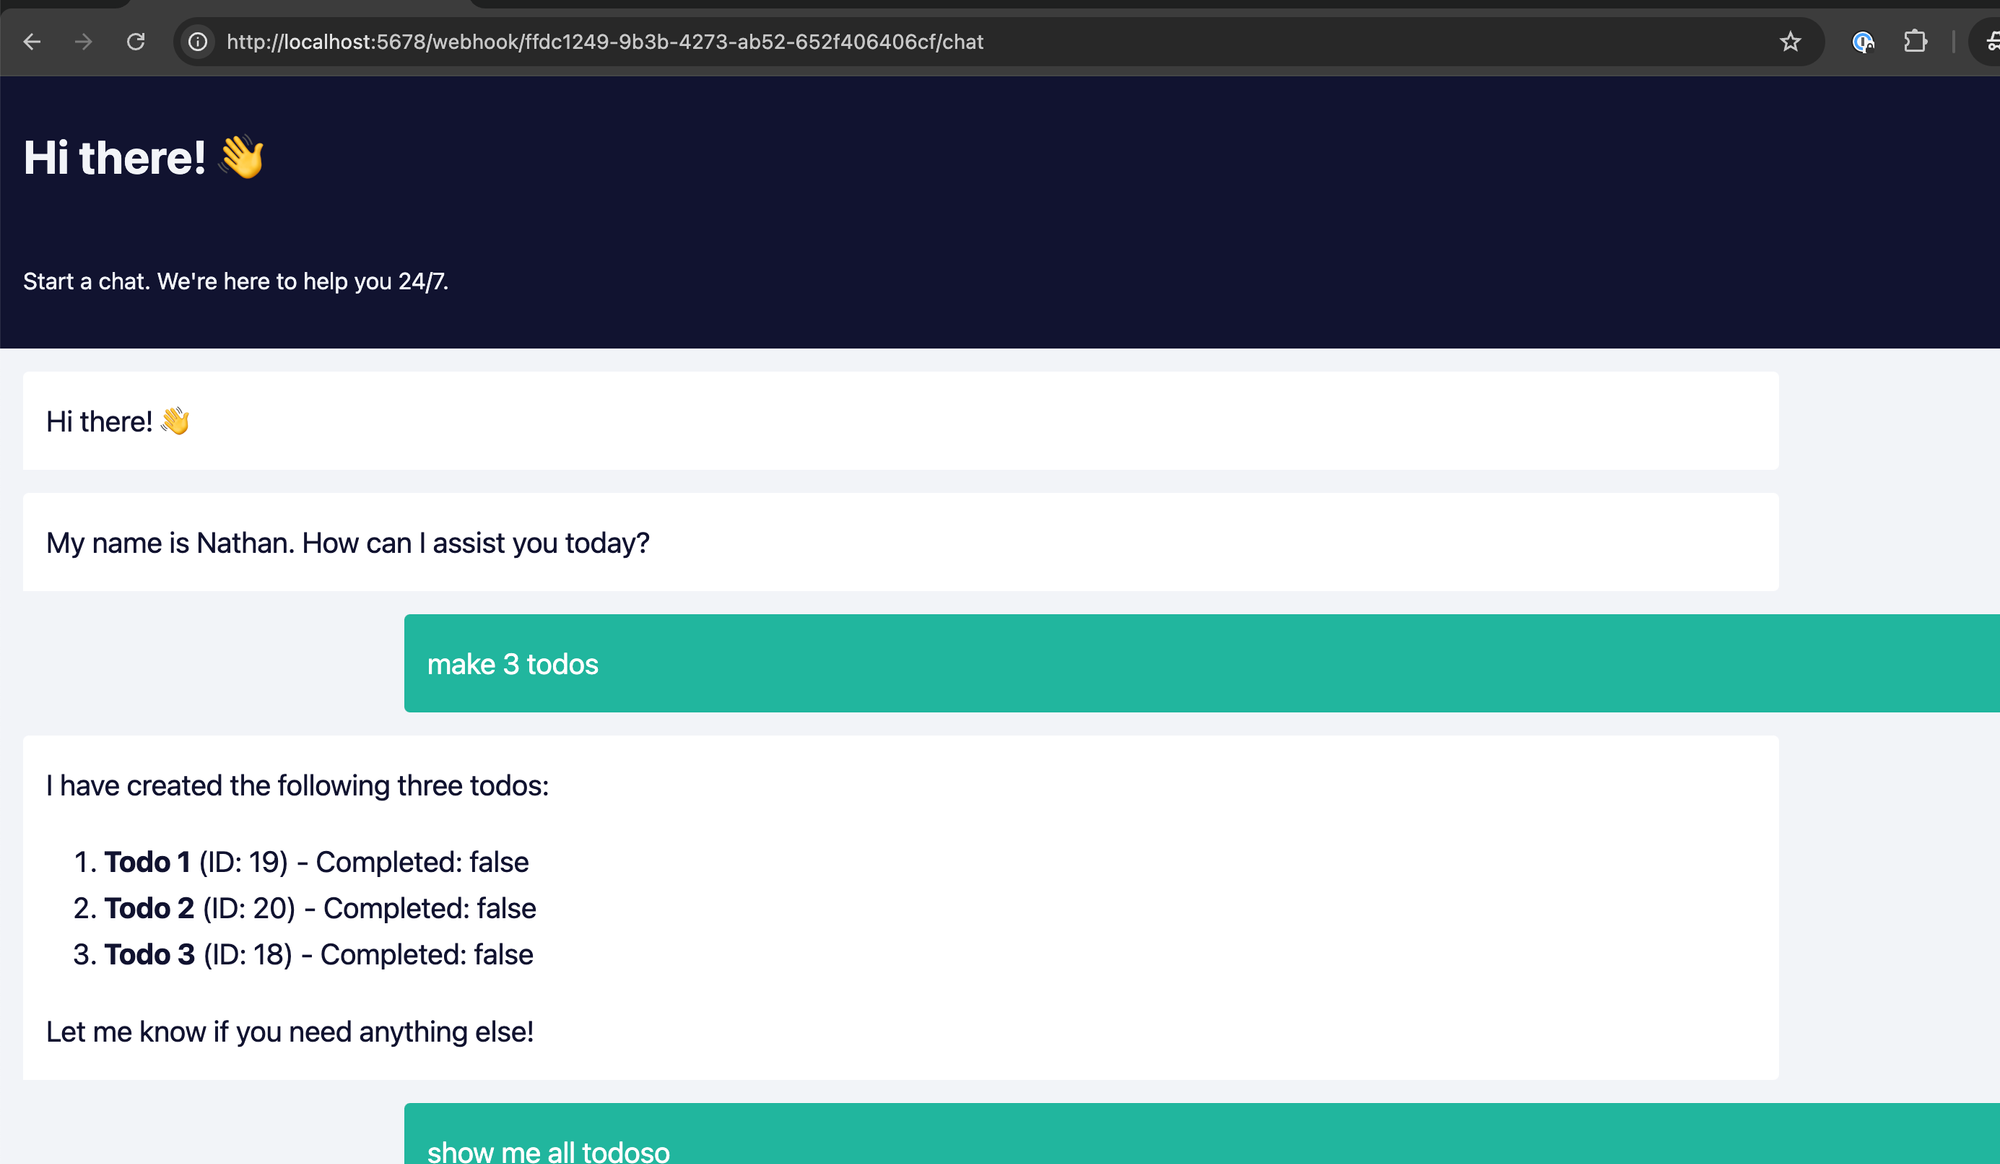
#3 Test the agent Workflow
Testing Creating / Updating Todos
Let's ask the agent to create some todos.
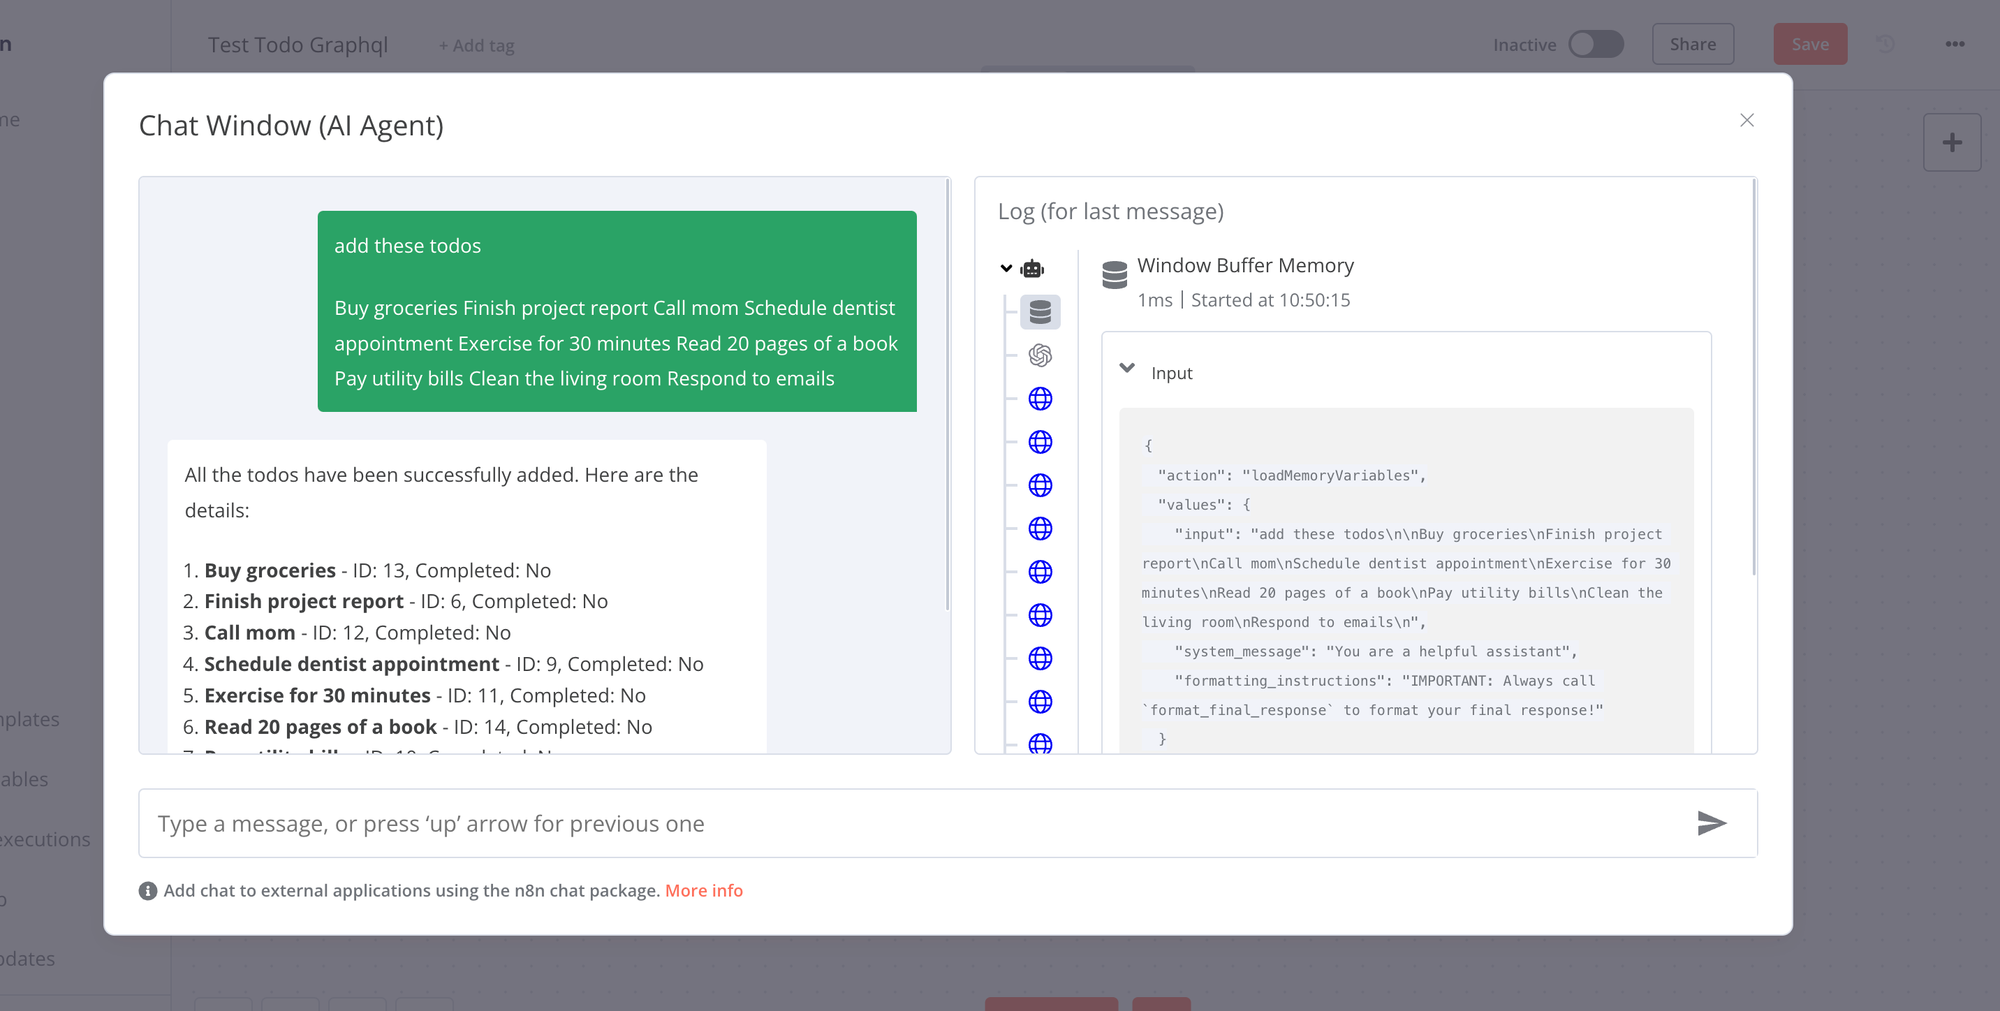
The response looks promising, and on the log page we can see what it actually sends to the Next.js server (we should also be able to see something in the server logs).
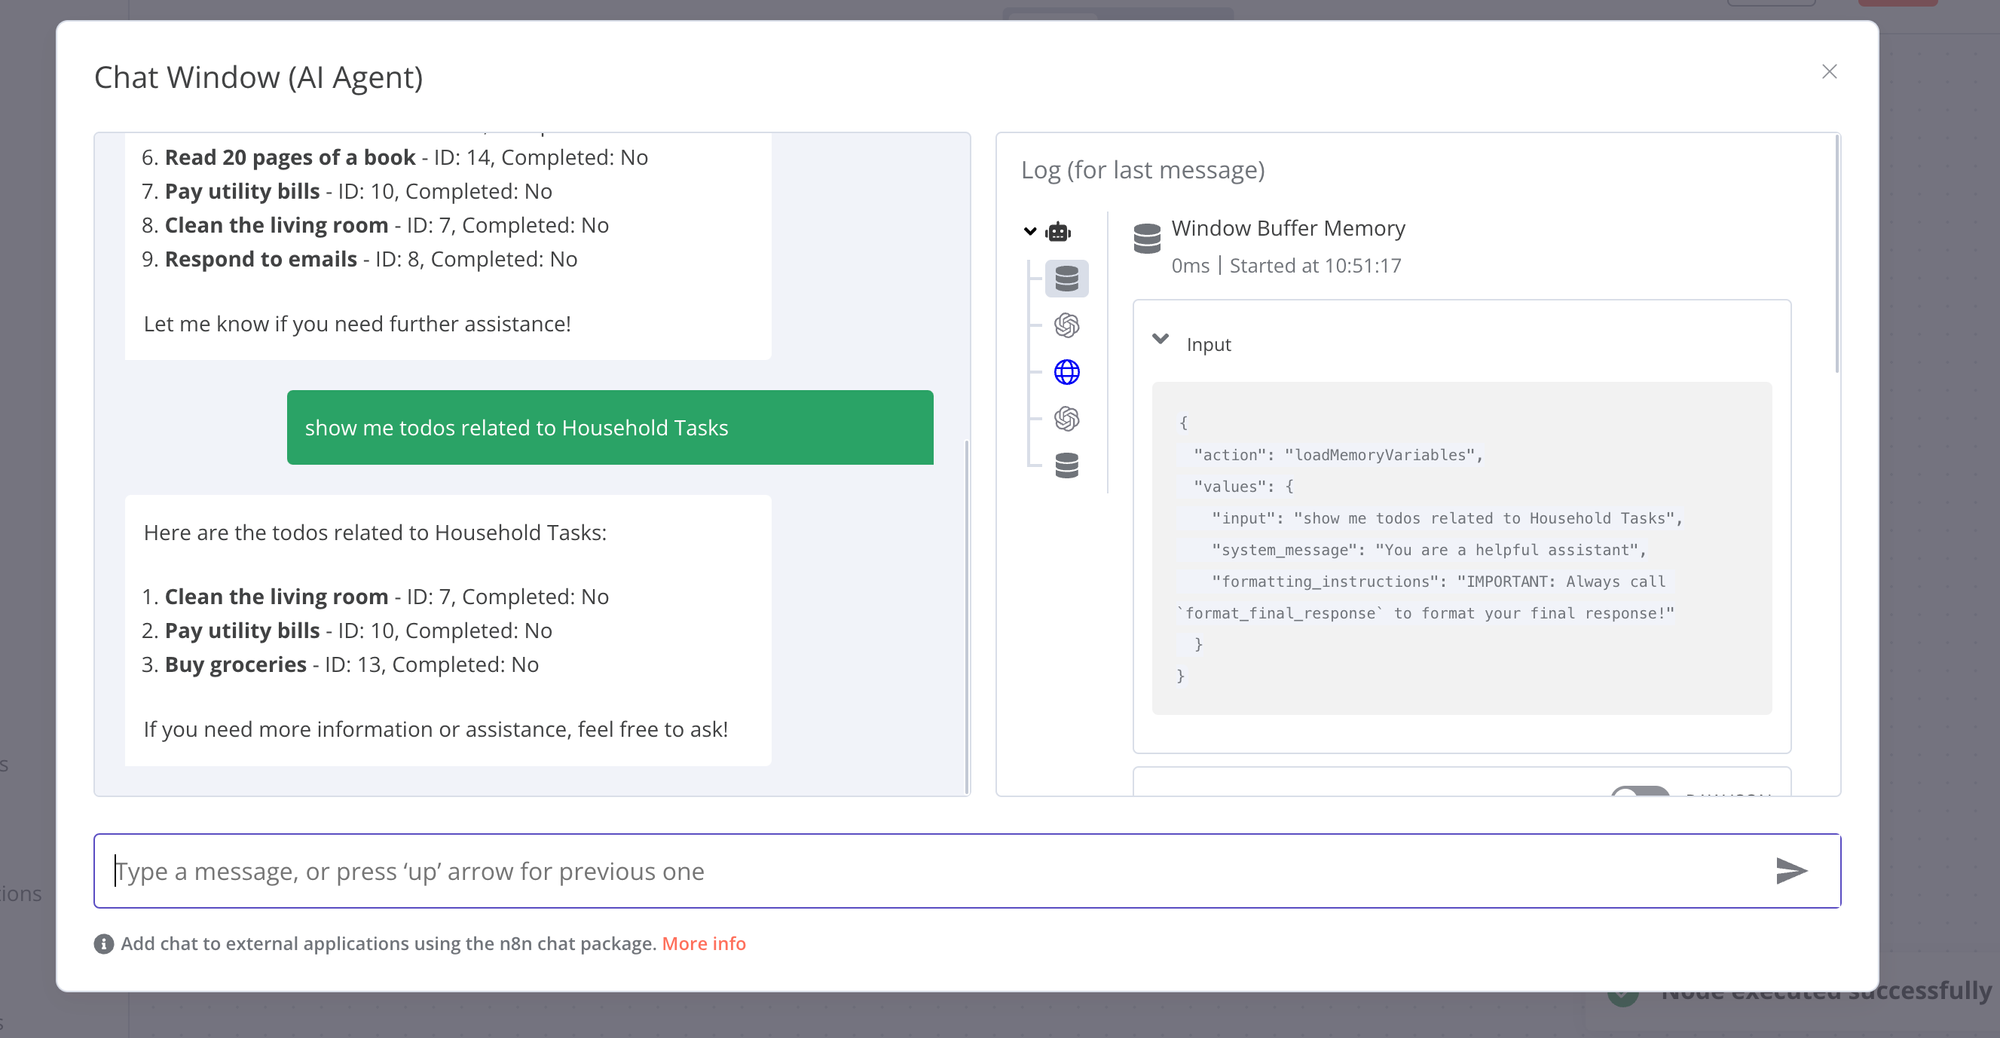
Test reading Todos
Now let's test reading (listing the todos). We can ask for all todos, but we can also ask for todos based on a random criterion, here "todos related to household"...
(https://airabbit.blog/content/images/2024/10/image-171.png)
And the answer looks quite feasible.
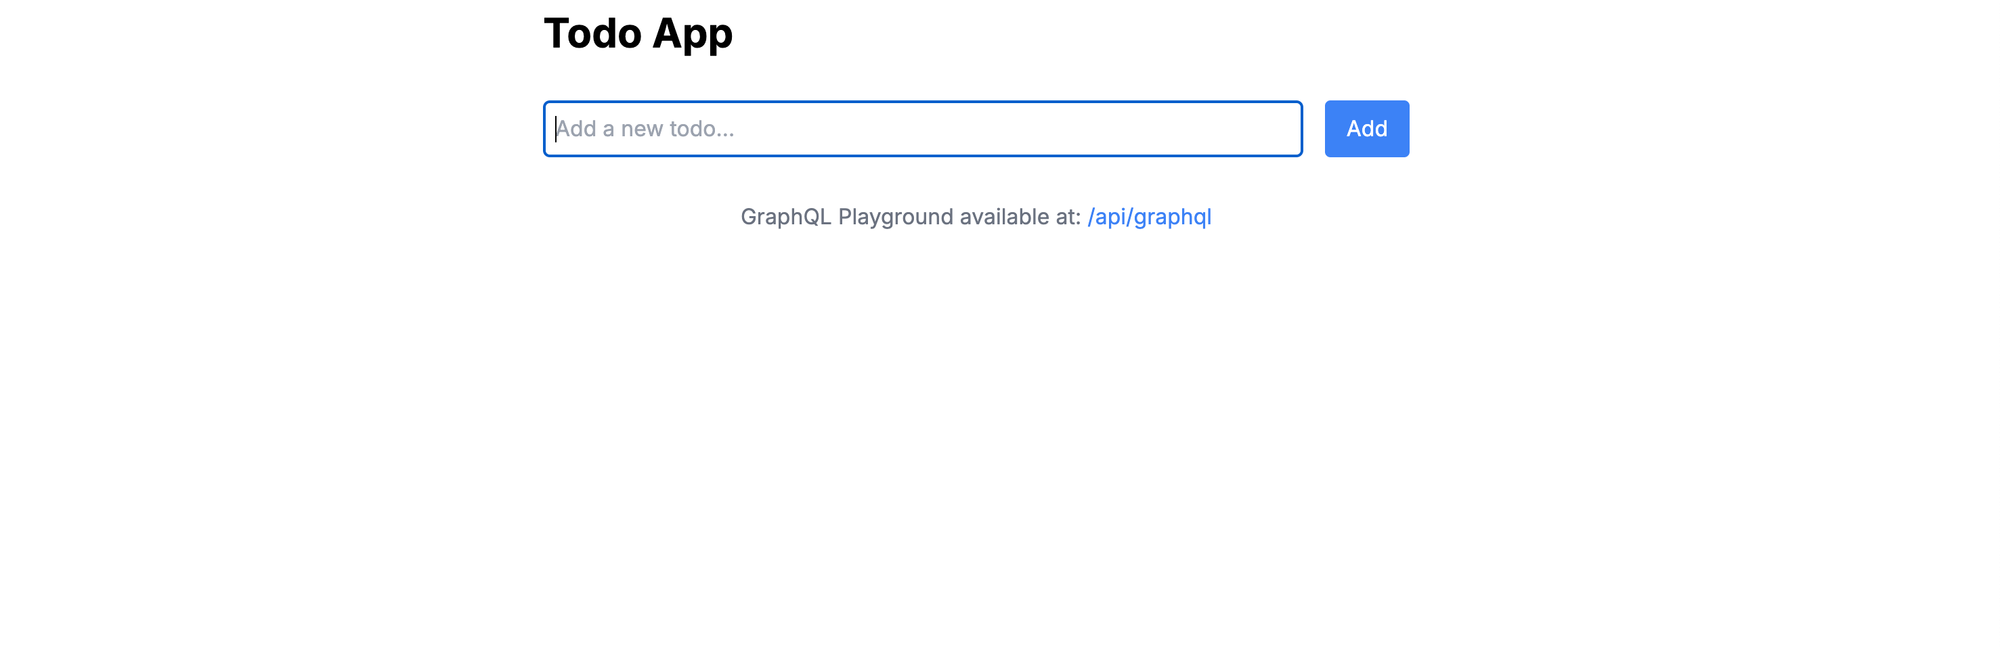
Test the NextJS UI
Now that we have an agent, we almost don't need a UI anymore. But for the sake of completeness, let's have a look at the original application and hope to see the todos we just created there.
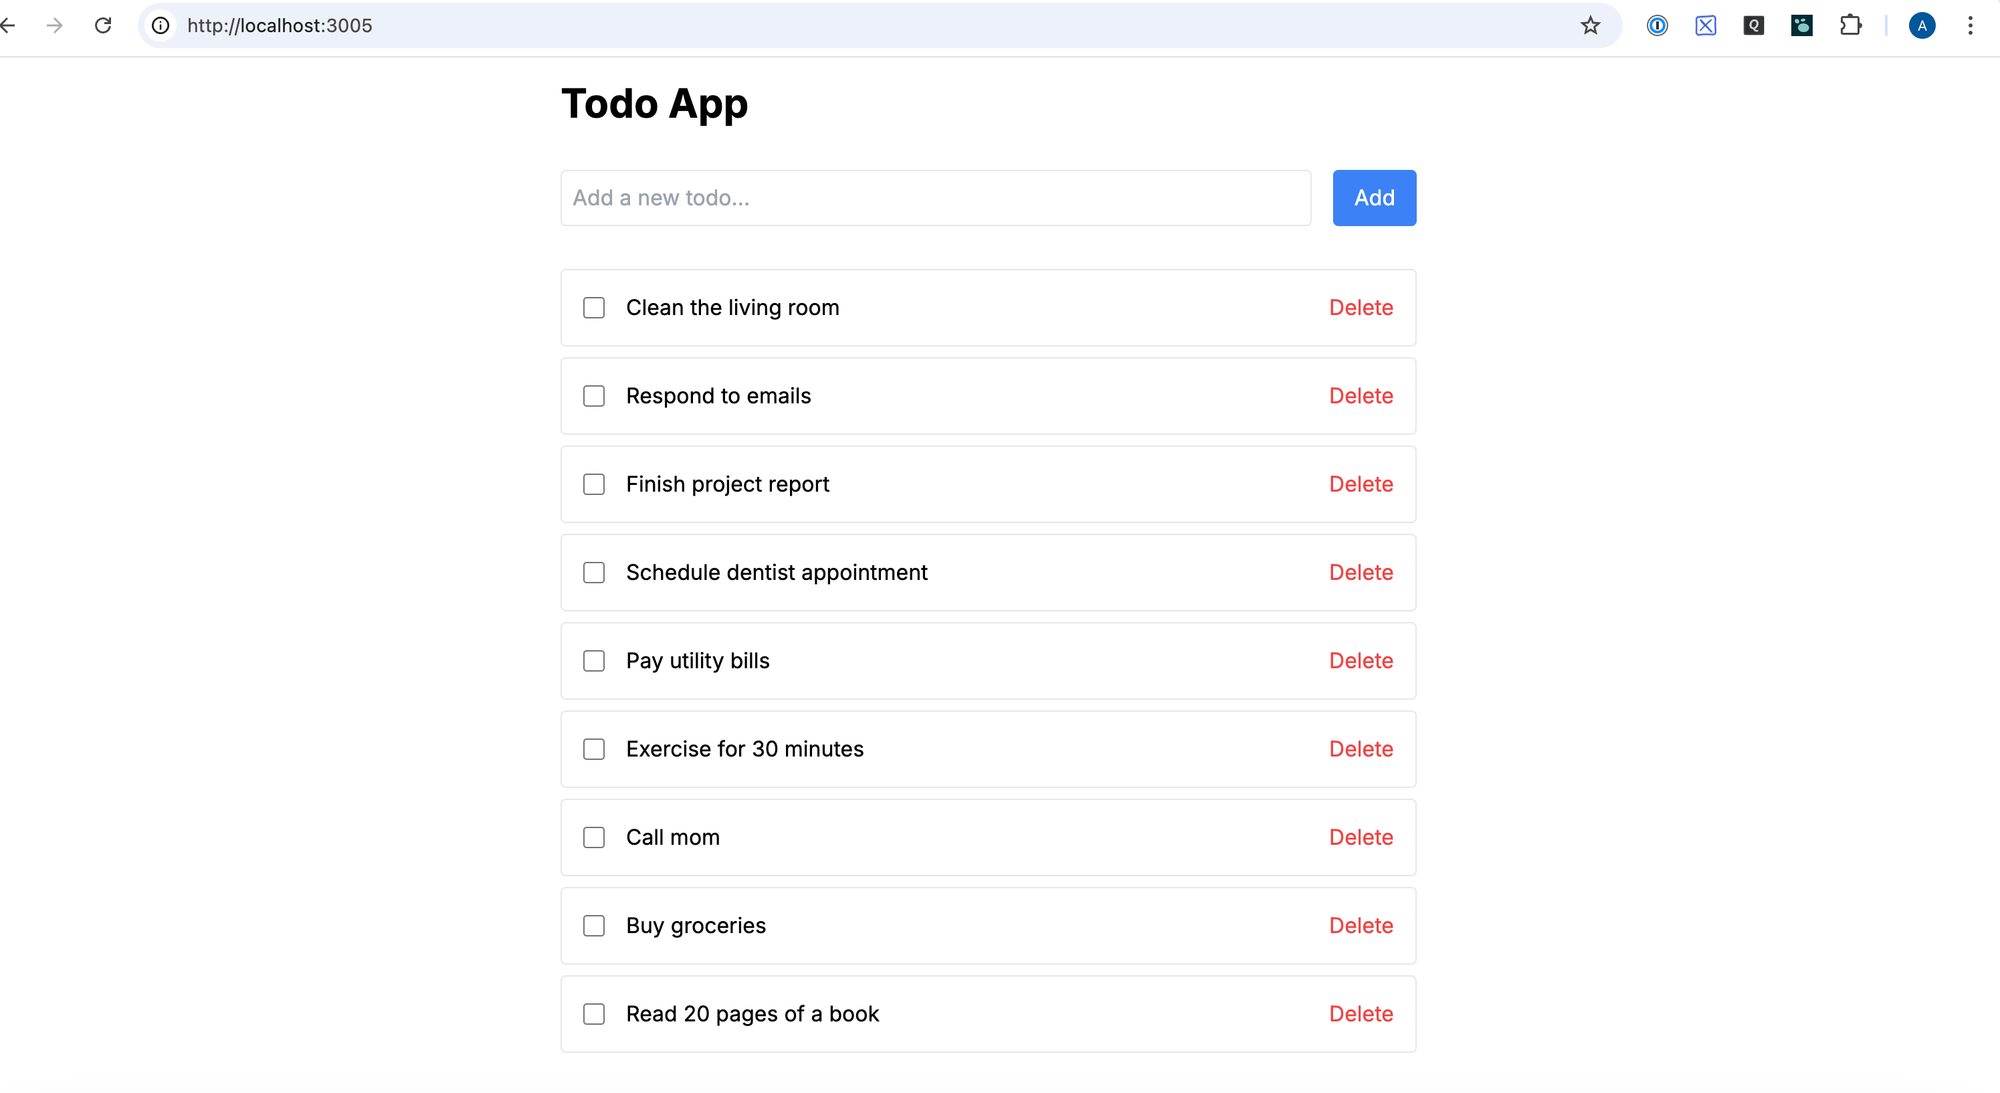
And as you can see, all the todos we created in the agent are visible here.
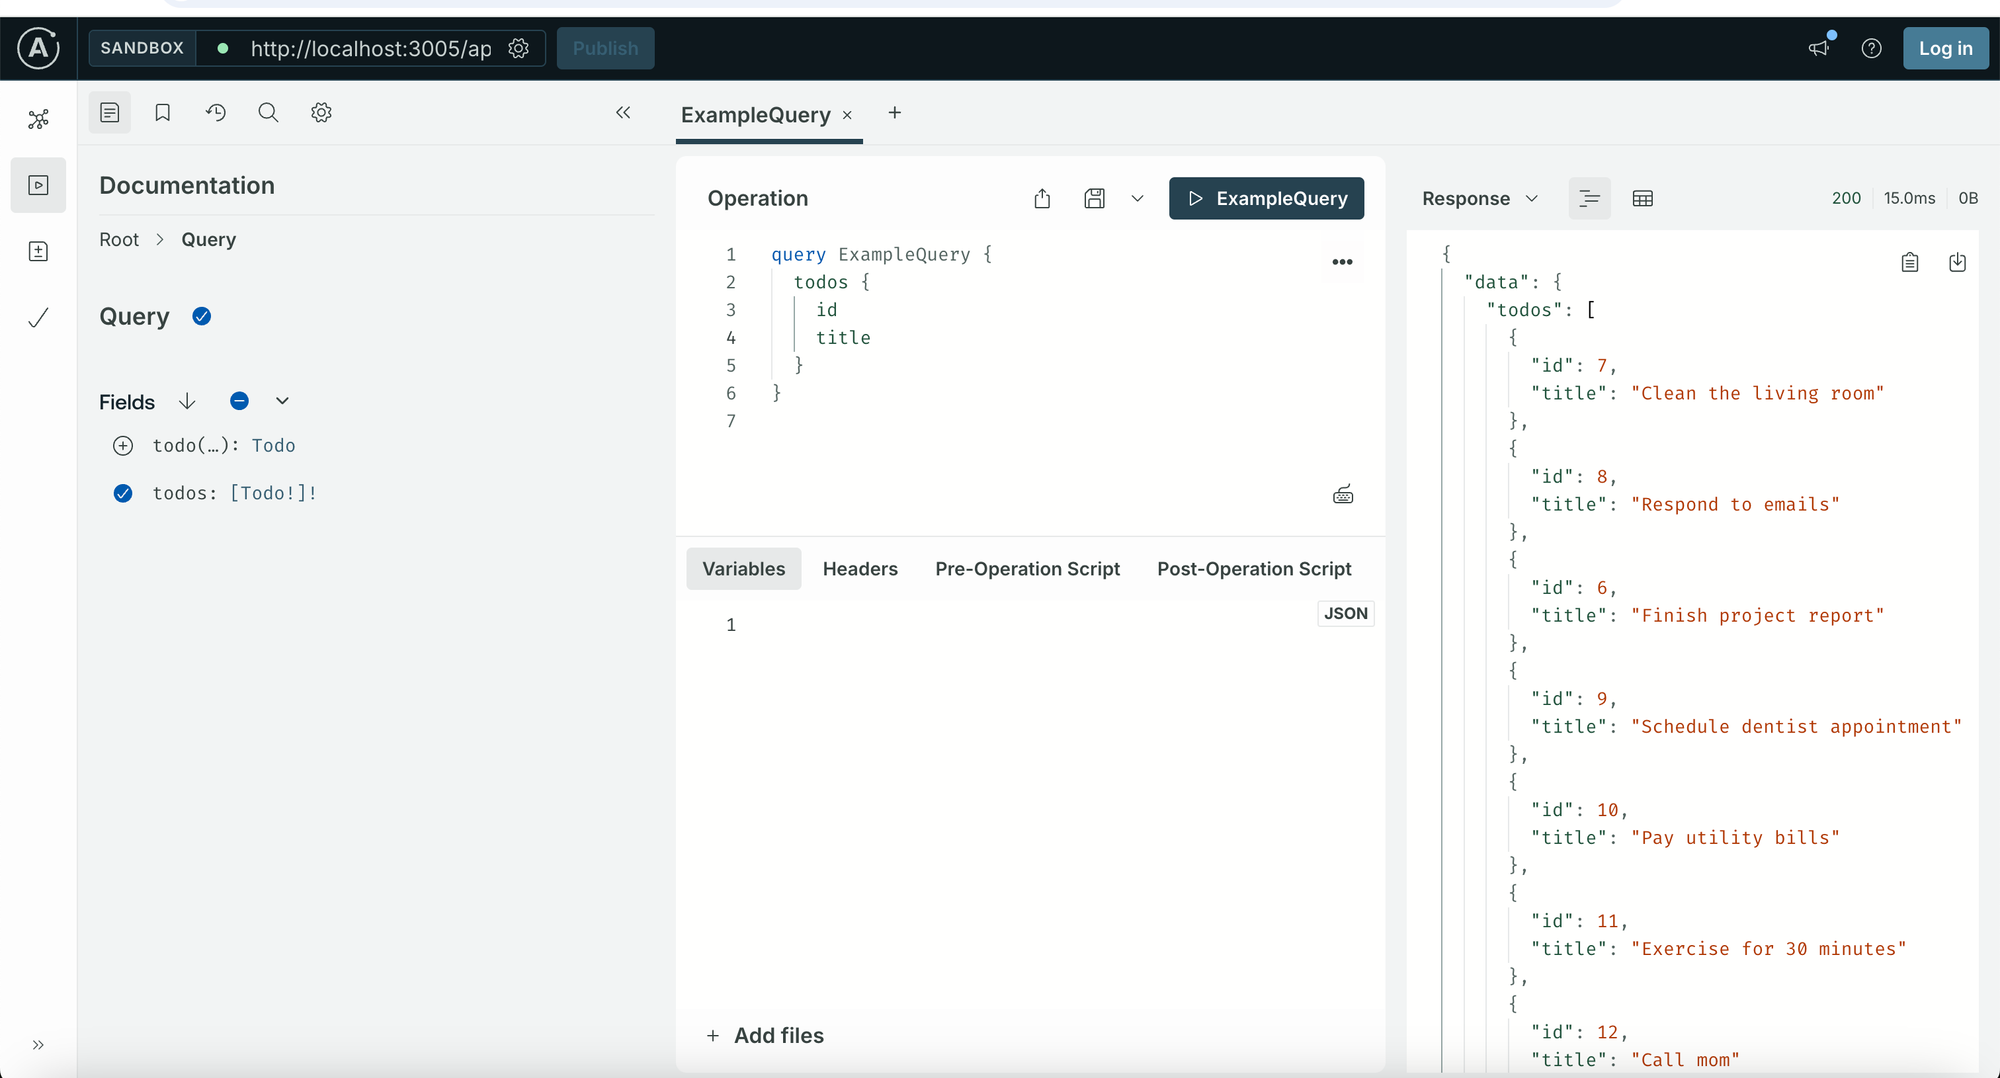
And also visible in the GraphQL Playground.
Mission accomplished 😄
Wrap up
In this tutorial, we created a GraphQL Next.js todo application, then created an agent in n8n and equipped it with the todo API using a single component. With the flexibility and power of GraphQL, the agent can determine which method to call and which data to fetch based on the user's needs, saving us the time of creating a component for each endpoint and avoiding fetching more data than we need (one of the biggest benefits of GraphQL).
What's next:
You can take this a step further and make it publicly available or integrate it into any website, like here.
Read more about the incredible power of n8n and many other features in the documentation.