How to paste an image as Text with Groq AI on Apple Devices
Unlock the power of image recognition with our guide on creating an Apple workflow using Groq AI! This tool transforms images into descriptive text, bridging the gap between visual and textual content. Perfect for bloggers and online store managers, it enhances accessibility and SEO while saving ...


Large language models are getting smarter at interpreting images, almost as we humans do. The challenge, however, is to combine them with other types of information, such as text, without losing the link between them, i.e. the context of the image.
This happens because images and text are passed separately through different channels, even if they’re inserted together in the same prompt. For example, you might have an image in a blog post, but the AI model processing that content will only see the text, not the image itself.
In this guide, we'll explore how to set up an Apple workflow (Shortcut) that turns images into descriptive text using Groq AI, an inference engine that is much faster than any other LLM, including OpenAI and Claude.
This descriptive text can be used for instant image captioning. It also ensures that Large Language Models like OpenAI understand the context of your images, which they might struggle with if provided only fragments of text.
In the end, we should have something like this:
Why Groq?
In my experience, Groq was able to describe an image with a standard resolution of 1024x1024 in approximately 3 seconds. Additionally, Groq offers its services as completely free (at least for now), making it an attractive choice for almost realtime image captioning.
If you prefer using another provider for any reason, you can certainly do so. Simply swap the model URL, model, and API key. This process is straightforward if the provider is OpenAI compatible. Otherwise, integration might be a bit more complex, similar to the Gemini integration discussed in my previous post.
Want to download instead?
If you're short on time or prefer a quick solution, you can simply download the shortcut and have it running in just 2 minutes. By using the shortcut, you'll be directly supporting our efforts to bring these ideas to life.
Introducing the Image Description Workflow
This workflow allows you to generate descriptive text for any image you encounter. Whether you're managing a blog, an online store, or any content-rich platform, having descriptive captions can significantly enhance your content's value and accessibility.
Ok, so let's get started.
Step 1: Configure the Workflow
The workflow can be triggered in one of two ways:
- Copying the Image: Copy the image to your clipboard and start the workflow manually (e.g., via the Services menu or a keyboard shortcut).
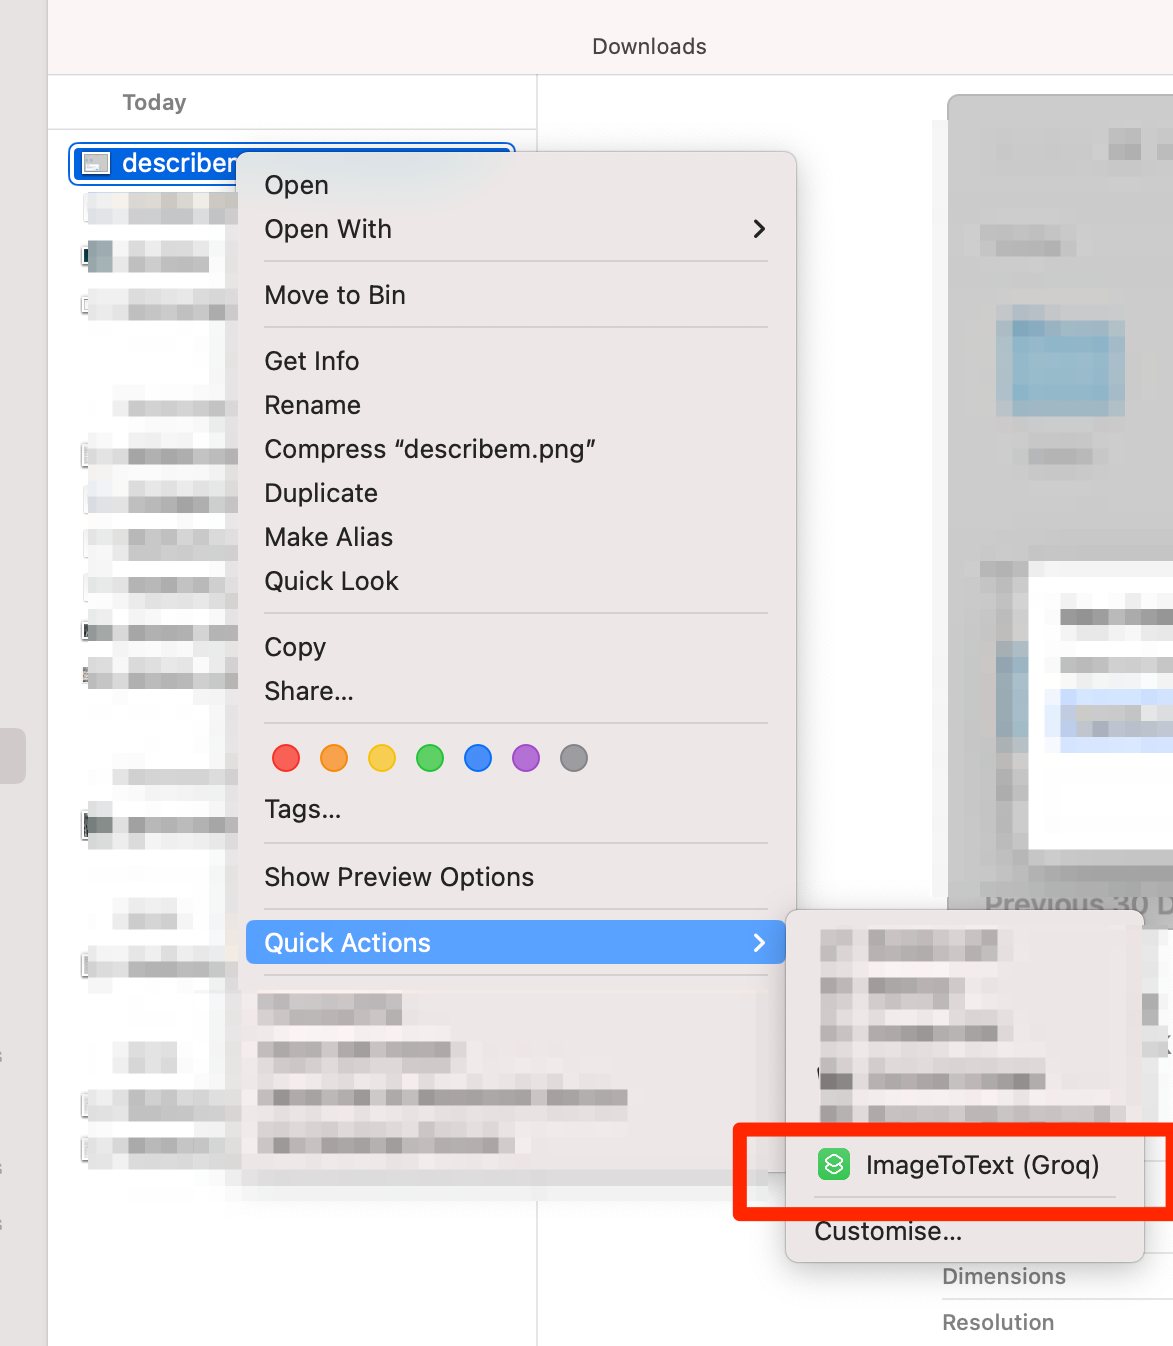
- Quick Actions: Select an image file and start the workflow from the Quick Actions menu in your file system.

Adding the API Key
First, you need to add your Groq API key to the workflow. If you don’t have an API key yet, you can sign up here (currently free).
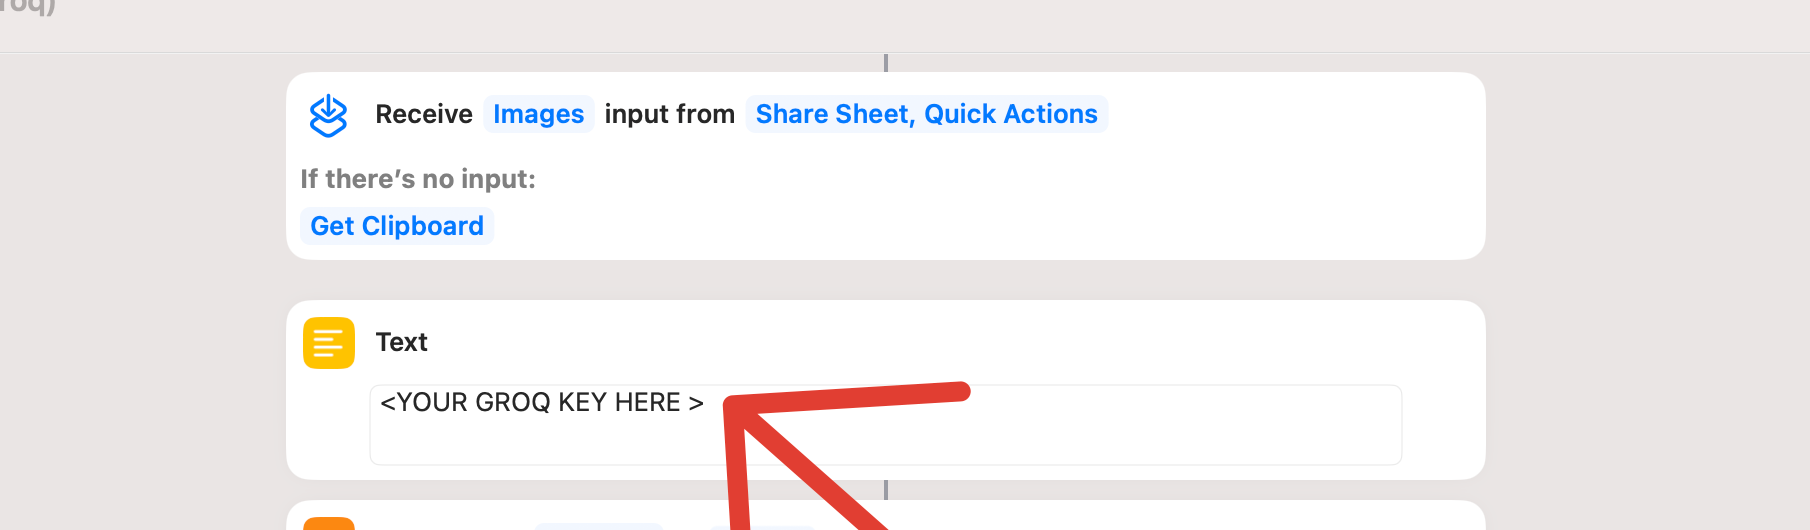
- Add the API Key: Insert your Groq API key in the designated field within the workflow.
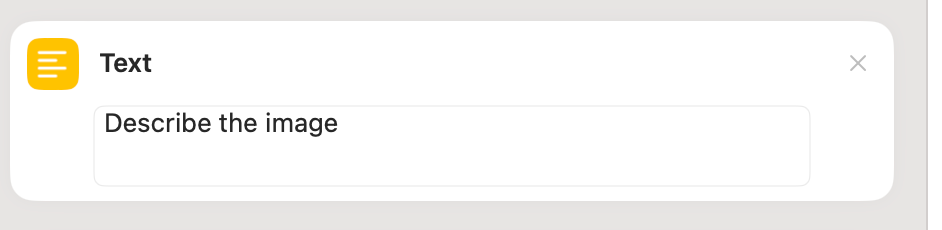
- Prompt Configuration: Add a prompt to instruct the LLM on what to do with the image. For this use case, "describe the image" is a great starting point. You can expand this with more complex prompts to enforce a specific output structure or length.
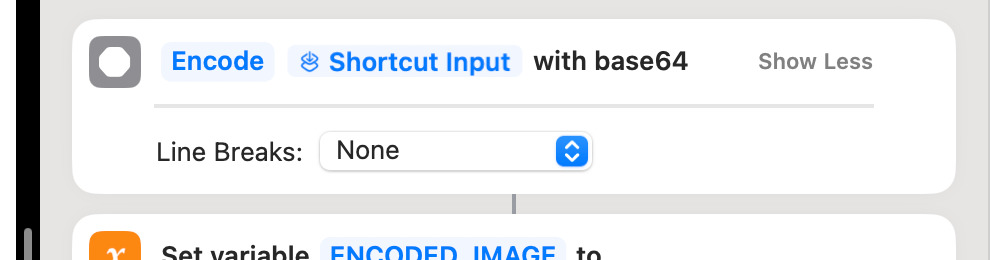
Step 2: Encode the Image
To process the image with Groq, it needs to be encoded in base64.
- Encode Image to Base64: Use the "Encode Base64" action and select the image from the input.
Step 3: Make the HTTP Request to Groq
Now, set up the actual request to Groq’s API.
- API Endpoint Configuration:
- URL:
https://api.groq.com/openai/v1/chat/completions - Model Name:
llava-v1.5-7b-4096-preview - Variables to Pass:
- API Key
- Encoded Image
- User Prompt
- URL:
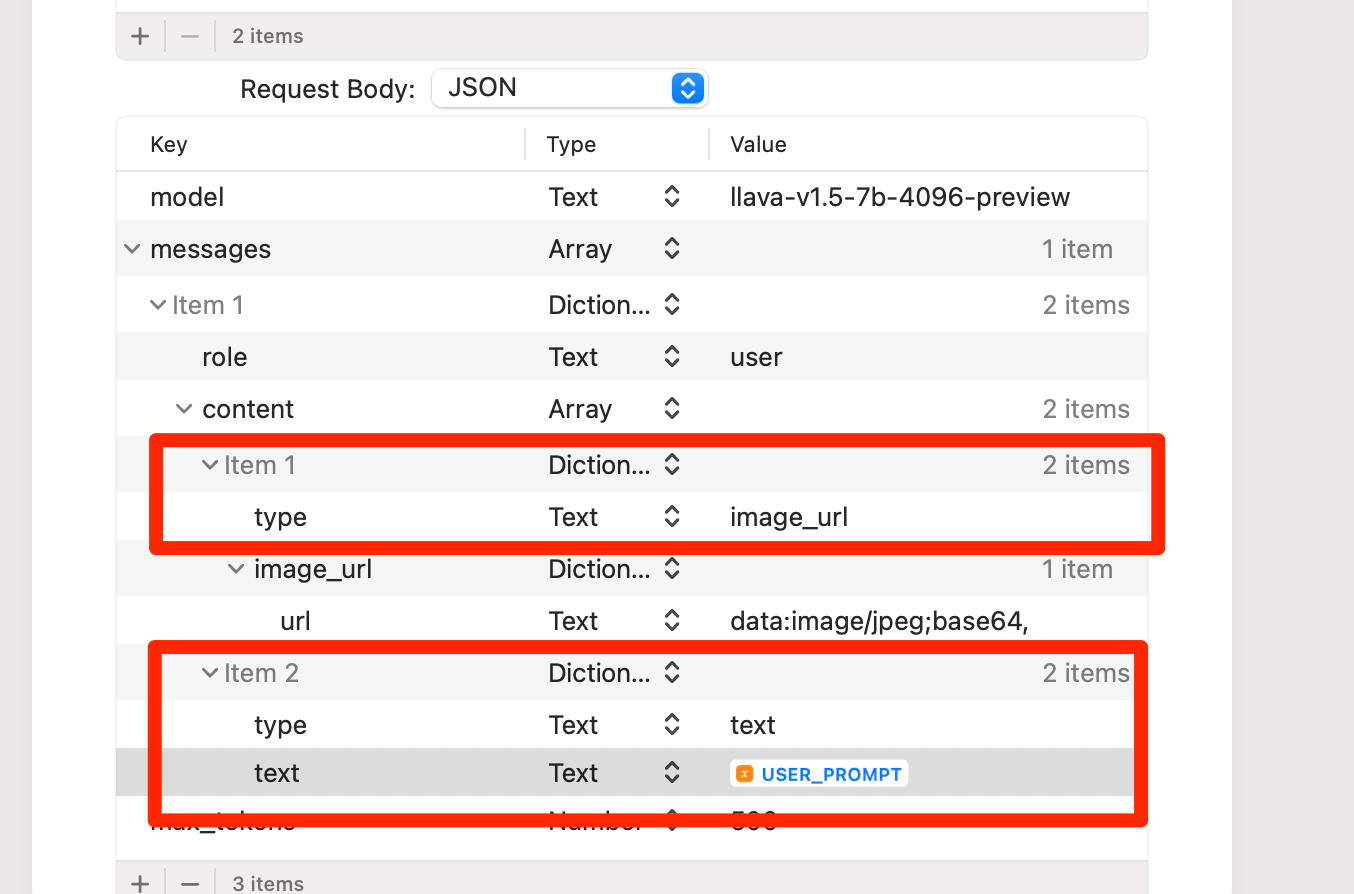
- HTTP Request Action: Add an HTTP request action to send the image data and prompt to the Groq API.
Step 4: Extract and Process the Response
After the request is made, extract the descriptive text from the response.
- Extract Result: Use an action to parse the JSON response and extract the relevant text.

- Copy to Clipboard (Optional): Optionally, copy the extracted description to your clipboard for easy pasting.

Step 5: Integrate the Workflow into Your File System
You can trigger the workflow in one of two ways:
- Manual Trigger:
- Copy and Paste: Copy an image to your clipboard and run the workflow manually via the Services menu or a keyboard shortcut.
- Quick Actions:
- File Selection: Select an image file in your file system and run the workflow from the Quick Actions menu.
Now, you should be able to trigger the workflow as follows:
Testing the Workflow
- Using Copy and Paste:
- Copy an Image: Copy an image to your clipboard.
- Run the Workflow: Execute the "Describe Image" shortcut.
- Paste Description: Paste the generated description wherever needed.
- Using the Right-Click Menu:
- Select an Image: Right-click on an image in a supported application.
- Run the Workflow: Select Services -> Describe Image.
- View Description: The description will replace or accompany the image based on your setup.
Conclusion
With this workflow, you can effortlessly generate descriptive text for any image, enhancing your SEO, enabling better AI analysis, and improving accessibility. Whether you’re a content creator, marketer, or developer, these automated descriptions can save time and boost your digital presence.