Create Stunning POD Mockups with Your Logo Using Flux AI and Segmind
Unlock the power of AI image generation with this guide on fine-tuning models to create stunning visuals for your brand! Discover how to overcome limitations when AI doesn't recognize your logo or icon, using tools like FLUX and Stable Diffusion. Learn step-by-step methods to generate unique merc...
AI image generators such as FLUX and Stable Diffusion (I refer to them as models) can generate stunning images that can bring a lot of attention to a person or brand. One of the images I remember going crazy viral was a picture of the Pope wearing a puffer jacket. It was hilarious and got a lot of attention.
This image was generated with a single prompt, and it was possible to generate it because the AI (Midjourney as far as I know) already knew all the subjects in the picture (Pope Francis and the puffer jacket).
The applications are endless because the generators were pretrained on many other things that we could combine to generate crazy stuff.
The problem
But what if the AI model does not know the subjects that should be part of the picture, for example a brand logo or icon? This could be the case if the brand is not as popular as a big brand with hundreds of thousands of images and media on the internet used to train these models.
Here is an example
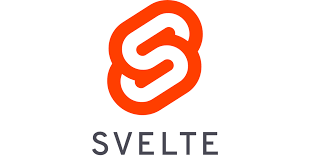
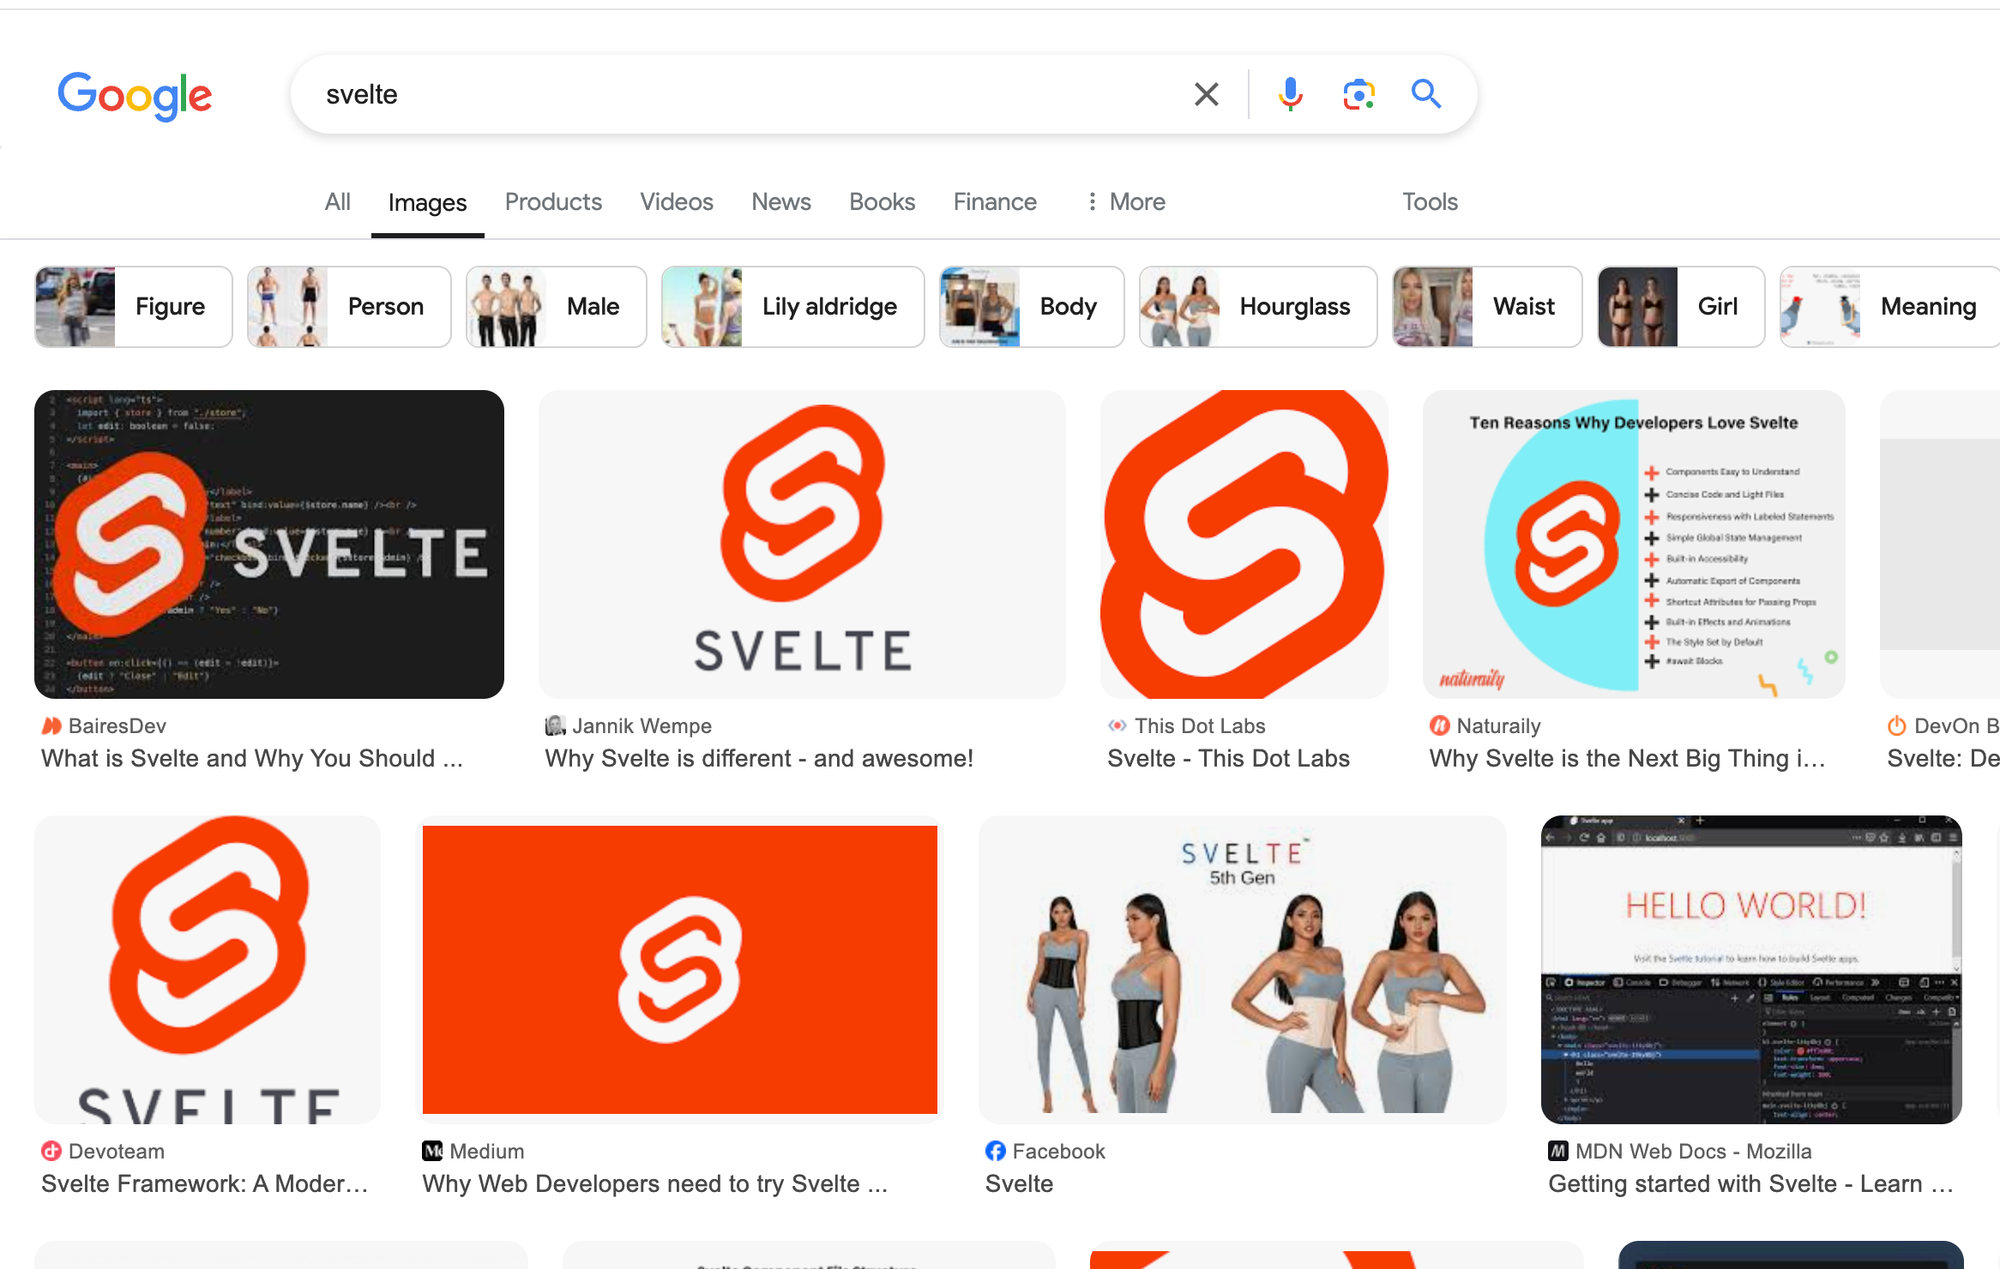
In the course of this tutorial we will be using the logo of one of my favourite Open Source UI frameworks called Svelte. This is what the logo usually looks like when you Google it.
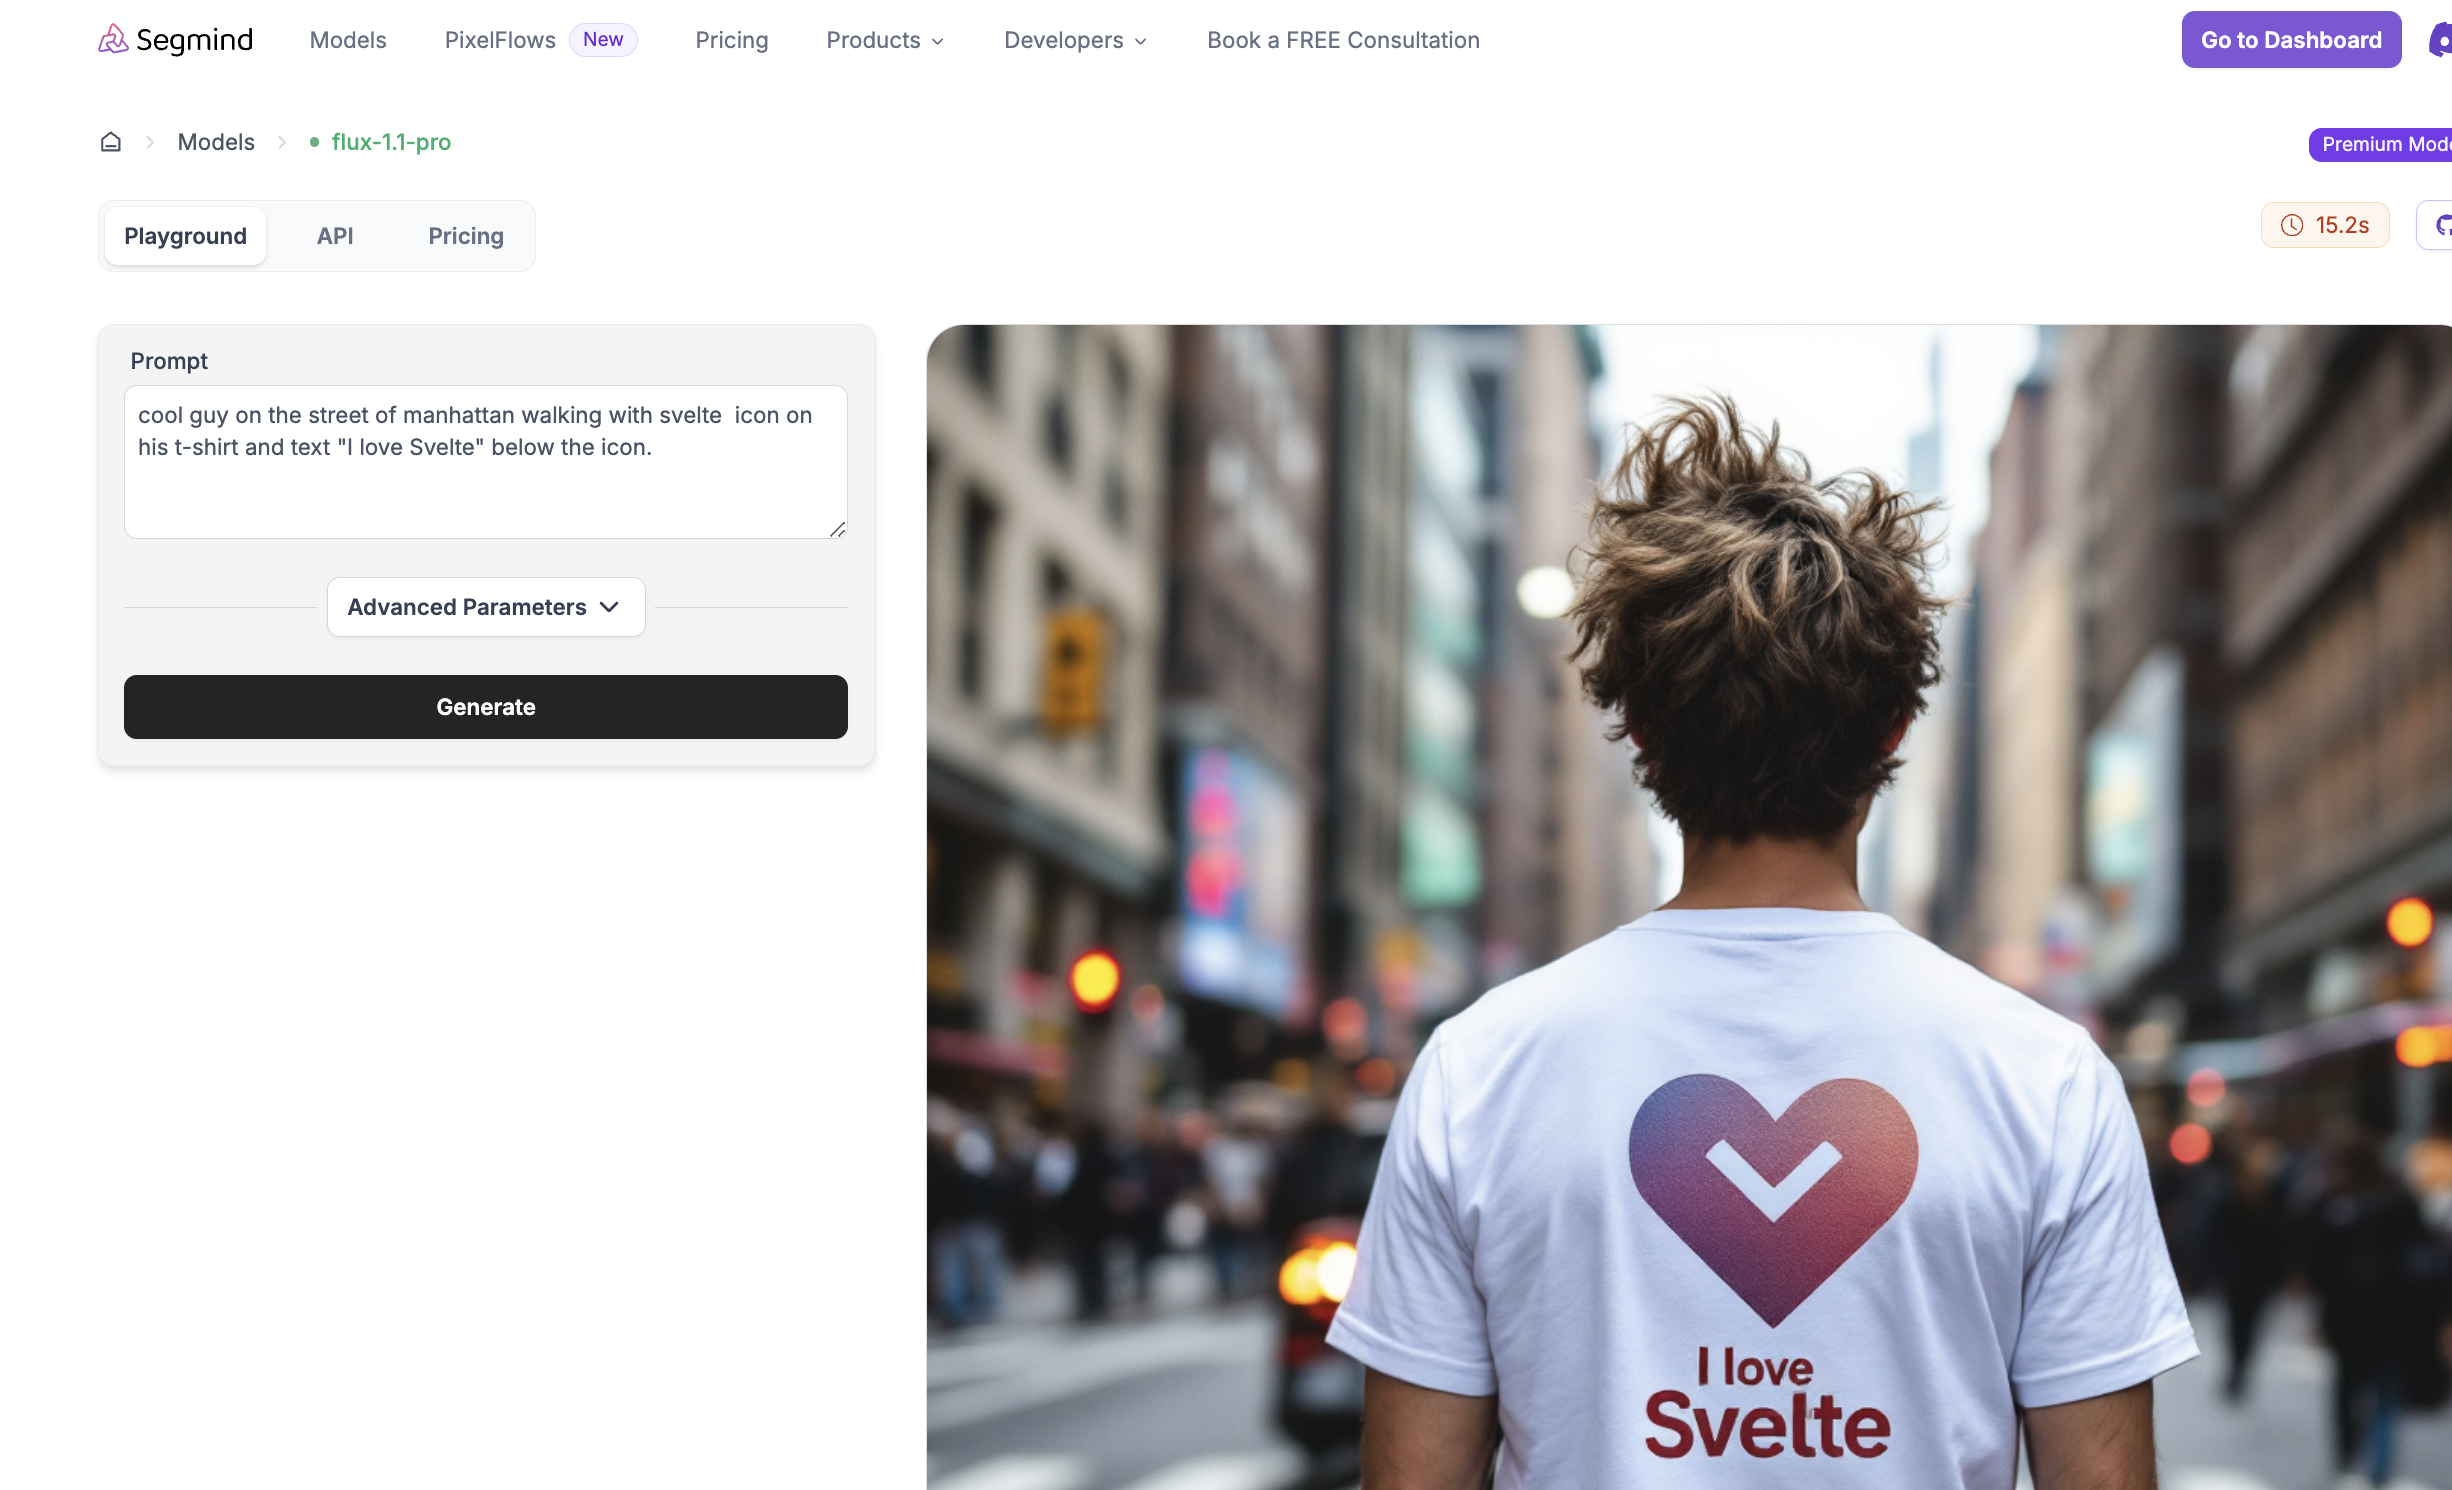
If we ask the Foundation Flux model (not fine-tuned) to generate a scene with this look, it will fail because it does not know what it looks like.
Here is what I get on Segmind:
And on Replicate with a different set of parameters, it does not look much different. The icon is not the Svelte icon.
I tried it on different platforms and it does not look much different.
Flux does not really know how the Svelte icon looks like.
The solution
Instead of trying to describe the shape of your brand or logo, which can be difficult in most cases, you could fine-tune the model with the subject you want to have in the generated images. These themes can be anything:
- shapes
- Logos
- People
- Literally anything
These objects don't exist in a vacuum, of course, but the real power and creativity comes, as with pre-trained objects, from combining them with other custom or generic objects to create stunning images that can be used for marketing.
An example of this is Merchandising or technically Mockup Generation with a given image or logo of your brand (could even be a person). By fine-tuning the model with this object, you can combine them to create scenes that you can use to advertise your brand or even generate ideas for new products that you can actually sell, for example for Print on Demand.
Here is a concrete example:.
Imagine you have a POD business and you have a creative logo, and you want to see this logo on all sorts of objects, like mugs, T-shirts, etc., in order to attract customers, but also to make new products.
You might say: "But there are already tools that can show me my brand on mugs, etc.".
Well, yes and no. They usually only show you the projection of your logo for predefined shapes and scenes. But with Fine tuning for YOUR own brand you can create an infinite number of scenes and combinations of other objects and the sky is the limit! It's a completely different game.
And here is how you can try to fine-tune an Image Generation model with your own images:
- Get the images to use for fine tuning. There are many options here:
- You already have a set of images.
- You want to use images from the internet (e.g. of a person or logo that you are allowed to use, of course).
- You have only one or very few images. In this case, you may need to synthesise these images to create different variations for fine-tuning.
- Fine tune the model using the images => Fine tuned model.
- Generate new images using the fine-tuned model.
And here is the example of this tutorial we are going to do:
- Download icons from the web for one of my favourite UI frameworks called Svelte (open source). I will use image4ai to do the bulk download form and the same tool to clean up the image for fine tuning.
- Fine tune the Flux model with the downloaded images using a fine tuning as a service from Segmind. You can also use any other framework like Replicate for this.
- Generate images of merchandising like t-shirts and mugs with this icon.
- (Optional) You can also download the weights and run this model locally (not in the scope of this tutorial).
Price and duration
Before we dive into the solution, let's have a quick look at the costs.
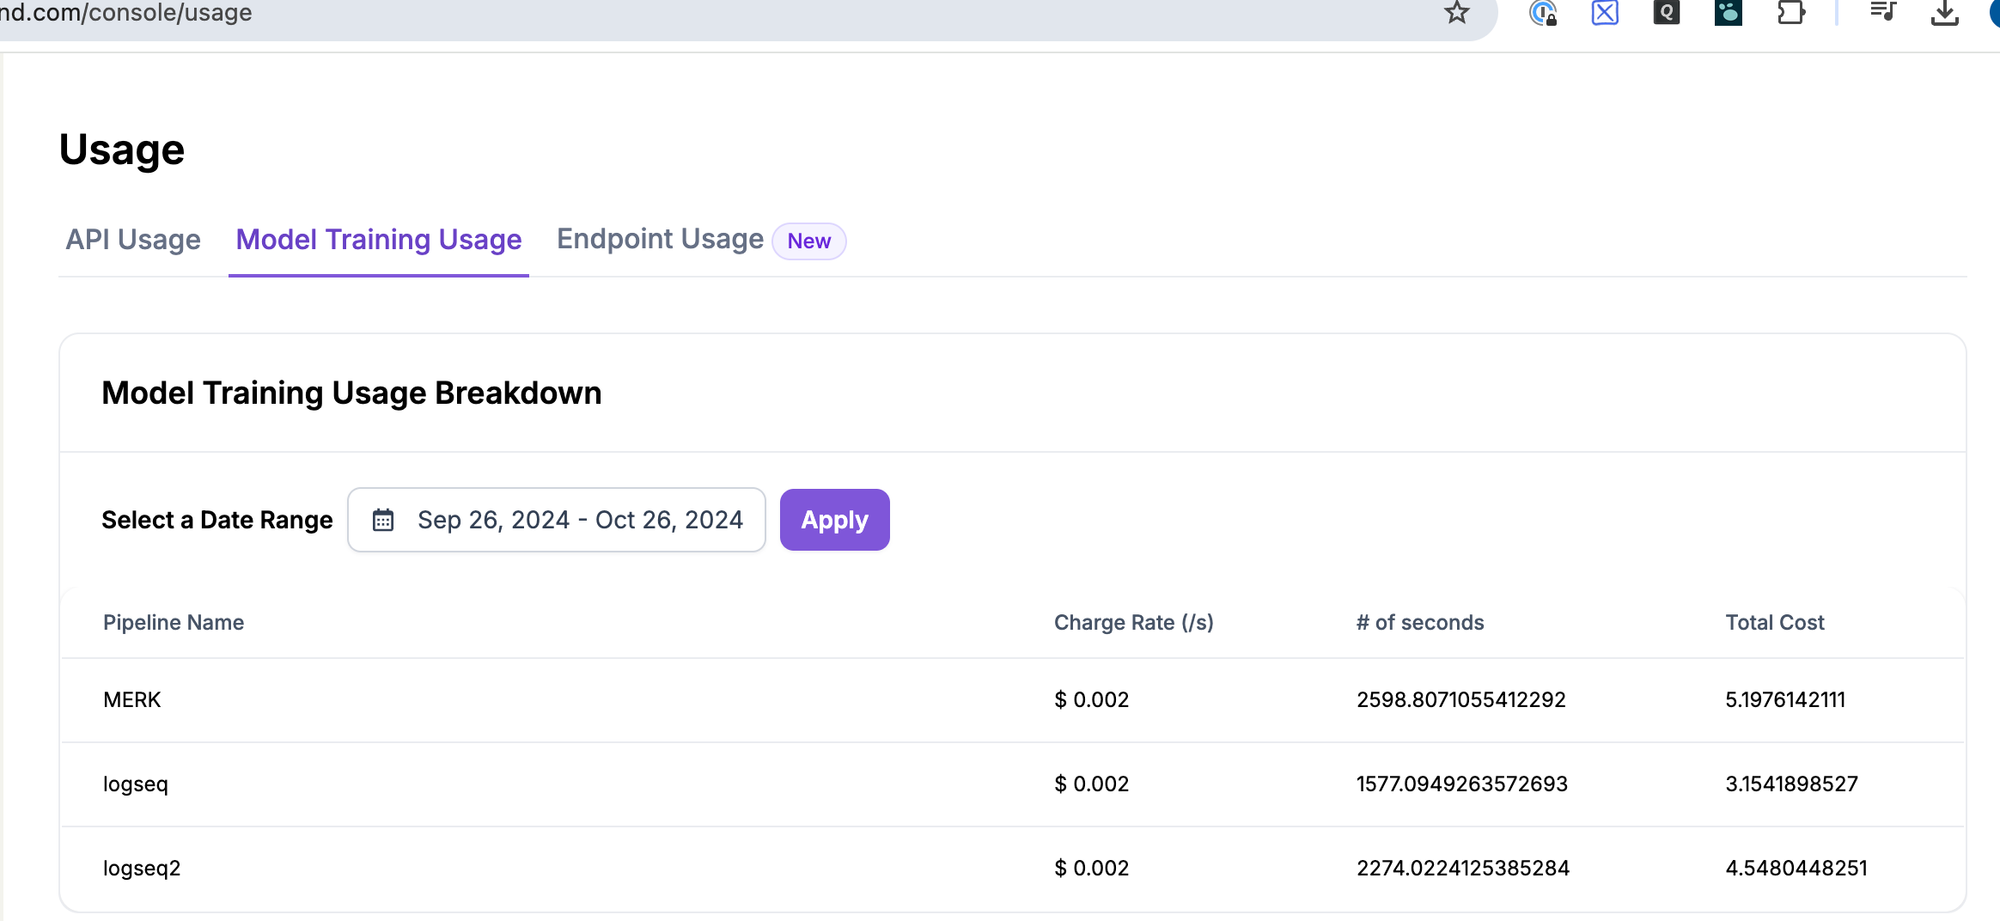
Based on my experience, the fine-tuning jobs for similar examples with about 50-100 imagescost from $3-5. If you use different parameter sets, the cost may vary.
Duration: In most cases it took about 20-25 minutes to complete the fine tuning job on Segmind. From October 2024, they will use A40 GPU for fine-tuning, which costs $0.0020 per second. Here is a snapshot of sample usage reports.
Ok, let's get our hands dirty.
Step by Step
Step 1: Gather data
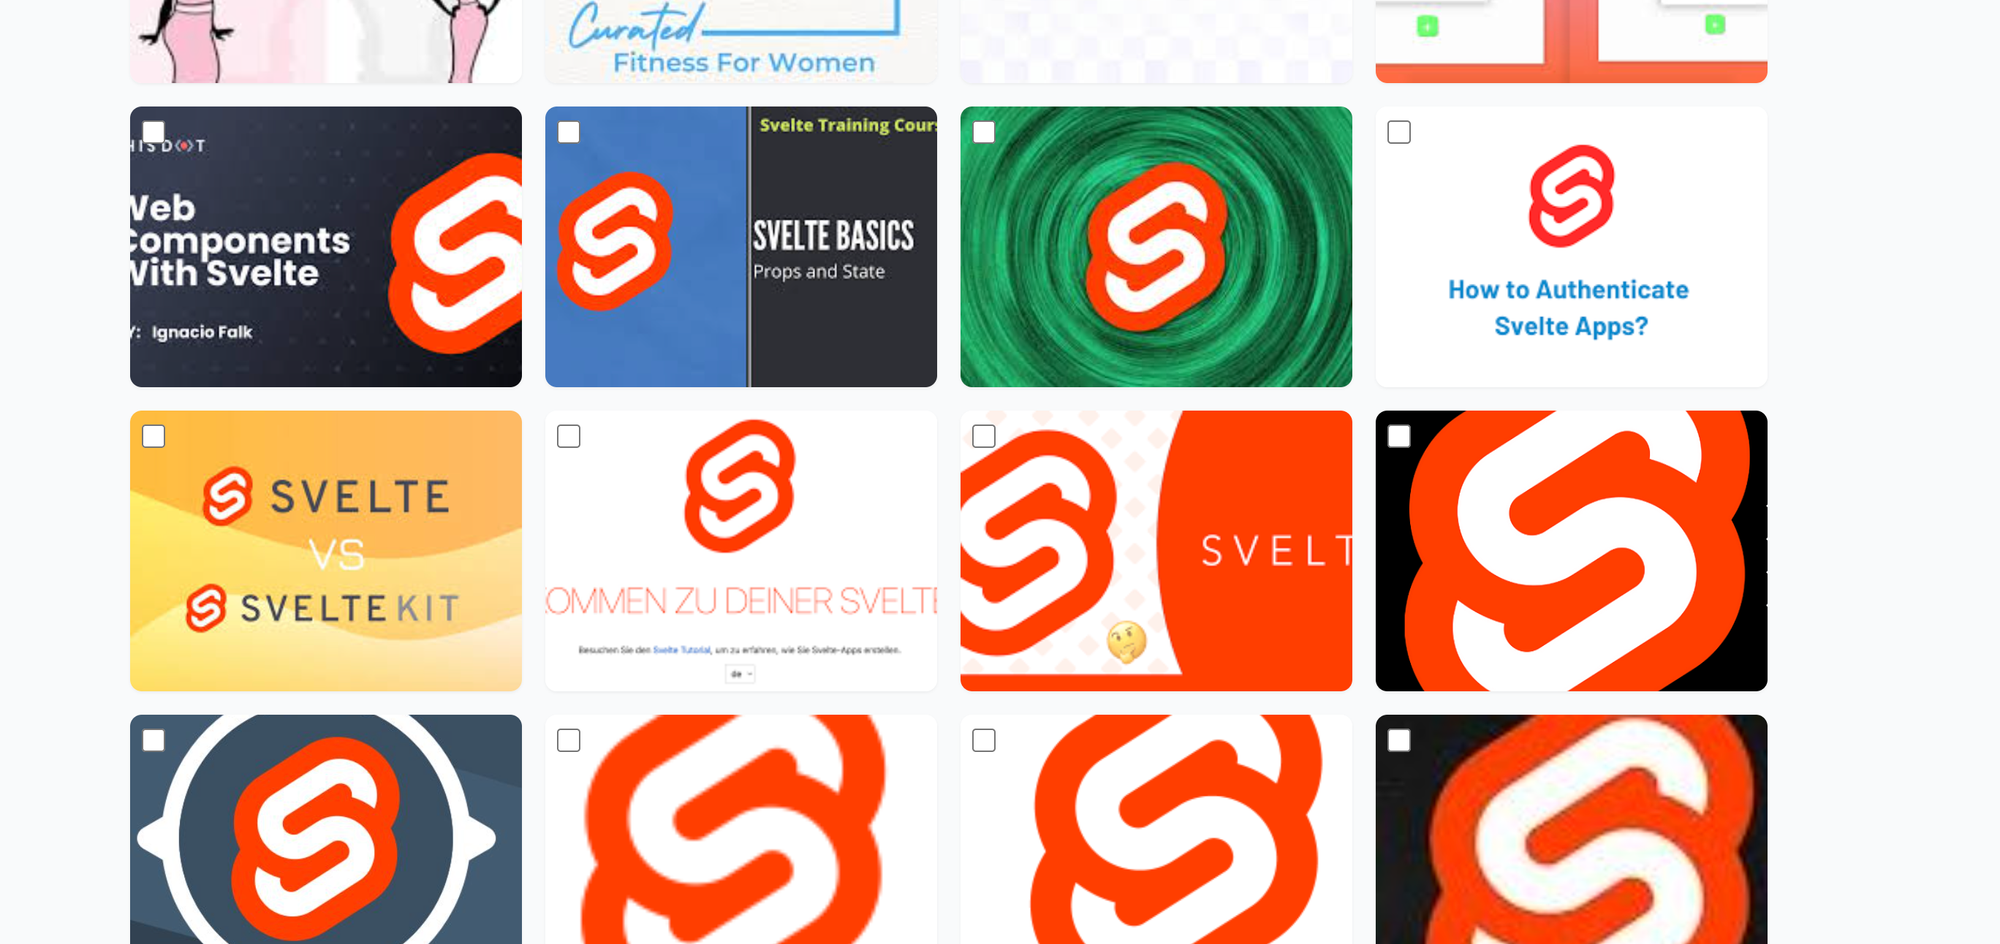
For our test, we will collect the logo of Svelte. Here is how it looks when I click on Google Images.
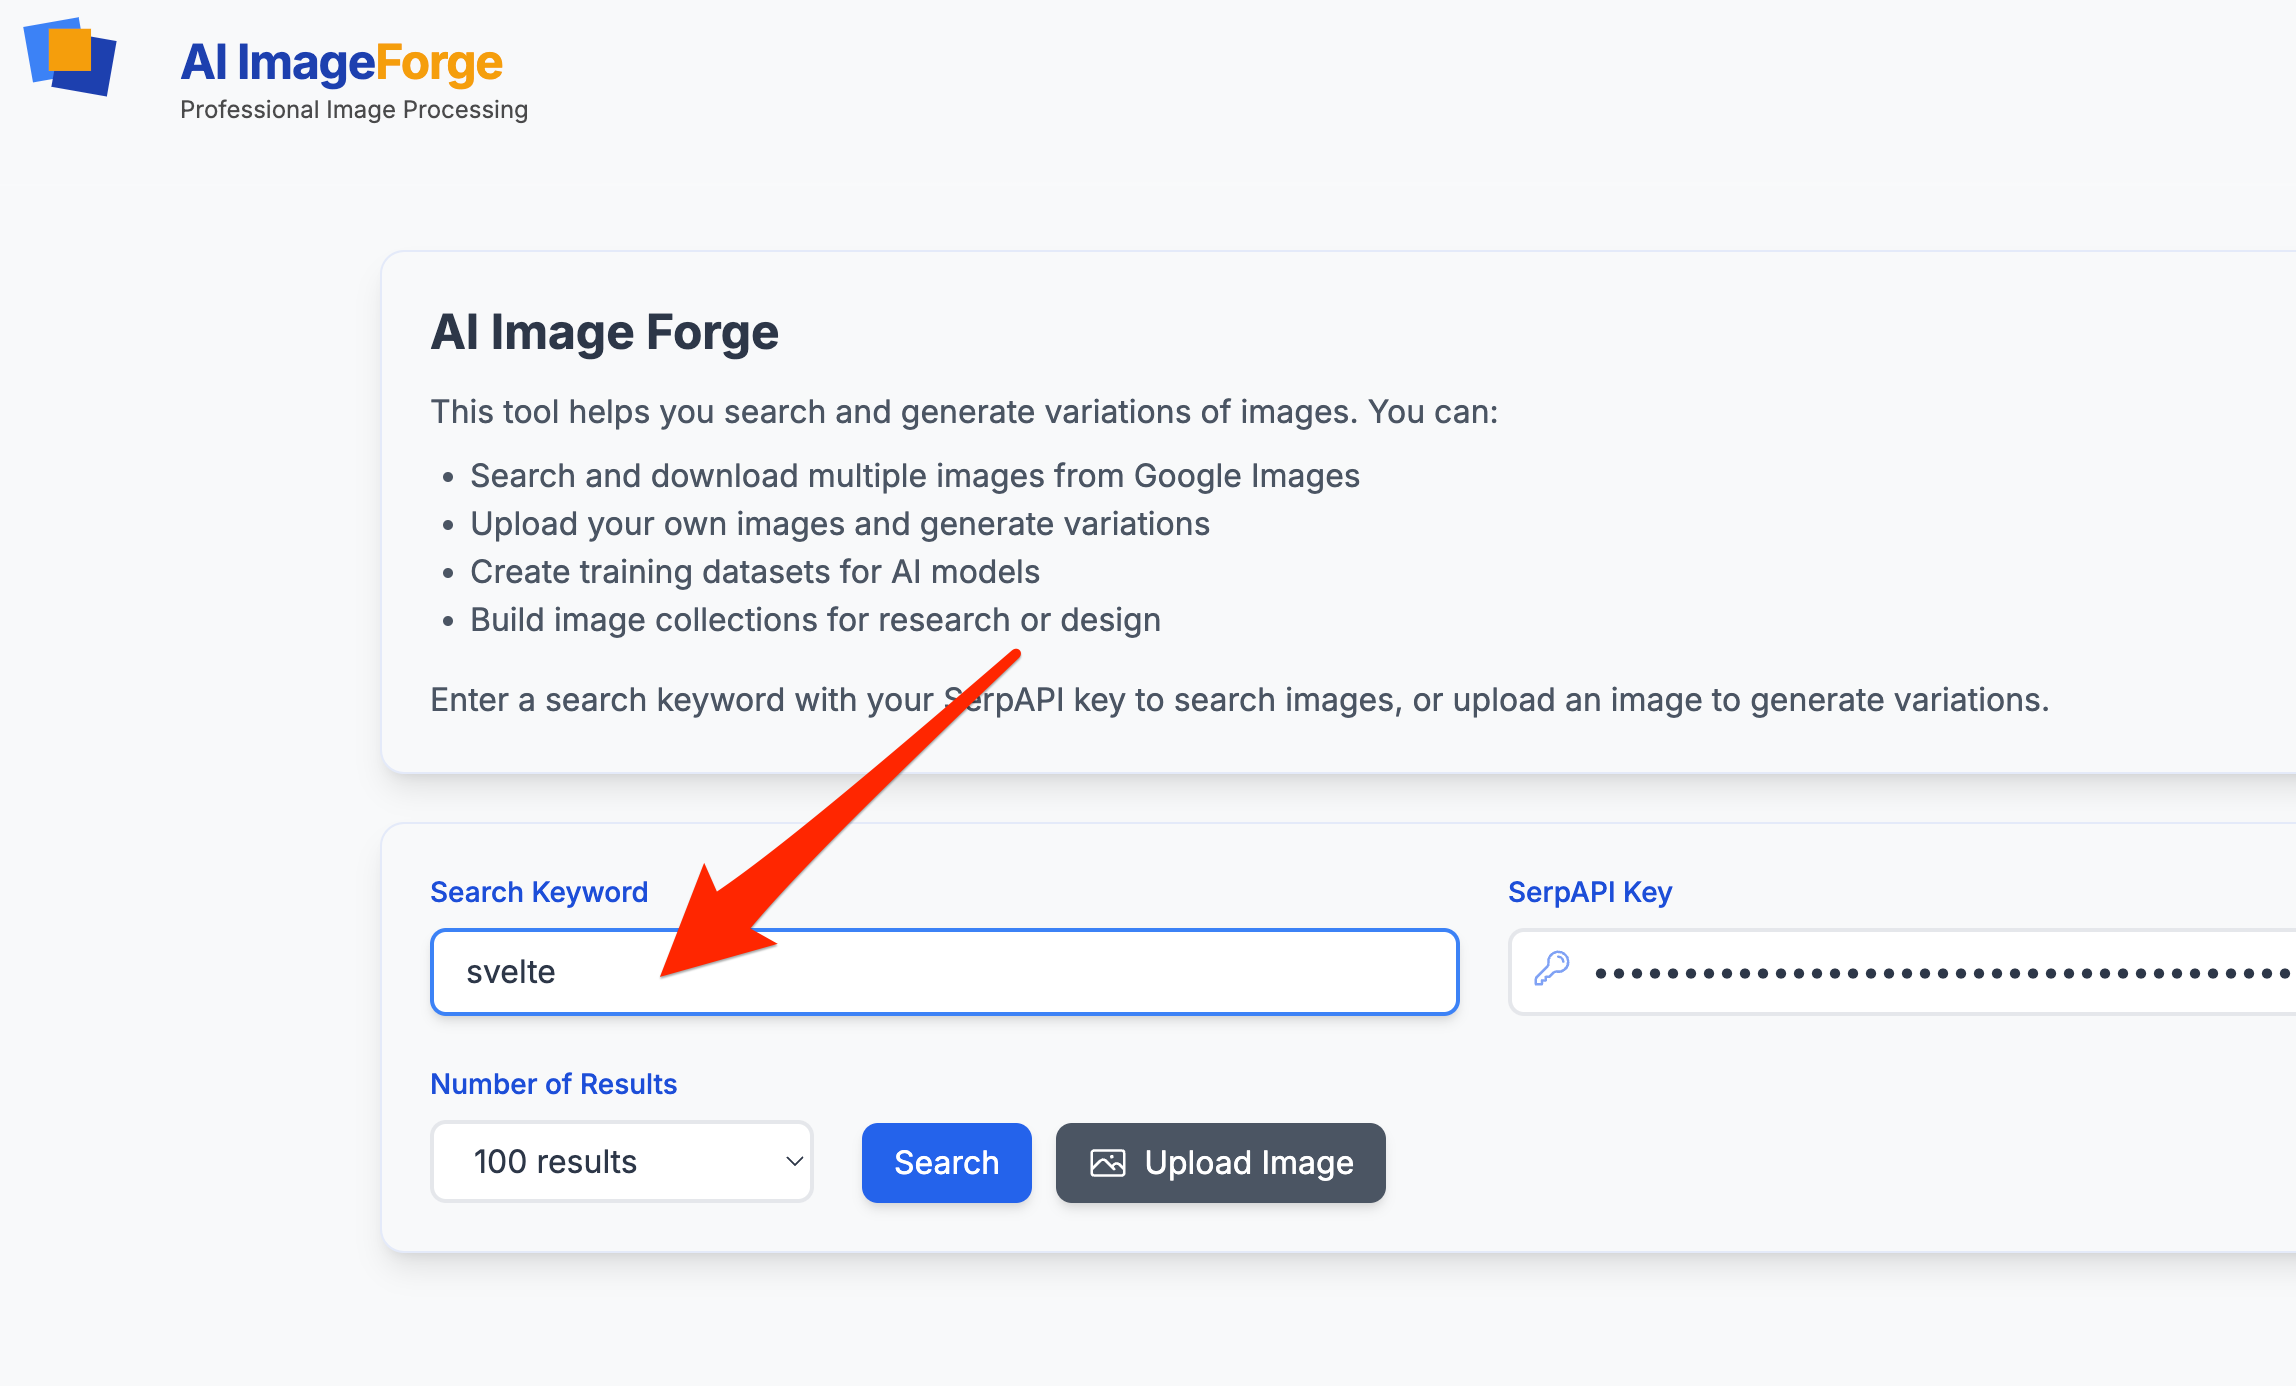
To download them all and prepare them properly, I use image4ai.com.
I can generate images using image4ai with either uploading and generating synthetic image variations or by downloading from the internet.
I select 50 images and crop all the logos and remove results that do not include the logo like this.
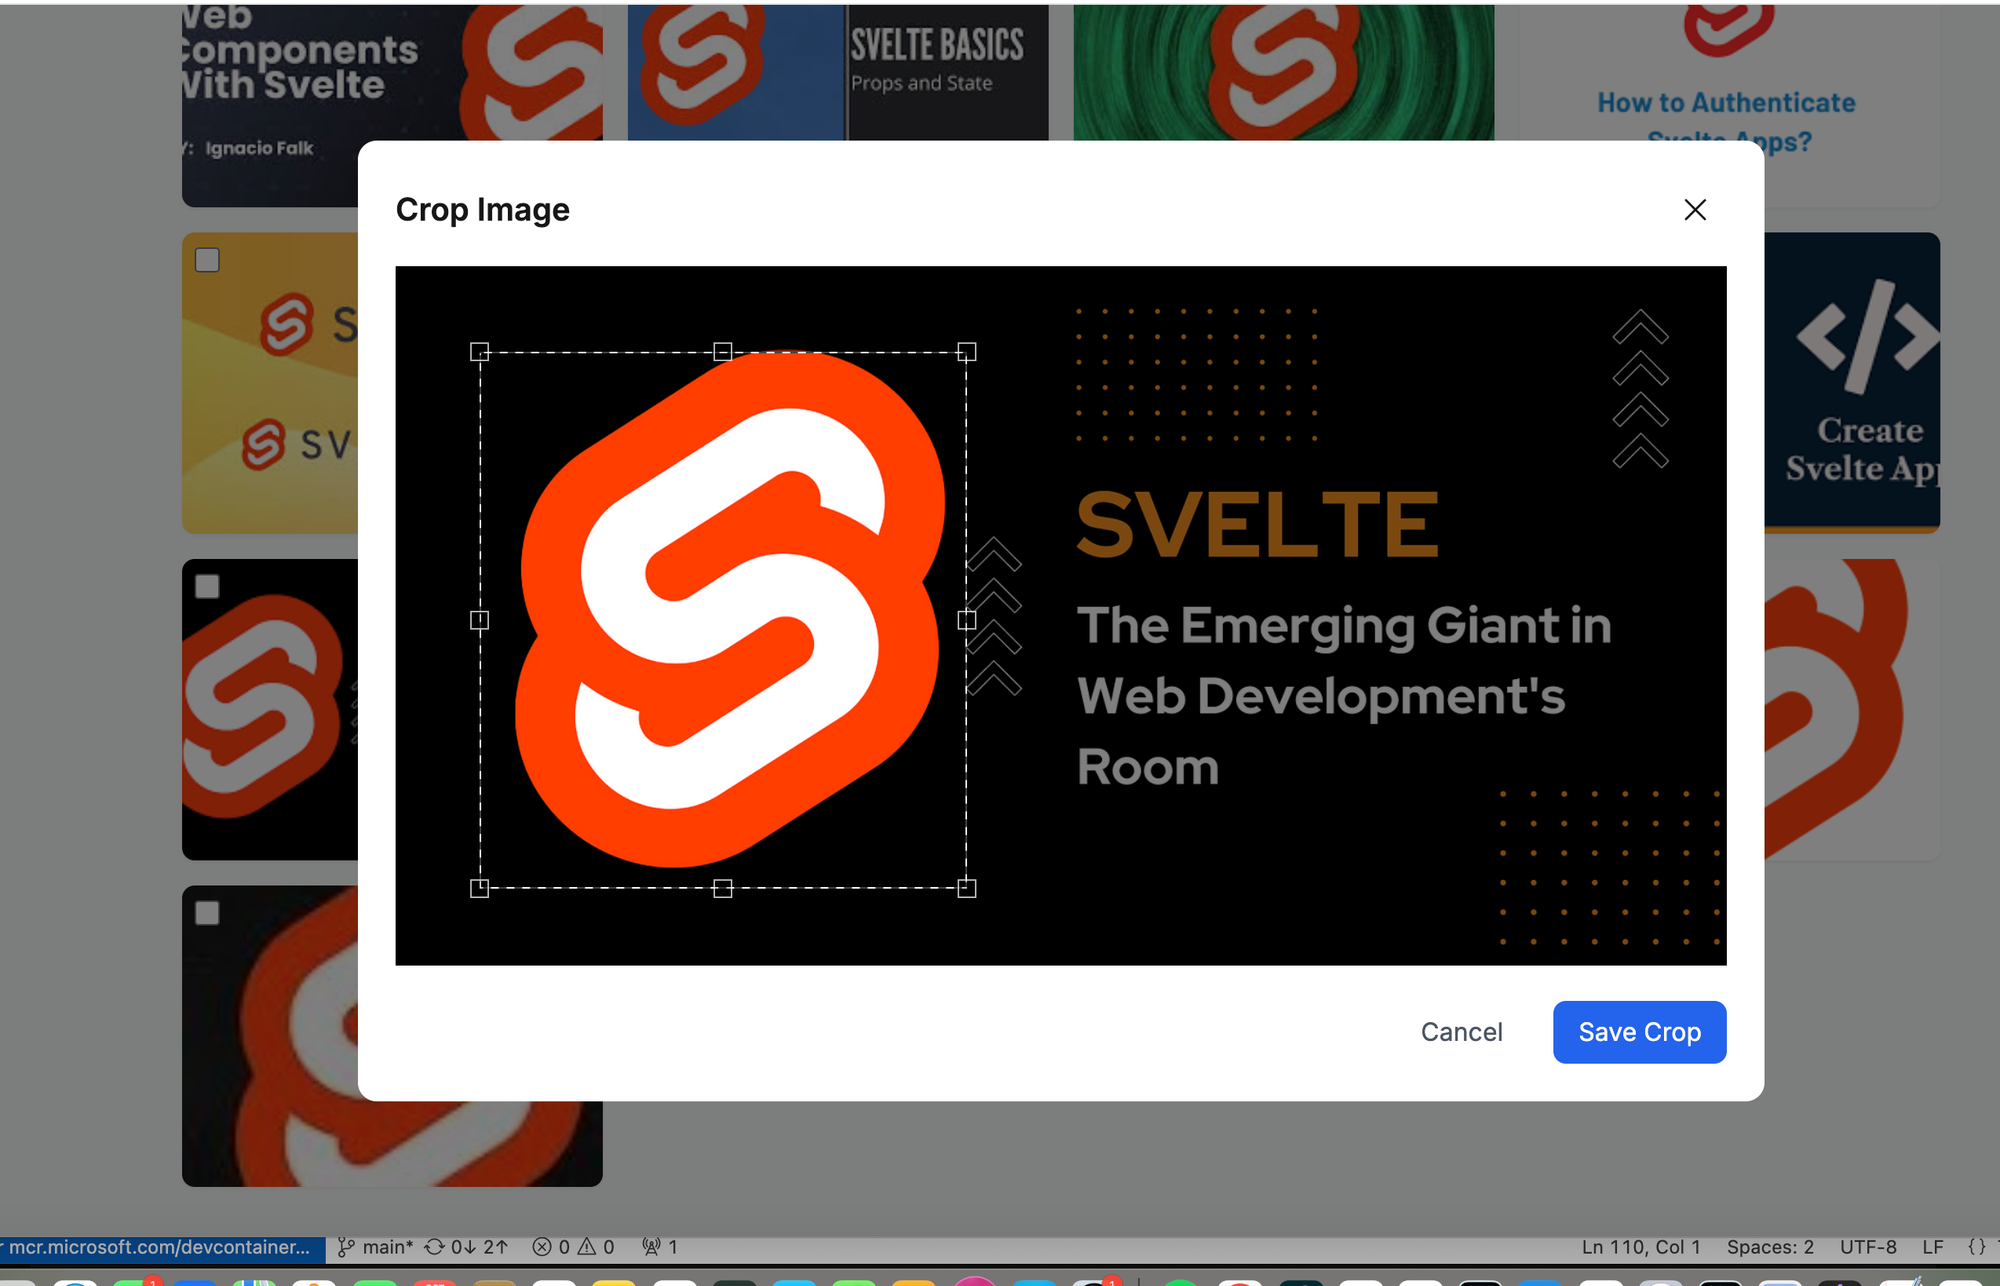
Finally, I download the remaining images. If they are less than 50 it should not be an issue, but 30-50 should be fine.
Note, if you already have an image you can try the experimental feature for synthesizing images from image4ai to generate image variations for your images. I personally got the best results when I used wholly different images from the internet that I cleaned up (cropped etc.) before fine-tuning.
Step 2: Start the fine-tuning job with the images
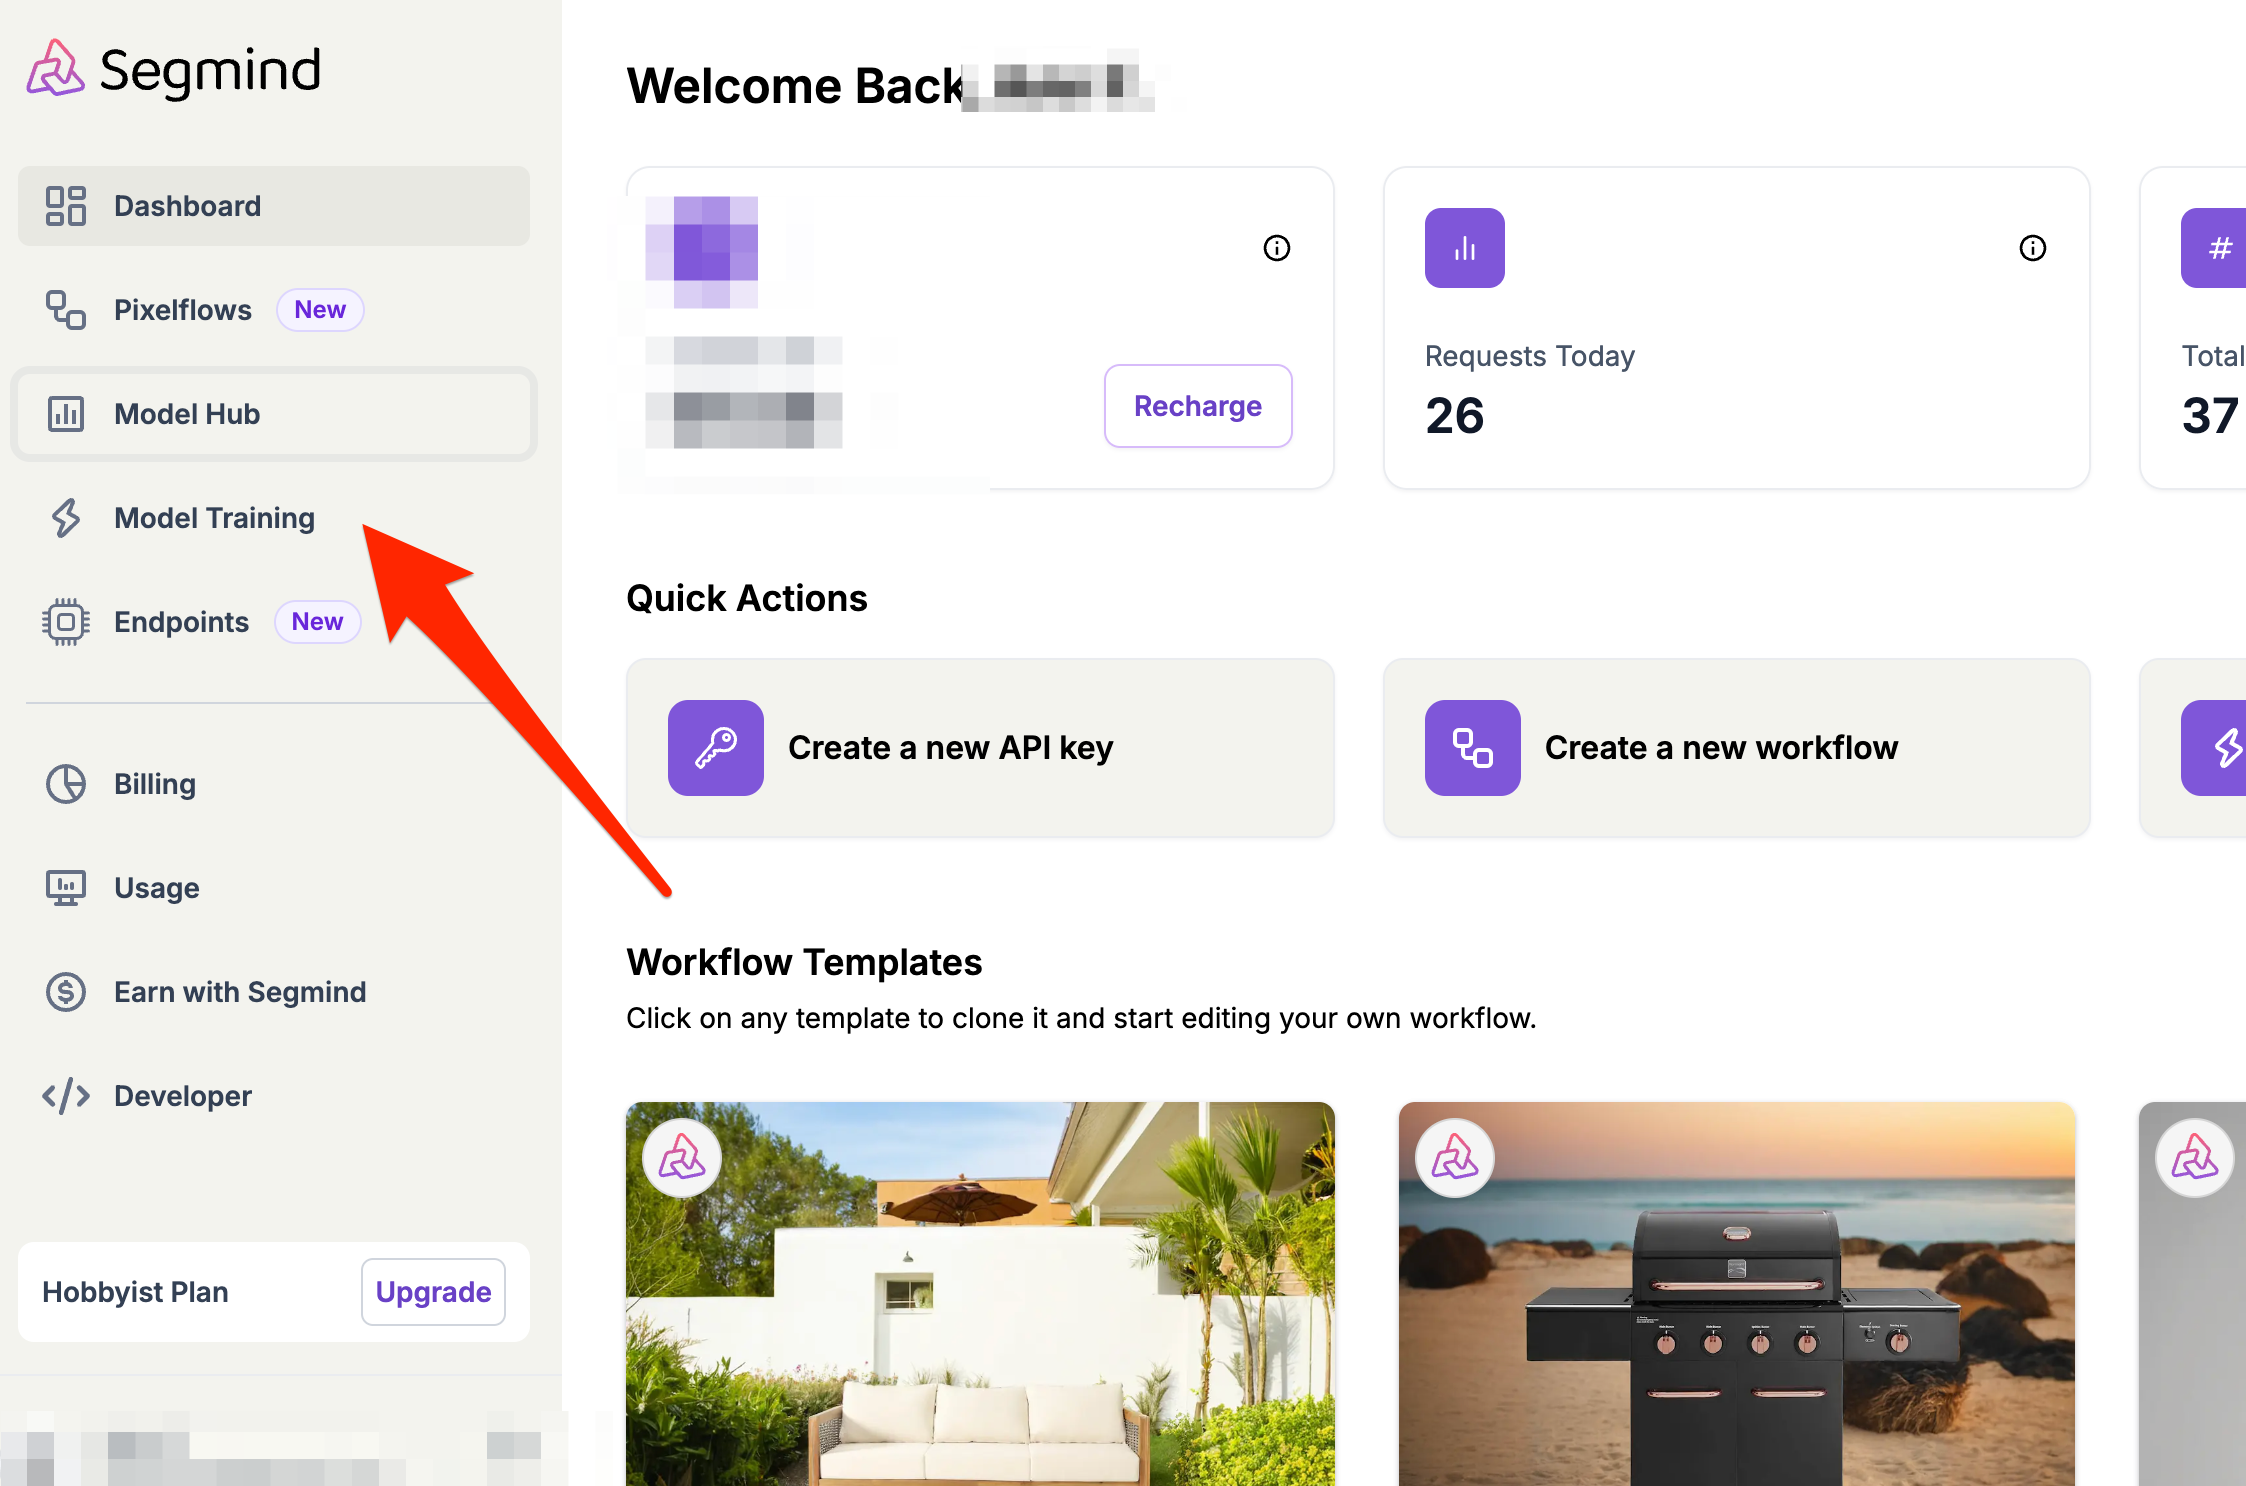
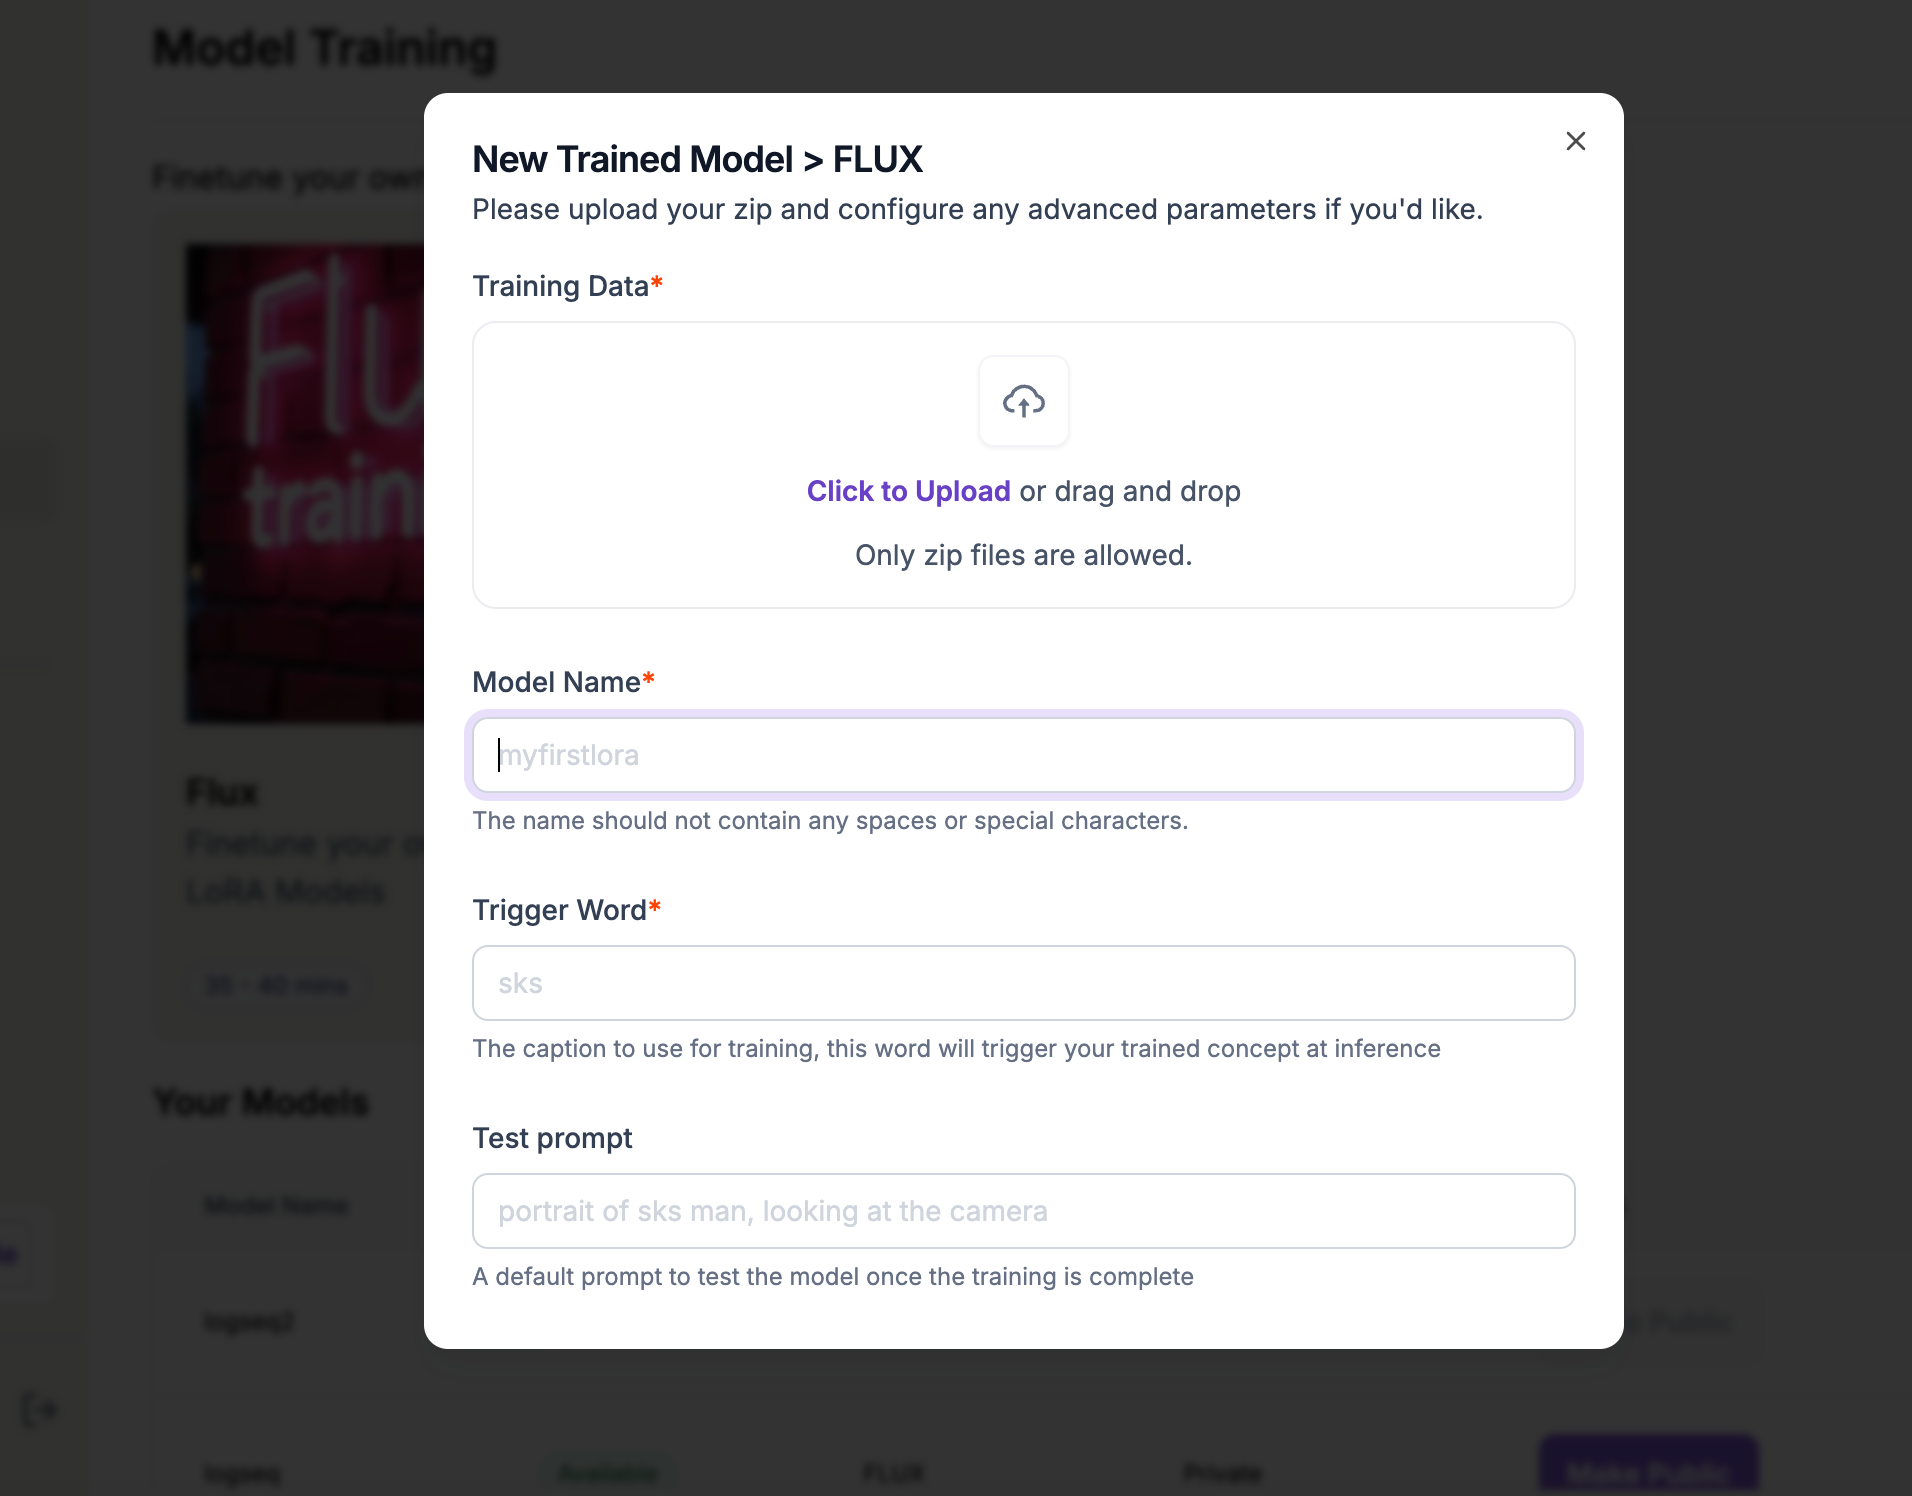
Navigate to the dashboard:
https://cloud.segmind.com/console/dashboard then hit Model Training as depicted below.
On other platforms like Replicate, you will find similar UI interfaces for selecting and starting fine-tuning jobs. On Replicate, it is here https://replicate.com/ostris/flux-dev-lora-trainer/train
Then select Flux model. Later you can experiment also with Stable Diffusion as well.
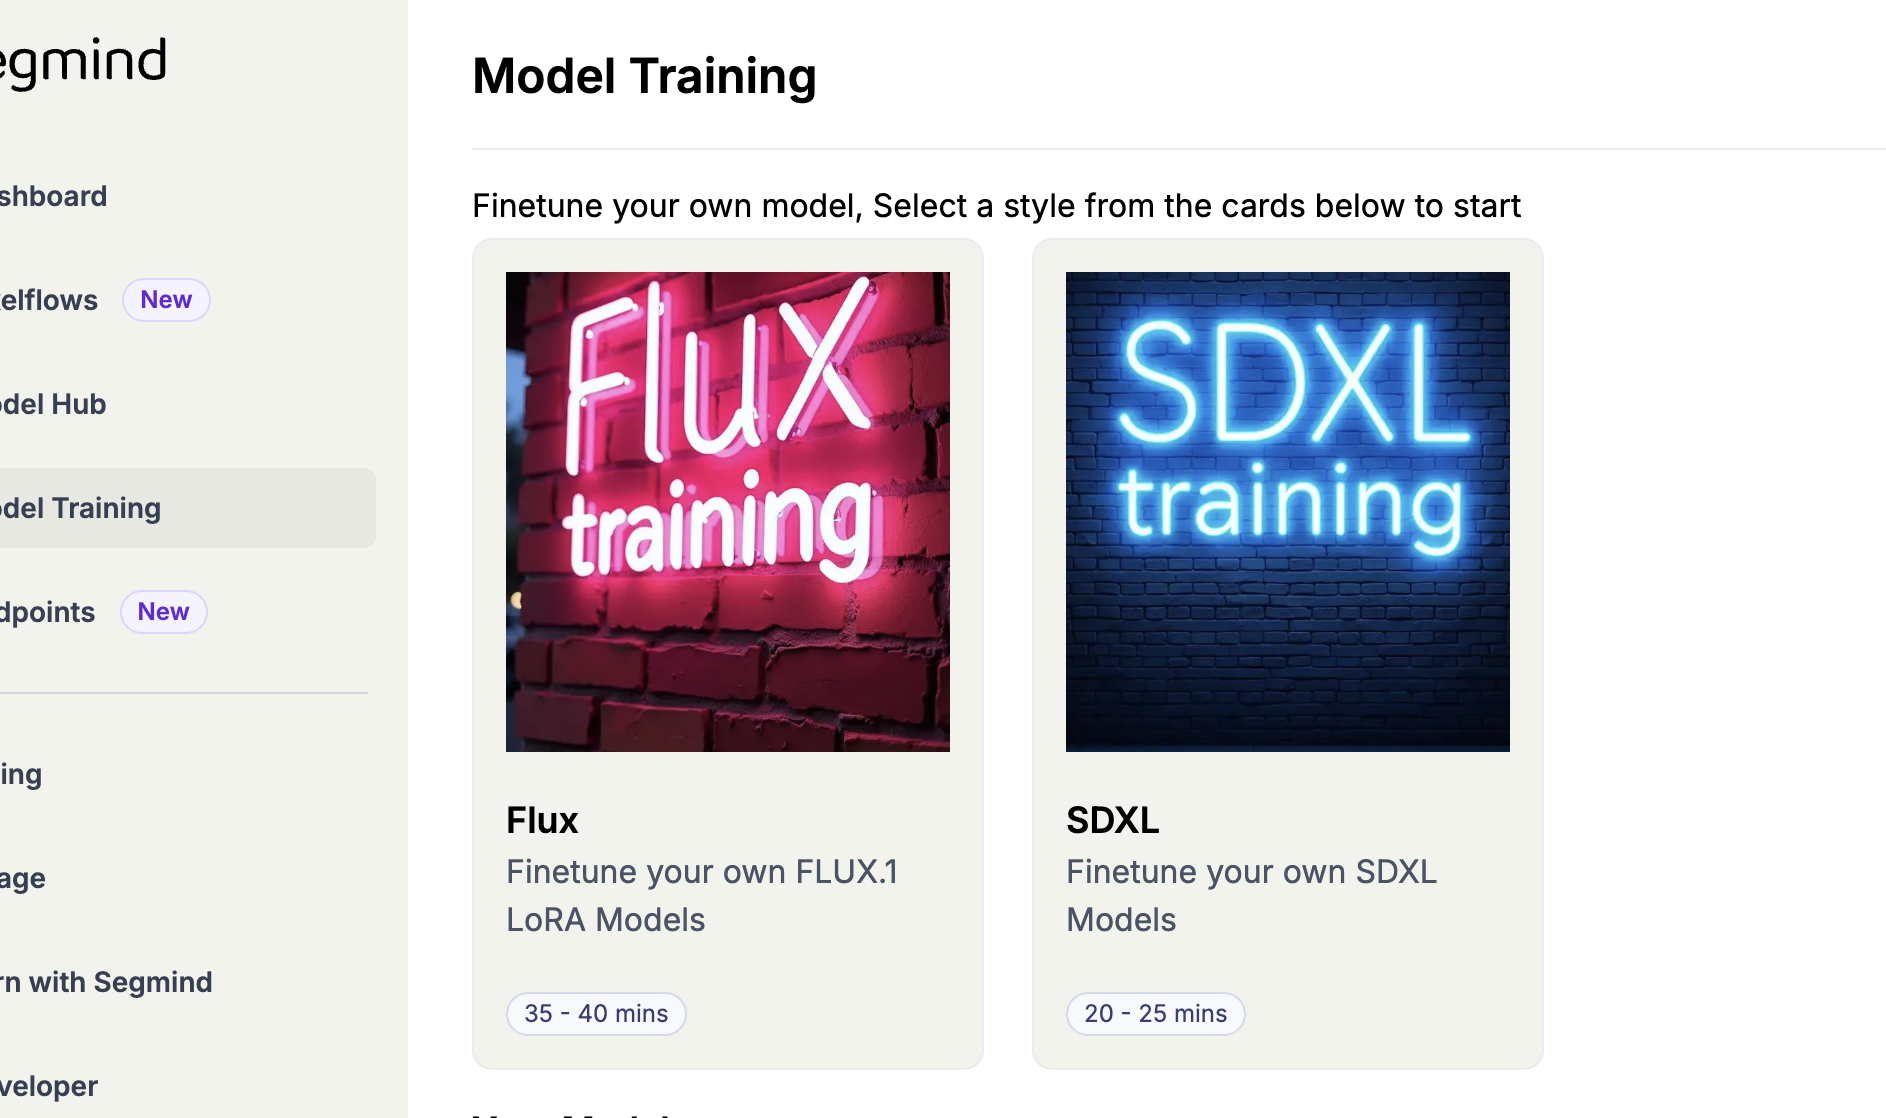
Then configure the fine-tuning job as follows:
Upload the images you just downloaded and give the model a name and a trigger word. The trigger word should be a fantasy word that you use later when you generate the image to refer to the object you fine-tuned the model on—in our case, this is the logo of Svelte. Make sure to use a word that is very improbable to be known by the model; otherwise, it will generate something it already knew.
For example, if I entered TIGERX as the trigger word, it might generate a tiger instead of my logo (which might include a tiger but in a very special shape). So make it a very exotic trigger word.
I used for our example above TOKESVELTE.
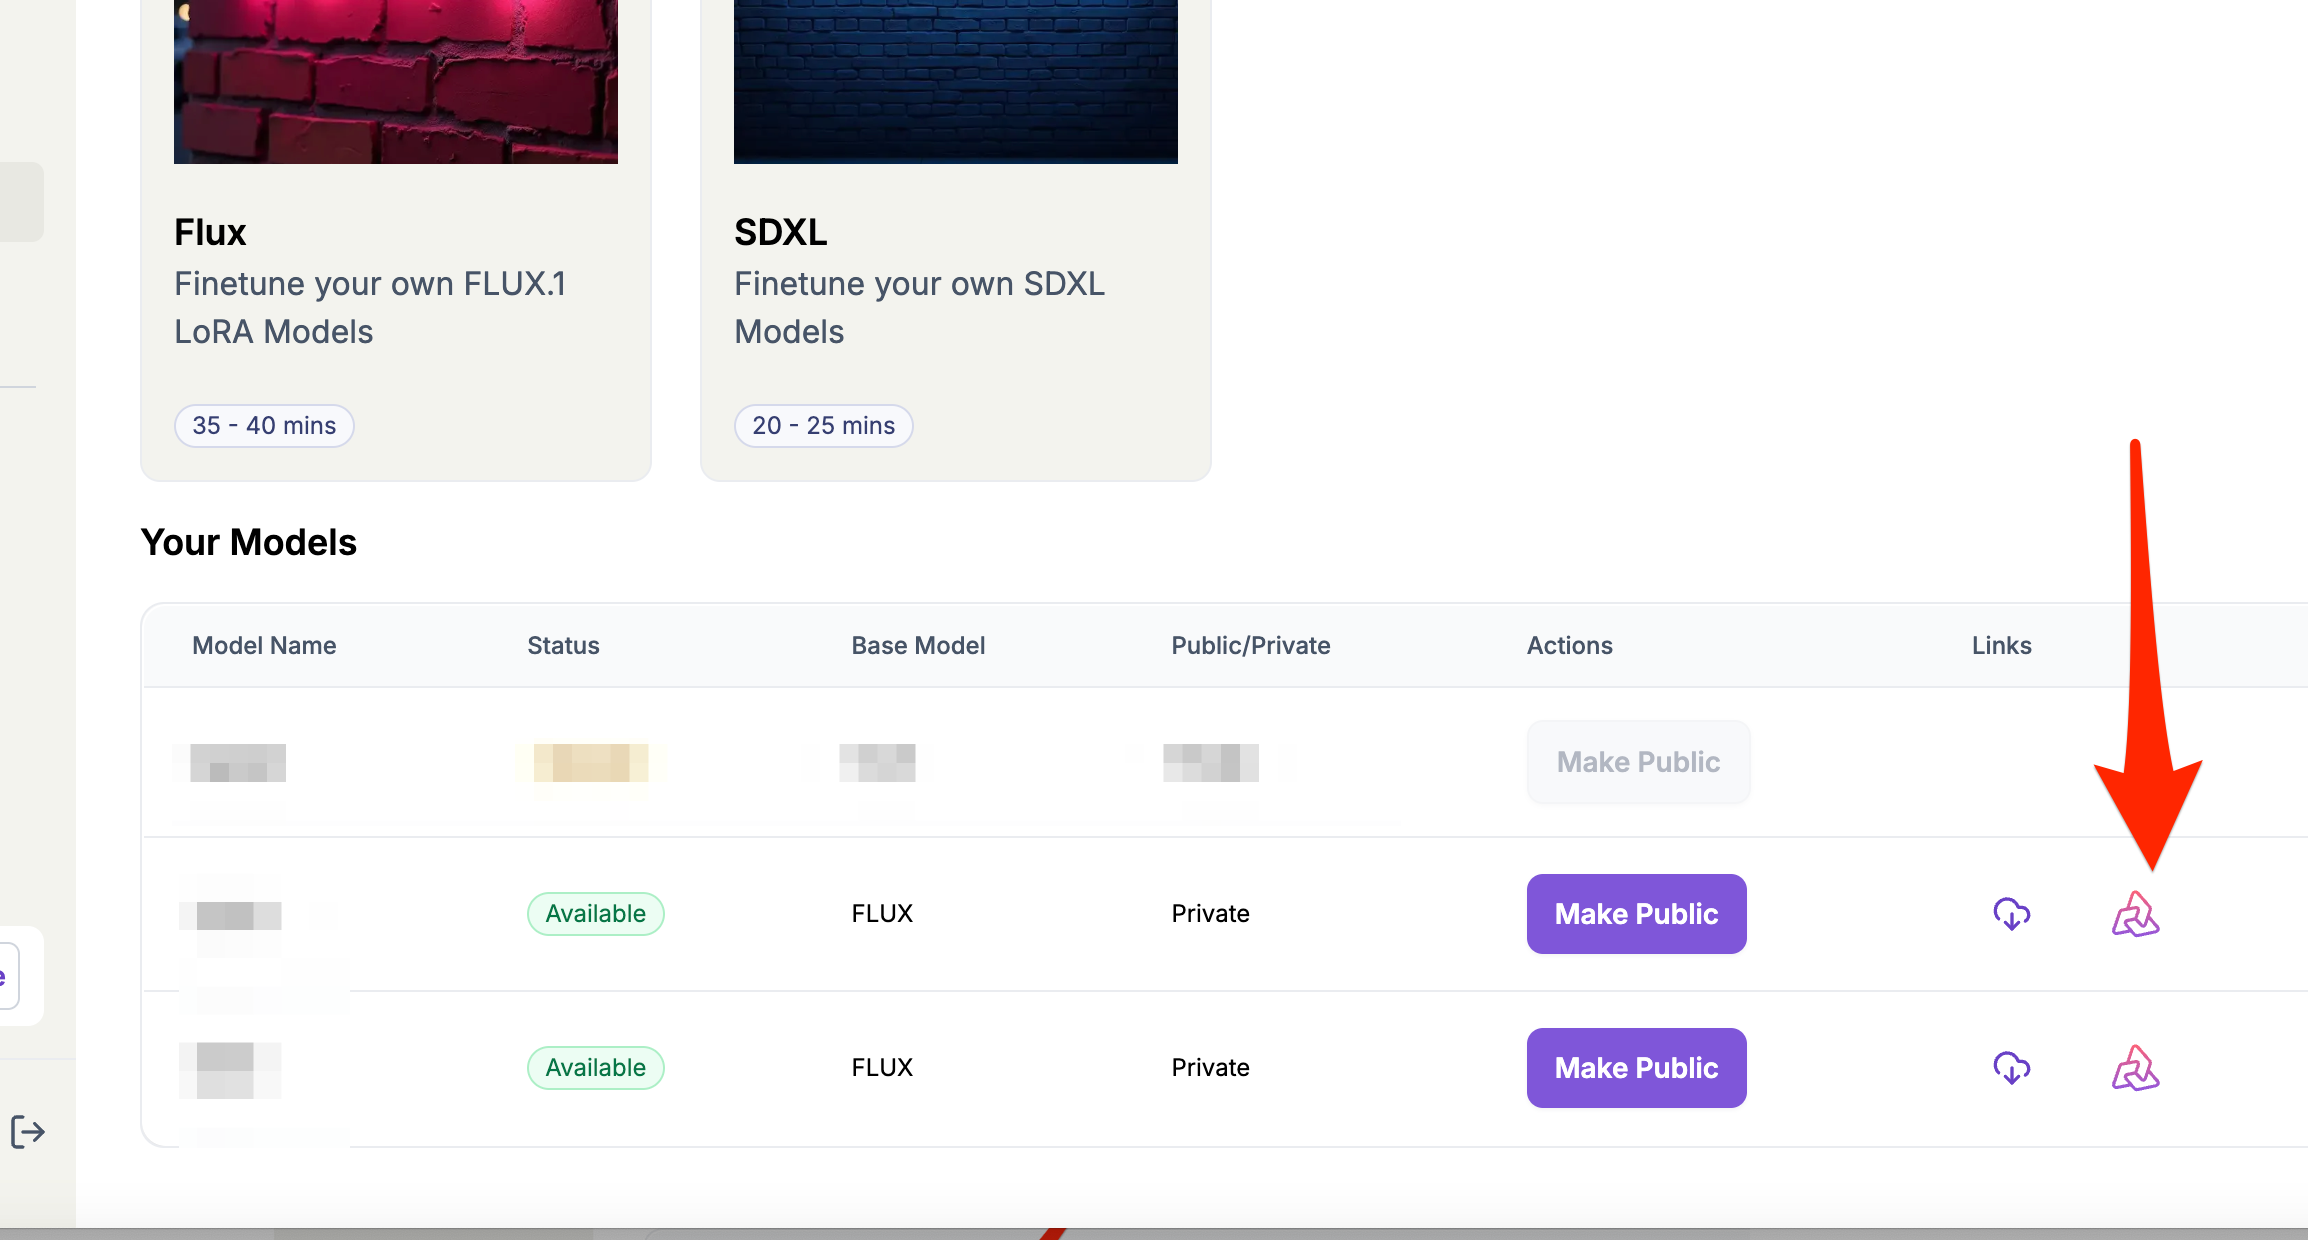
After the job is finished, you should be able to use this model now by hitting the Use Modelbutton.
Step 3: Generate images with the fine-tuned model
Now we can generate images.

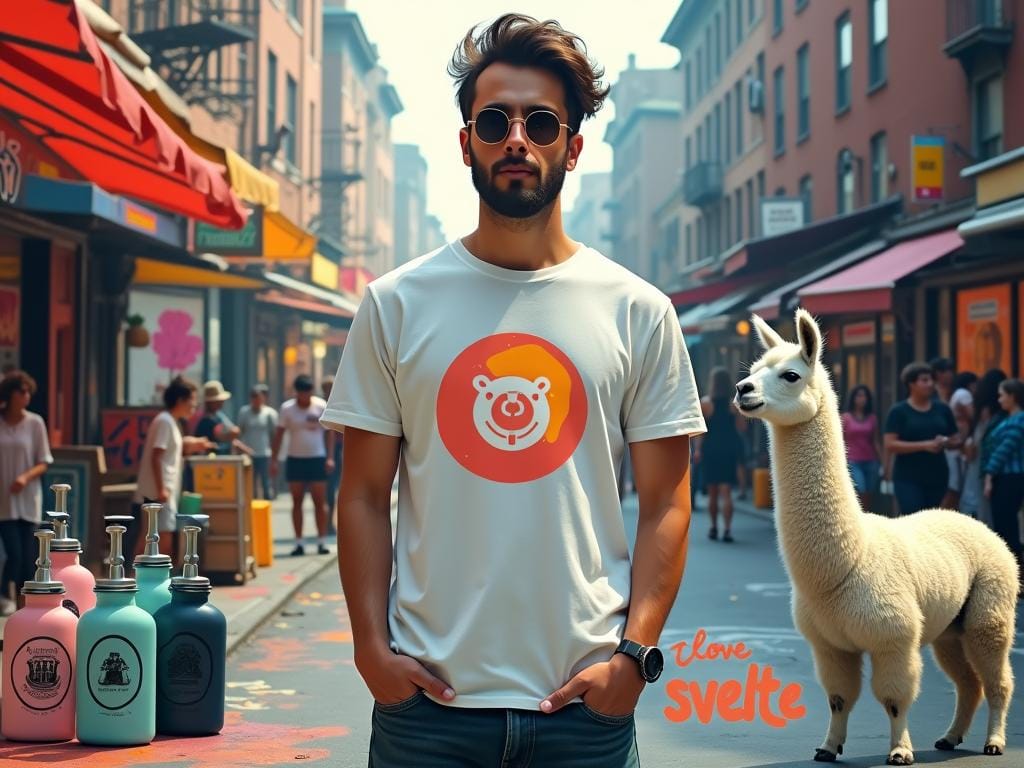
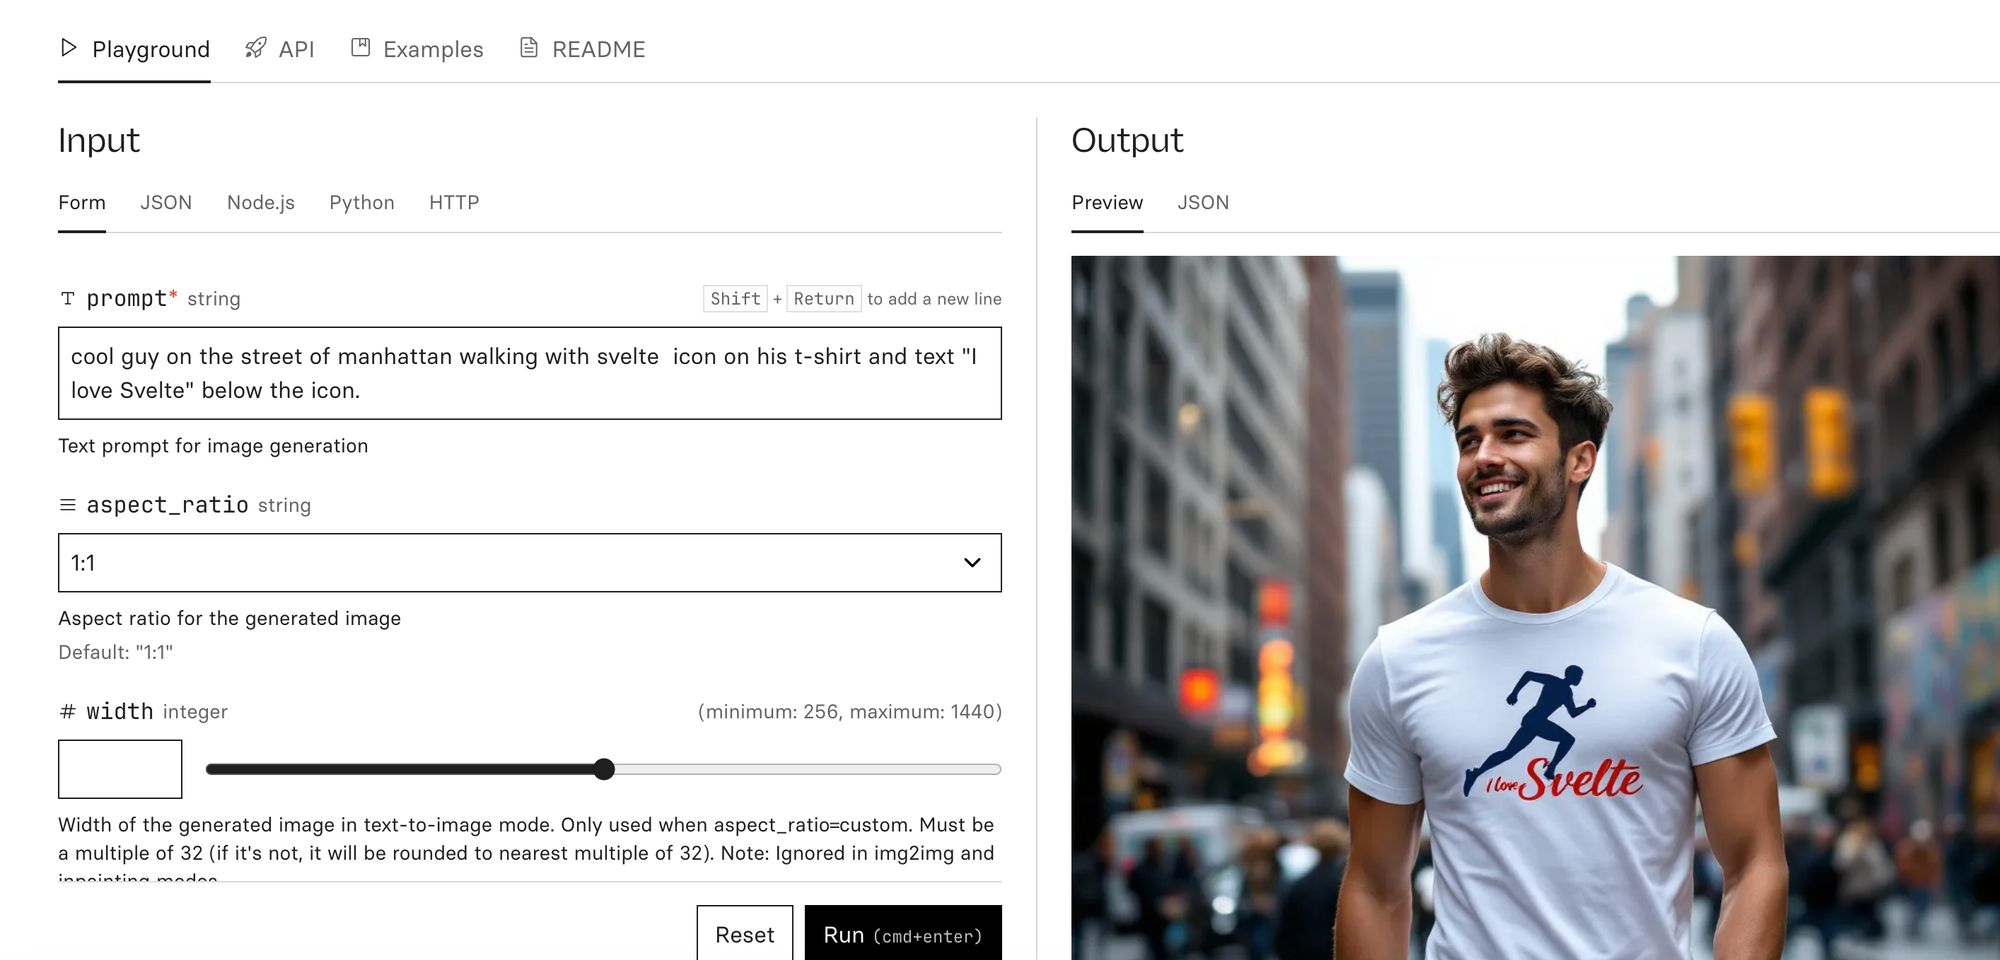
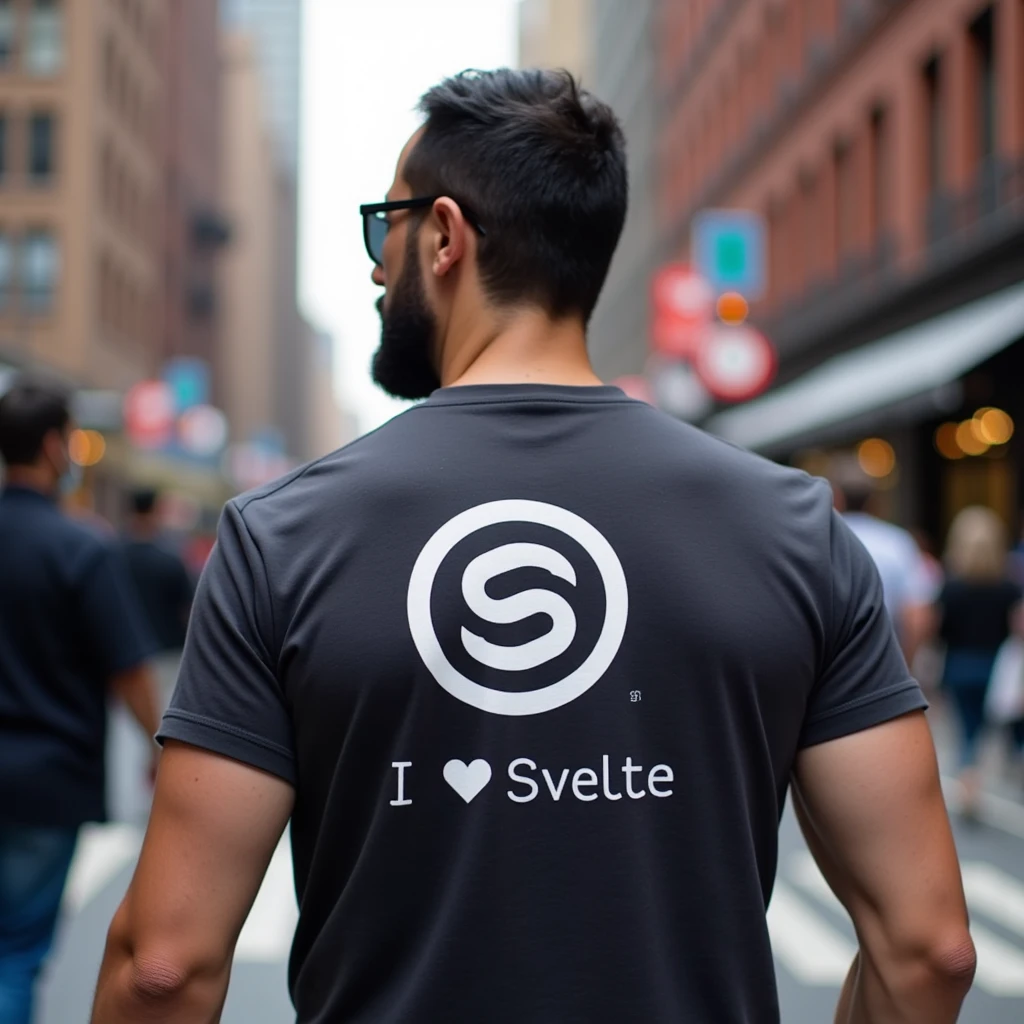
Cool guy on the street of Manhattan walking with TOKESVELTE icon on his t-shirt and text "I love Svelte" below the icon.
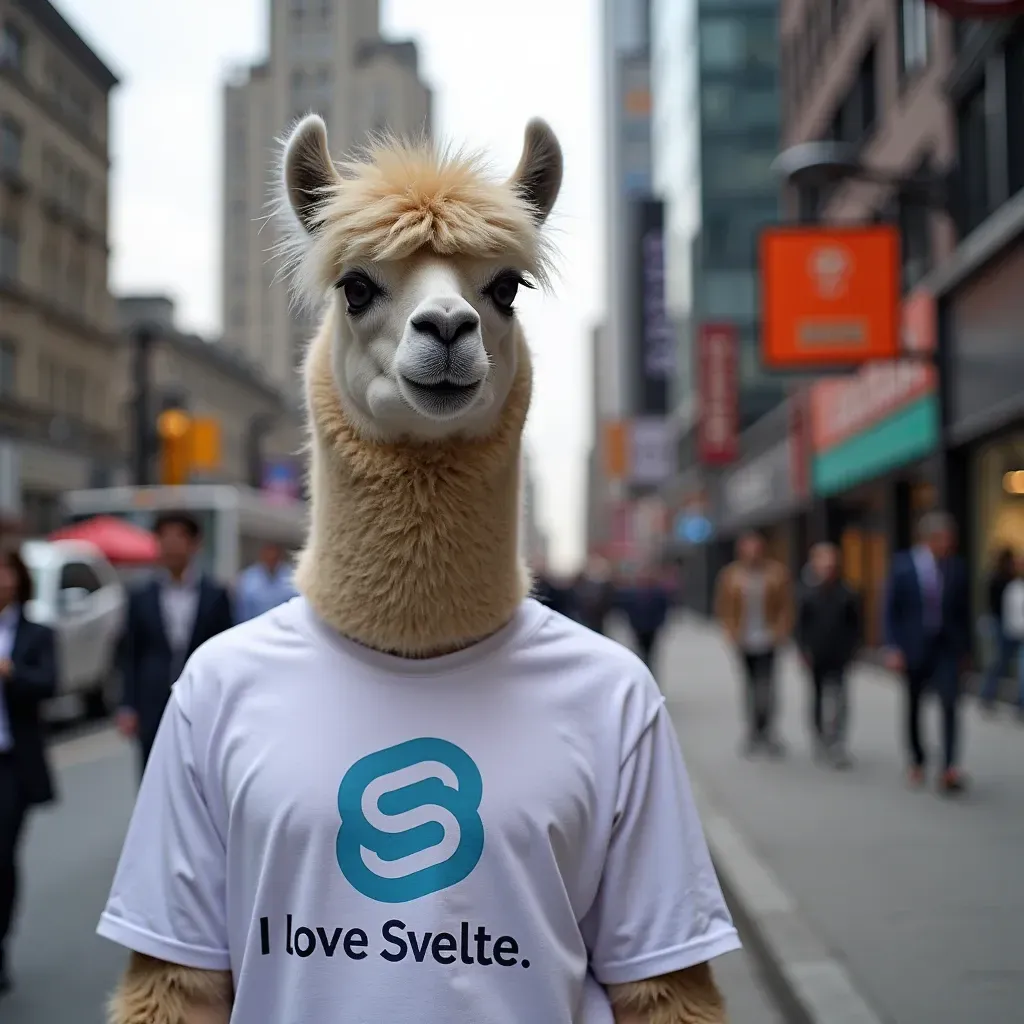
A Lama walking down the street in Manhattan with the TOKESVELTE icon on his T-shirt and the text "I love Svelte" below the icon.

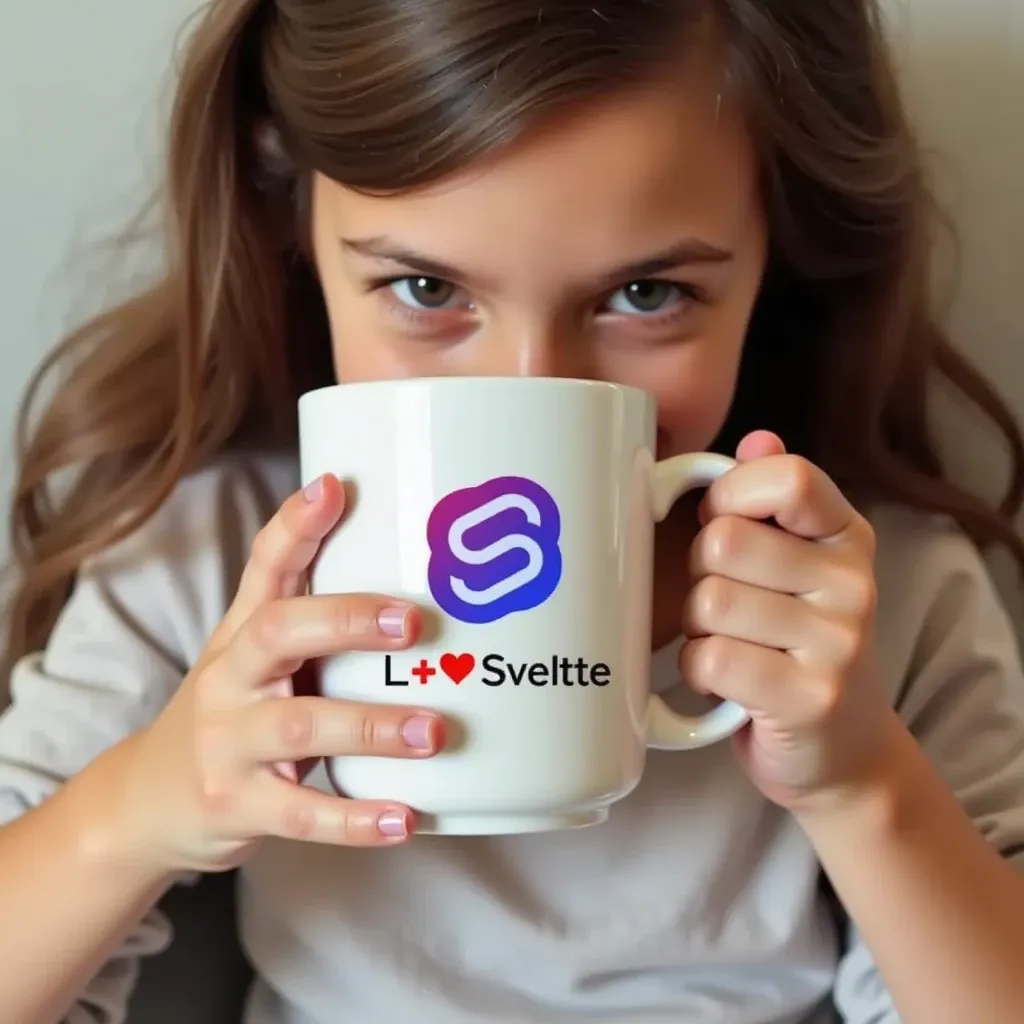
A girl drinking from a mug with the TOKESVELTE icon and the text "I love Svelte" underneath the icon.
PLEASE NOTE that depending on many parameters like the images you chose and the prompt, the result might (actually certainly) look different. I highly recommend experimenting a bit to get a feeling on how to leverage these tools to get the perfect resultthat suits your needs.
Wrap up
In this tutorial, we used a favorite brand we want to place in any scene for merchandising. We not only used it to project the logo on objects like a mug and t-shirts but we also described exciting scenes that look very realistic (the real power of the Flux models), and we can now use these images for marketing purposes. Please note that images are rarely perfect from the first shot; you need to experiment until you have the perfect result by:
- Changing the prompt
- Experimenting with different parameters
- Generating multiple times to have more variations to choose from
- And finally, you can still do enhancements and corrections on the final images with and without AI. For the latter, you will find tons of services on the internet like Freepik, Pixlr, etc.