Create a whole book with Claude AI Sonnet 3.7 (Part II)
The Model Context Protocol (MCP) is an open-source standard aimed at connecting AI assistants with diverse data sources for enhanced relevance and seamless integration.

I recently talked about a major update from Anthropic, where the output context length has been increased to 128k. This improvement helps remove one of the main obstacles for real-world applications by allowing for much larger prompts and outputs.
In that original post, we showed an example of creating an entire book with a single prompt. You can read the original post here.
Going One Step Further
In this blog post, we will push this idea further by letting Claude not only generate text but also accompanying images to illustrate concepts and make the book more visually engaging.
As you might already be aware, Claude does not currently have any built-in image generation capabilities. However, there are many other models, such as Flux, DALL-E, and others, that can produce images. Claude can use these image generators to create images in real time and embed them into the blog post without any detailed descriptions (unless you want more specific prompts, of course).
How Is This Possible?
Connecting external systems and APIs is central to applying AI in the real world—large language models rarely exist in a vaccum. Since LLMs cannot do everything on their own, they can interact with external services using a standard protocol called MCP. You can read more about it here:
https://www.anthropic.com/news/model-context-protocol
The Model Context Protocol (MCP) is an open-source standard developed to enhance AI assistants’ relevance by connecting them with different data sources. It aims to solve problems caused by data silos and the complications of integrating various information systems by providing a single protocol for smooth connections. MCP includes a specification, SDKs, local server support for Claude Desktop apps, and an open-source repository of servers. Developers can build secure two-way connections between data sources and AI applications, with early users like Block and Apollo already using MCP for better contextual understanding. Users can begin local testing of MCP servers using Claude for Work, with future plans for remote deployment. Building MCP connectors is made simpler by pre-built servers and quickstart guides available in the Claude Desktop app. The project encourages community collaboration, inviting developers and companies to shape the future of context-aware AI technologies.
We will use this protocol to let Claude generate images using DALL-E from OpenAI. I chose DALL-E for two reasons: many people use ChatGPT or the OpenAI API in one way or another, and DALL-E stores the generated image in the OpenAI cloud temporarily.
This means we can embed it into our blog without having to store it locally. Be aware that the image might be deleted after a few hours, so you should export the book/blog or download the images if you want to keep them longer.
For simplicity, I limited the example book to around 5000 words to reduce costs for image generation. Feel free to create more content and images as you wish.
Ingredients
For this tutorial, we don’t need much:
- Anthropic app
- An MCP server that communicates with OpenAI (DALL-E model)
- An OpenAI key
Step by Step
Step 1: Download the MCP Server
https://github.com/prasanthmj/primitive-go-mcp-server
Edit the file main.go to return the imageURL. By default, it returns the local path. With a public URL, you can paste it anywhere, and the image should be visible.
response = JSONRPCResponse{
    JSONRPC: "2.0",
    ID:      request.ID,
    Result: CallToolResult{
        Content: []ToolContent{
            {
                Type: "text",
                Text: fmt.Sprintf("Image generated and saved to: %s\nOriginal URL: %s", imageURL, imageURL),
            },
        },
    },
}
Rebuild the server with these changes:
go build -o ./bin/imagegen-go ./main
Note that you don’t have to run anything like npm run dev or similar. The server is invoked on demand by Claude.Step 2: Integrate It in Claude
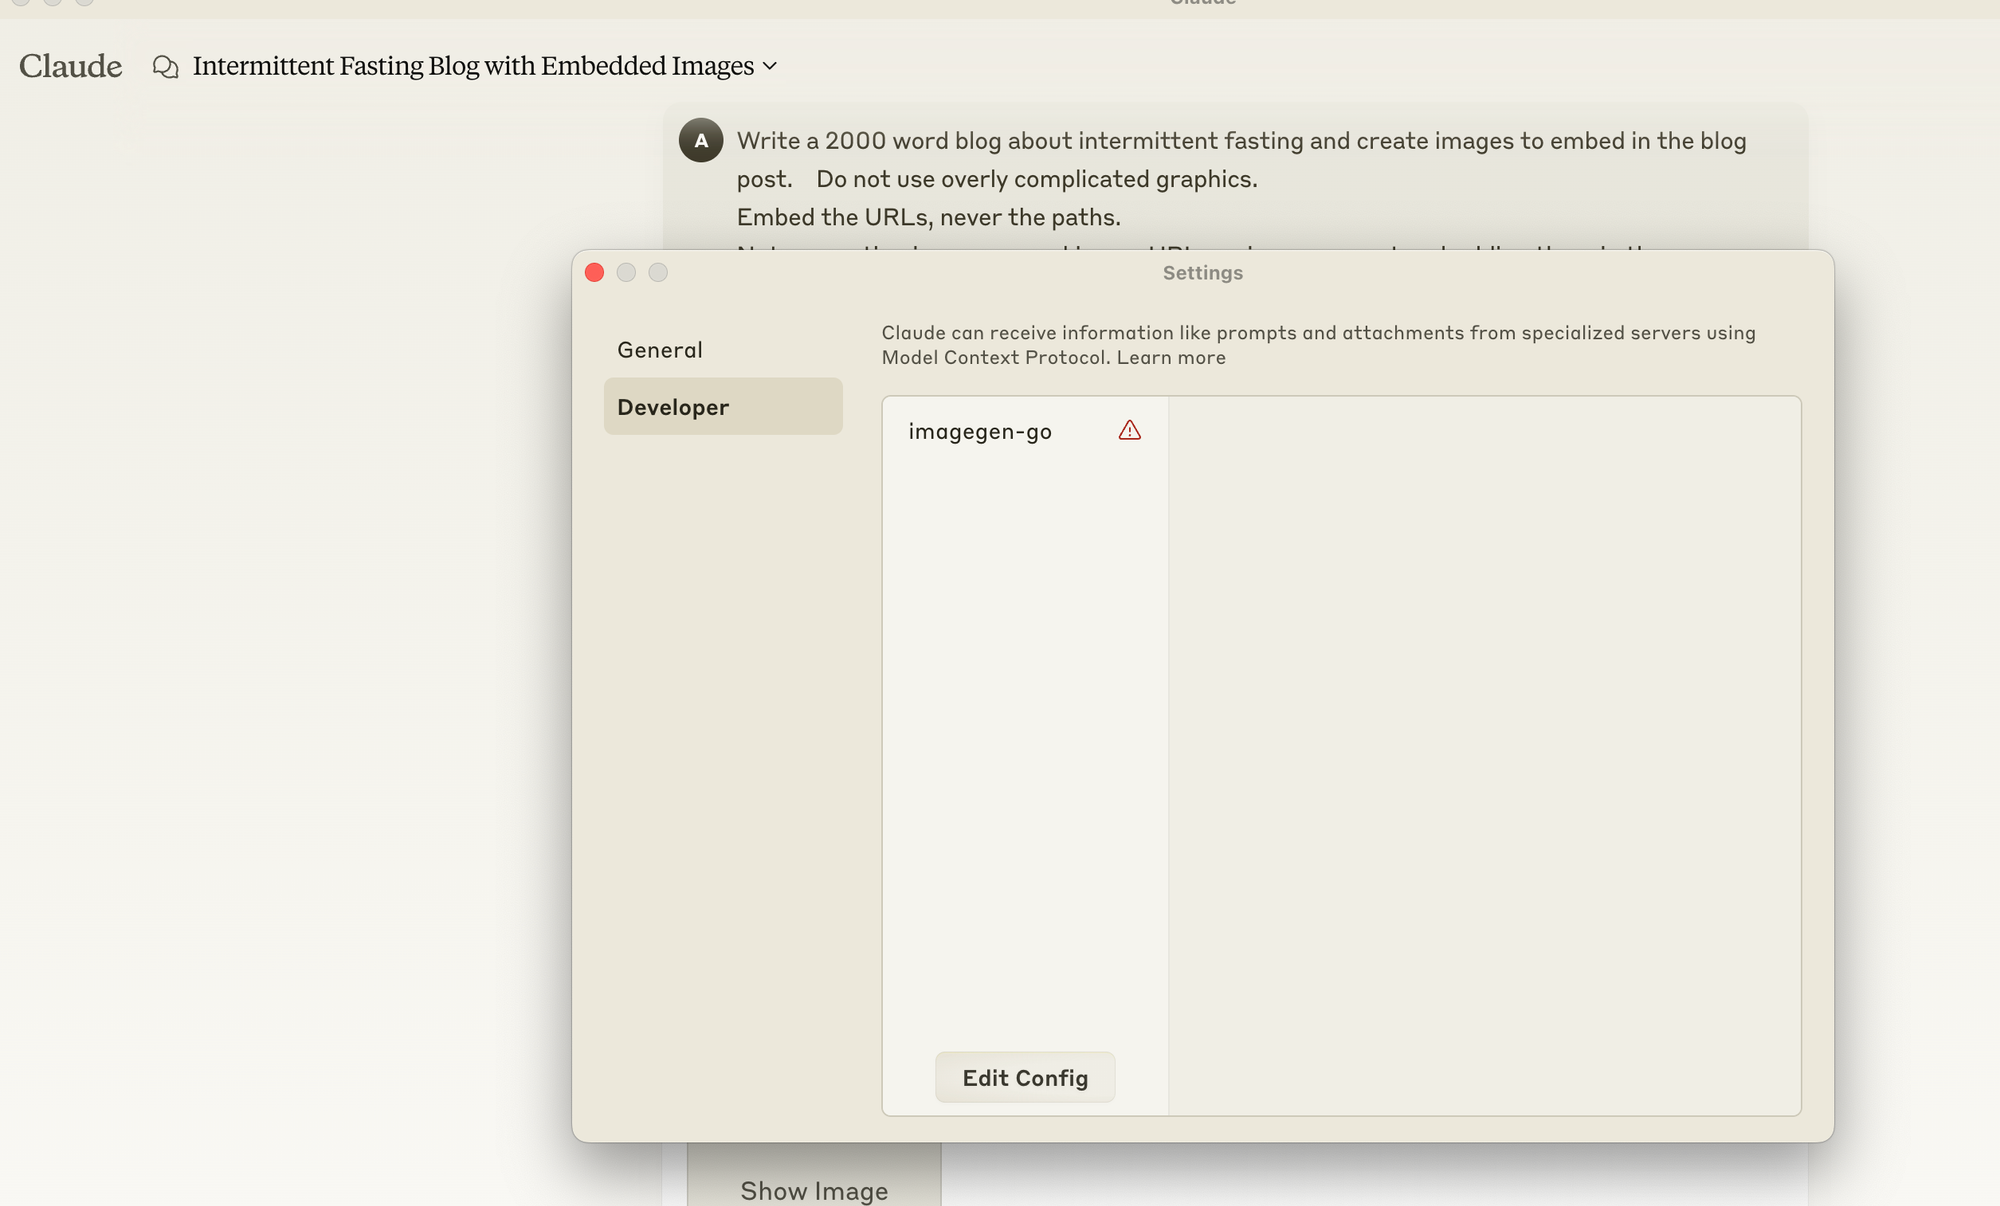
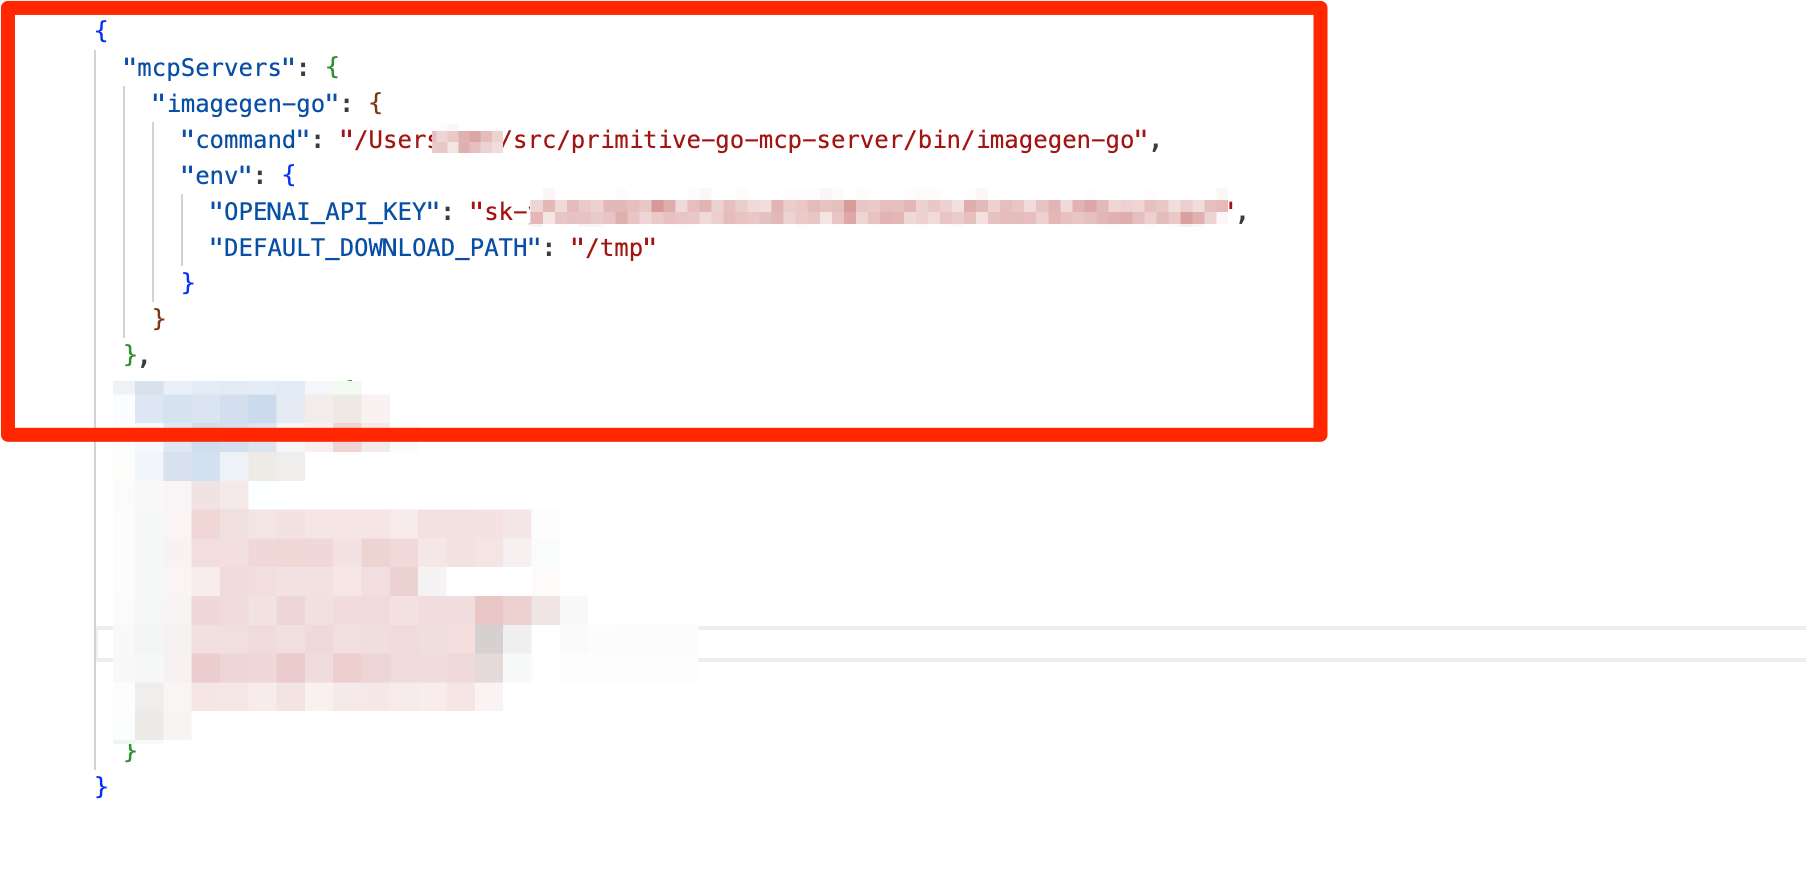
Open the Claude developer settings and add a new server. Make sure to update the command path according to where you downloaded the repository in the previous step.
And with that, we are nearly done.